Permission Sets enable SGNL Administrators to grant granular control over the features and objects within the SGNL product.
Permission Sets are groups of permissions, able to be assigned to Users and/or Teams to provide them with the level of access they need to complete their tasks.
Within each Permission Set there is a group of permissions.
An example Permission Set within SGNL is the Global Admin Permission Set. This should be granted sparingly to only a small set of Administrators that require full, global access to all features and objects within the SGNL Platform.
Within the Global Admin Permission Set, we see a range of Permissions that are expressed as the Resource, a period delimieter, then the level of access that is allowed, e.g. being granted the policies.read permission as part of the Permission Set would allow a User or member of a Team to read policies.
Users or Teams can be assigned 0 or more Permission Sets. Note A user having no Permission Sets assigned (either directly or through a team) will result in the user being unable to sign-in to the product or use any APIs, effectively disabling their access.
If more than 1 permission set is assigned (either directly or through a team), the permissions will be additive for the user. What this means is that if one Permission Set were to grant policies.read and another was to grant policies.create and policies.update all 3 of the aforementioned permissions would be granted to the user.
Permission Sets can have scoping applied through SGNL Labels. When Permission Sets are scoped, it means that all or some subset of the permissions they grant will be scoped only to the objects that have the label that the permission set is scoped to.
Given that not all objects in SGNL have or require a label, scoping a Permission Set will often (but not always) result in a mix of Global and Scoped Permissions.
Take for example the Policy Admin Permission Set. If I choose to Scope the assignment of that Policy for a given team, to the label Central IAM Team – SGNL will ensure that the team assigned this Permission Set will only be able to administer the Policies, Policy Versions, Snippets, and Snippet Versions (among others) that have the Central IAM Team label. These Policy Admins will however be able to see the Metrics and Logs globally within SGNL.
If your User account has sufficient permission, you’re able to review and assign/unassign Permission Sets.
Admin from the left navigation menu.Add Permission Set or hover an existing Permission Set to activate the Remove Permission Set context menuSession-Based Permission Sets provide dynamic permission assignment during OIDC Single Sign-On. Instead of statically assigning permissions to users or teams, permissions are granted based on claims in the user’s ID token at sign-in time.
There are two methods to implement Session-Based Permission Sets:
This method involves configuring your IdP to include permission sets directly in the ID token using SGNL’s specific format.
Token Structure Example:
{
  "sub": "[email protected]",
  "iat": 1721026800,
  "exp": 1721113200,
  "iss": "https://your-idp.example.com",
  "aud": "https://your-client.sgnl.cloud",
  "permissionSets": [
    {
      "permissionSetId": "f47ac10b-58cc-4372-a567-0e02b2c3d479",
      "scopeId": "6ba7b810-9dad-11d1-80b4-00c04fd430c8"
    },
    {
      "permissionSetId": "e4d909c2-90d0-4037-8c3f-6c8b4c7b6d5e"
    }
  ]
}
Key Points:
permissionSetId (required): The UUID of the permission set to grantscopeId (optional): The UUID of a label to scope the permissions toThis method allows you to map existing IdP claims (such as group membership) to SGNL permission sets.
Configuration Steps:
groupsAuditorsLog ReaderHow it works:
Example ID Token:
{
  "sub": "[email protected]",
  "groups": ["Everyone", "Auditors"],
  "department": "Audit and Compliance"
}
With the mapping above, this user would receive the Log Reader permission set for their session.
Both Entra ID and Okta support the ability to insert Custom Claims into User Tokens. You can read more about performing this function within their respective help documentation.
Note: To insert Custom Claims, Okta requires their customers to have purchased a SKU that allows the creation of Custom Authorization Servers. The Default Org Authorization Service is not able to add Custom Claims.
For Both Entra ID and Okta (where a Custom Authorization Server is available) – you can also configure SGNL to dynamically determine the suitable SGNL Claims to issue during Sign-In at your IdP. Refer to the below documentation for general guides in protecting Applications during SSO.
The most simplistic configuration with Okta is to use Groups Claim Mapping. You can configure this on the OIDC Application, by configuring a filter for Group Claims to be sent.
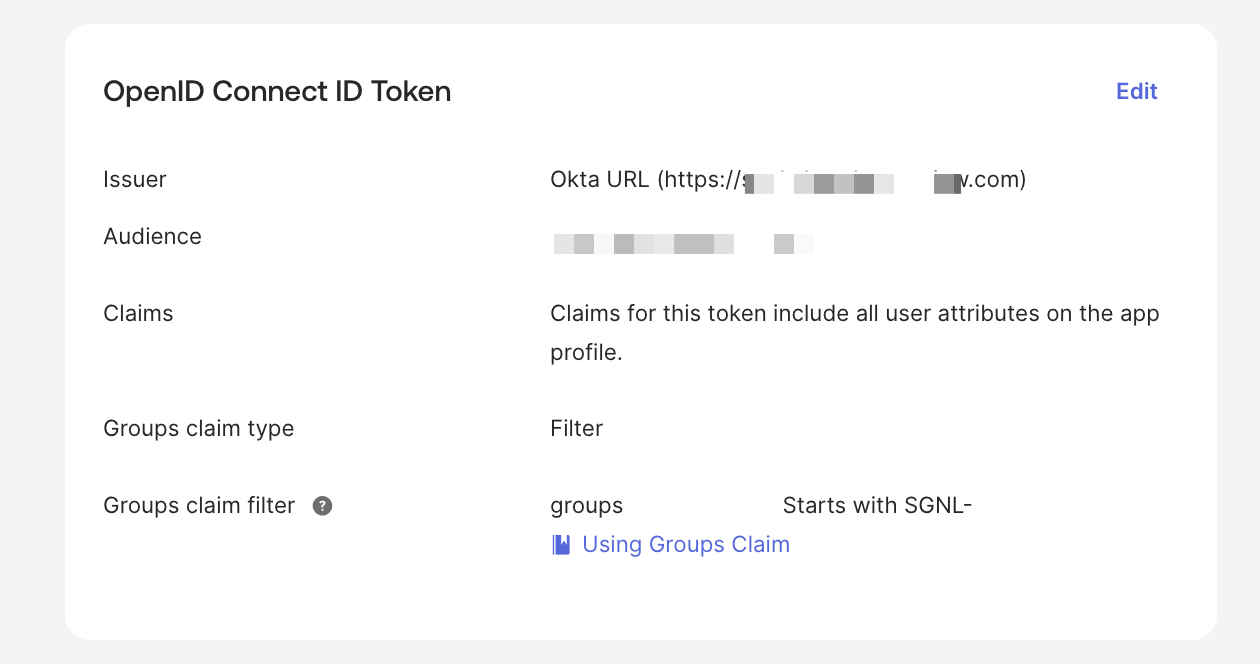
The groups will be included in the ID token and can be mapped to SGNL permission sets using the claim mapping configuration.
For Microsoft Entra ID, you can use Method 2 (claim mappings) with group claims.
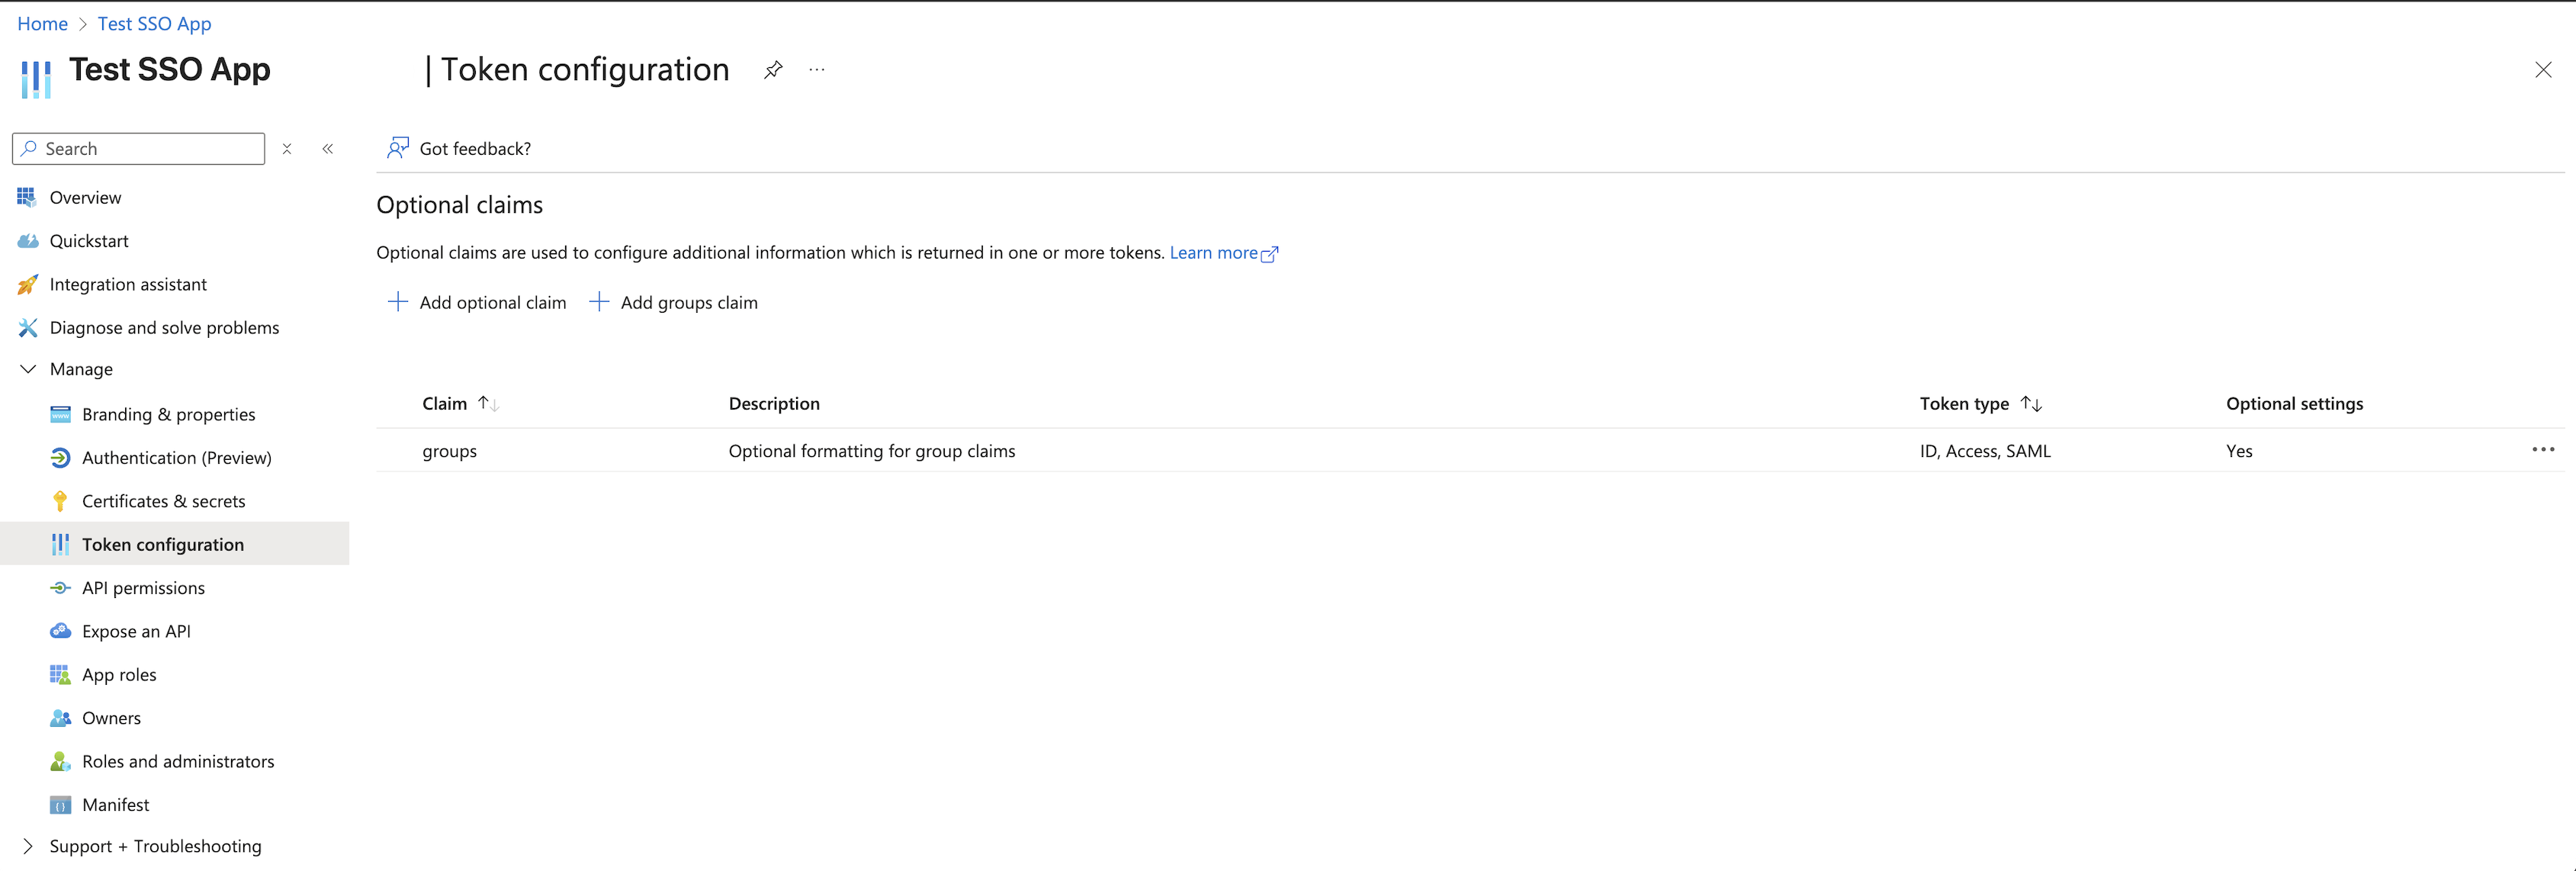
The groups will be included in the ID token and can be mapped to SGNL permission sets using the claim mapping configuration.
No permissions granted at login:
Wrong permissions granted:
Permissions not scoped correctly: