Creating and Configuring the On-Premises Connector

This document provides step-by-step instructions for creating and configuring the SGNL On-Premises Connector using the SGNL Console.
Step 1: Create On-Premises Connector

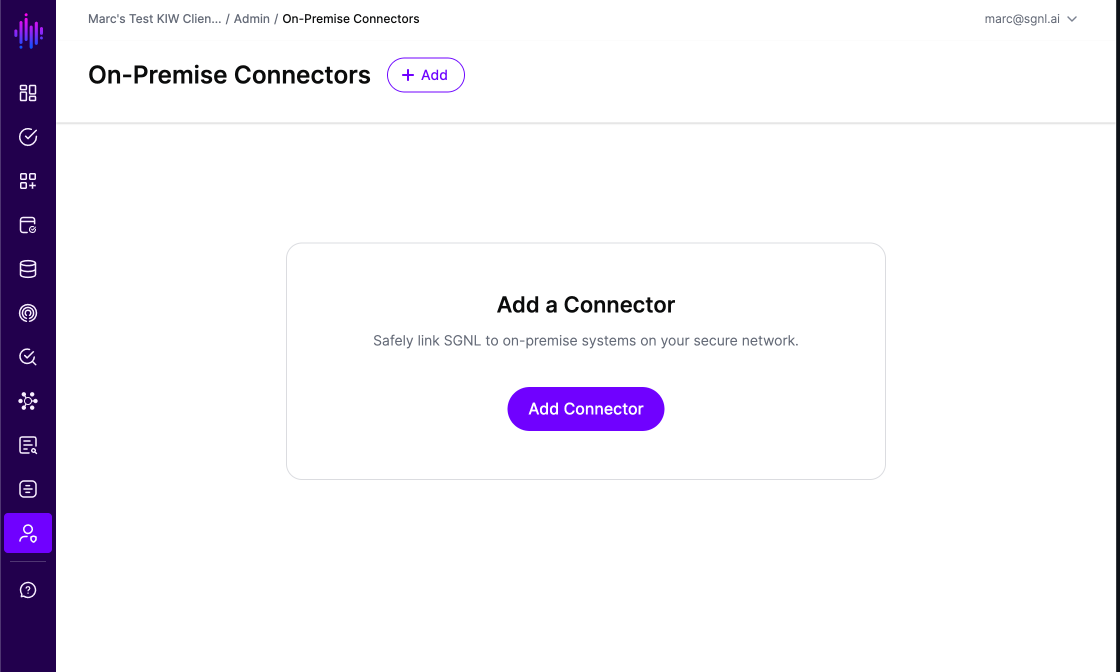
  • Log in to the SGNL Console.
  • Navigate to the Admin Page and select “On-Premises Connector”.
  • Click on “+Add” to add a new On-Premises Connector.
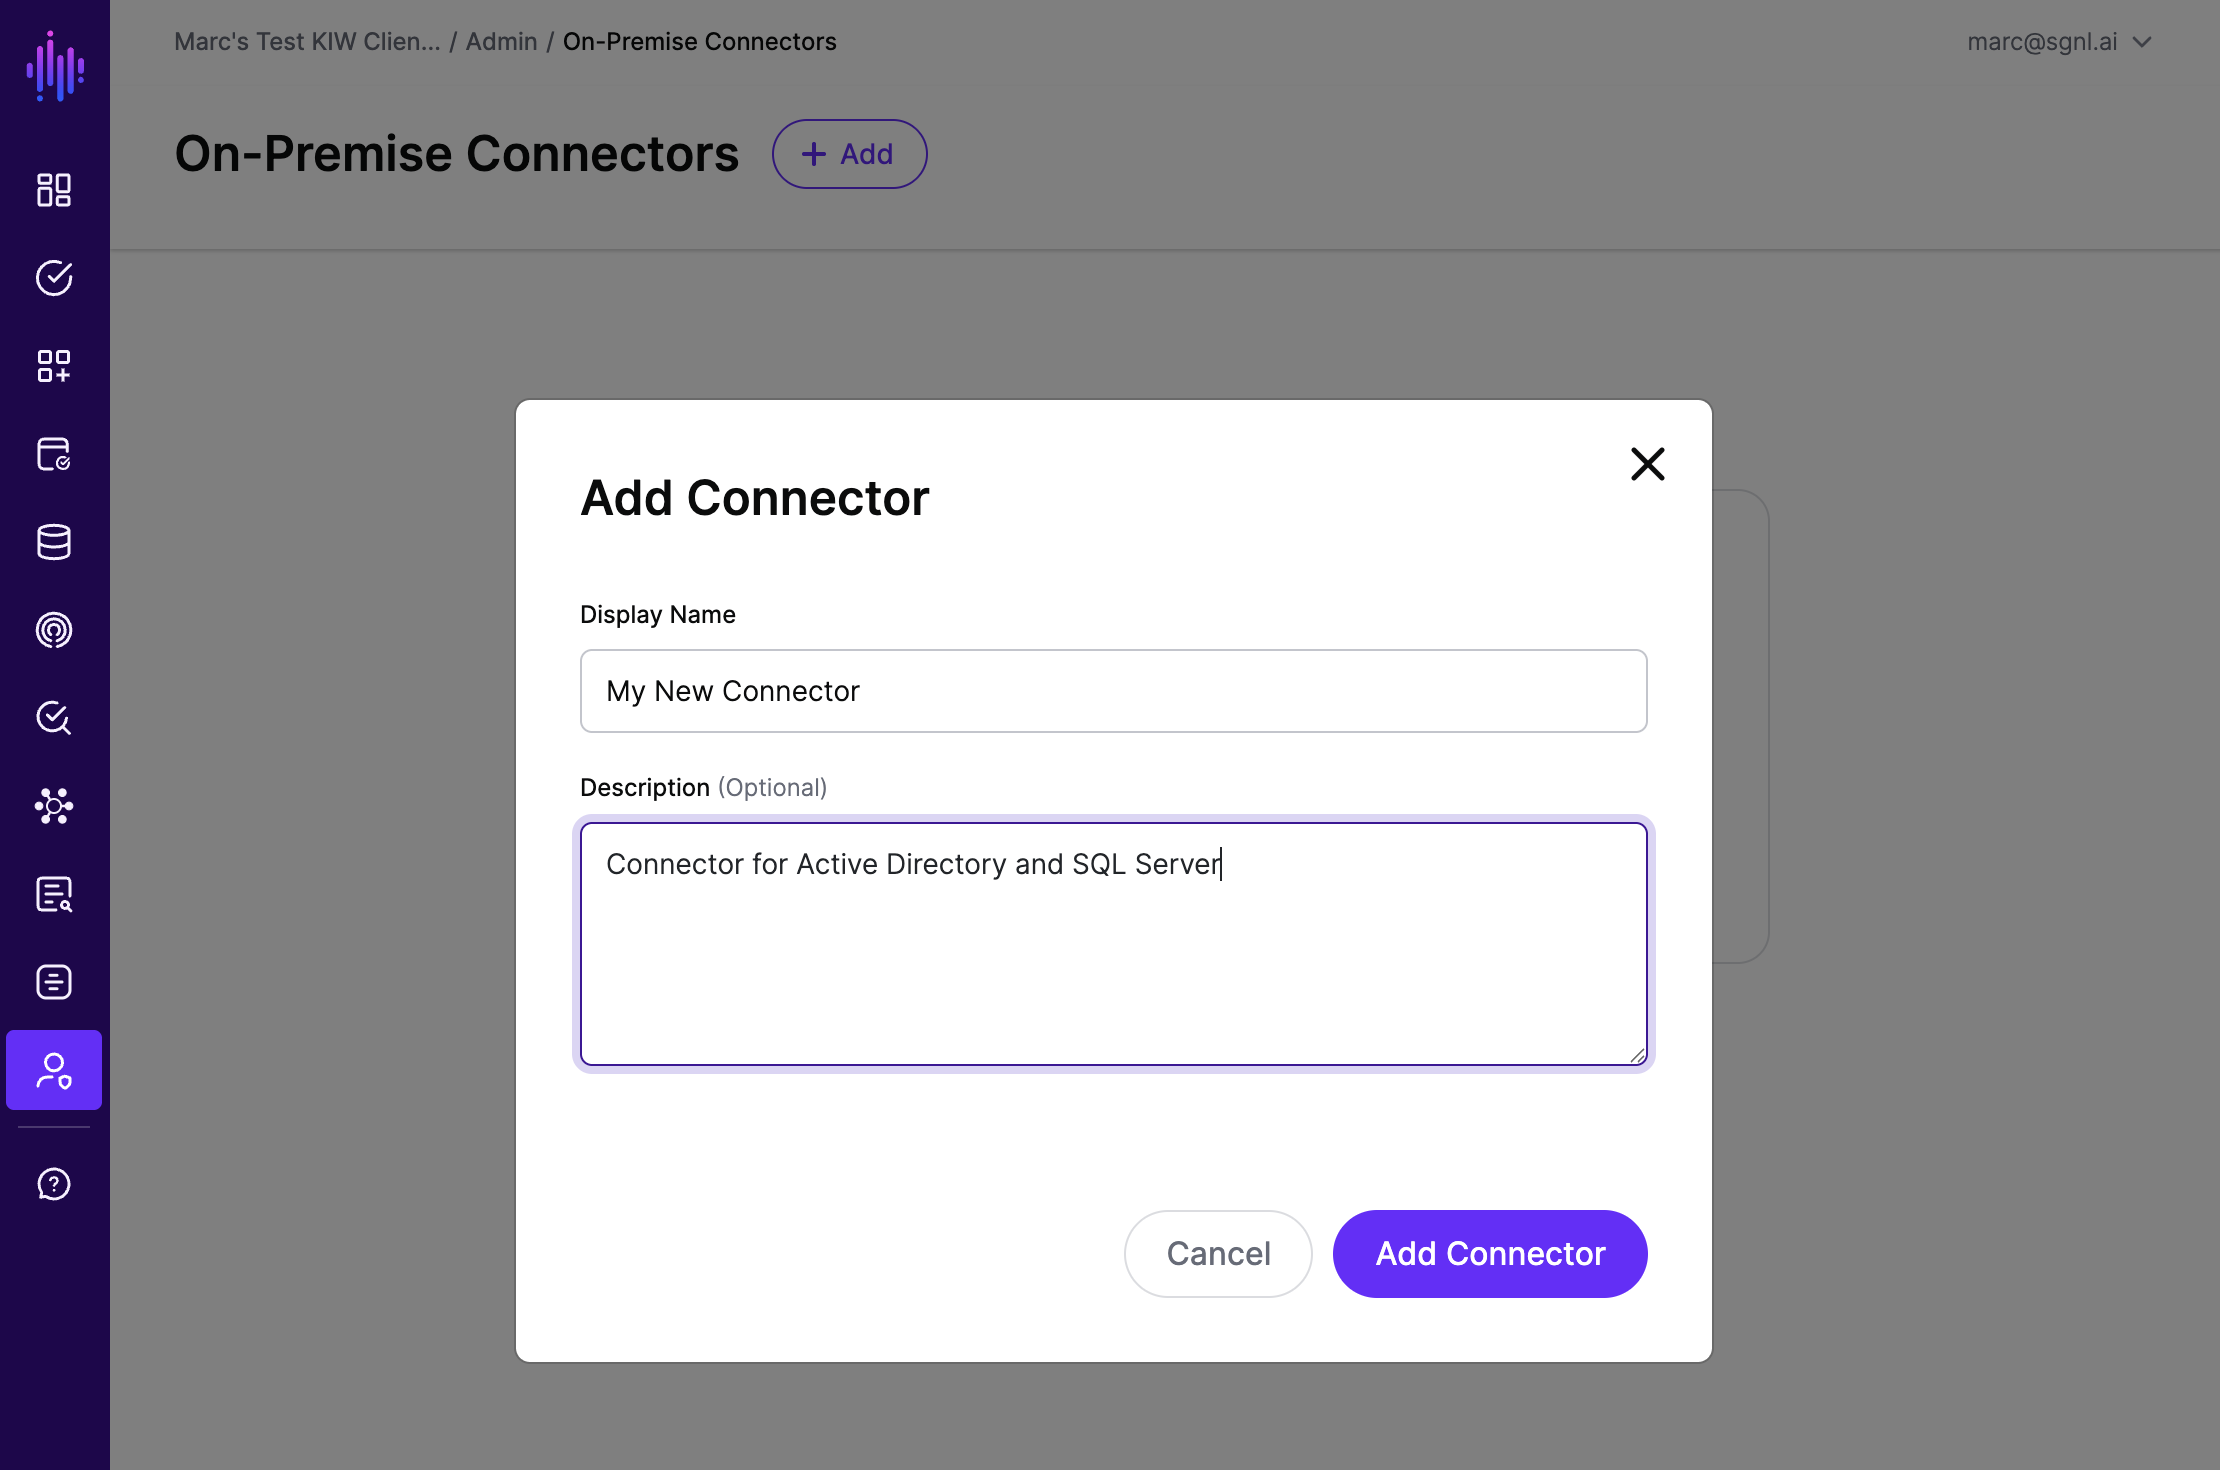
  • Enter the “Display Name” and “Description” for the Connector.
  • Click “Add Connector” to complete the creation process.

Add a Connector

Specify a Name

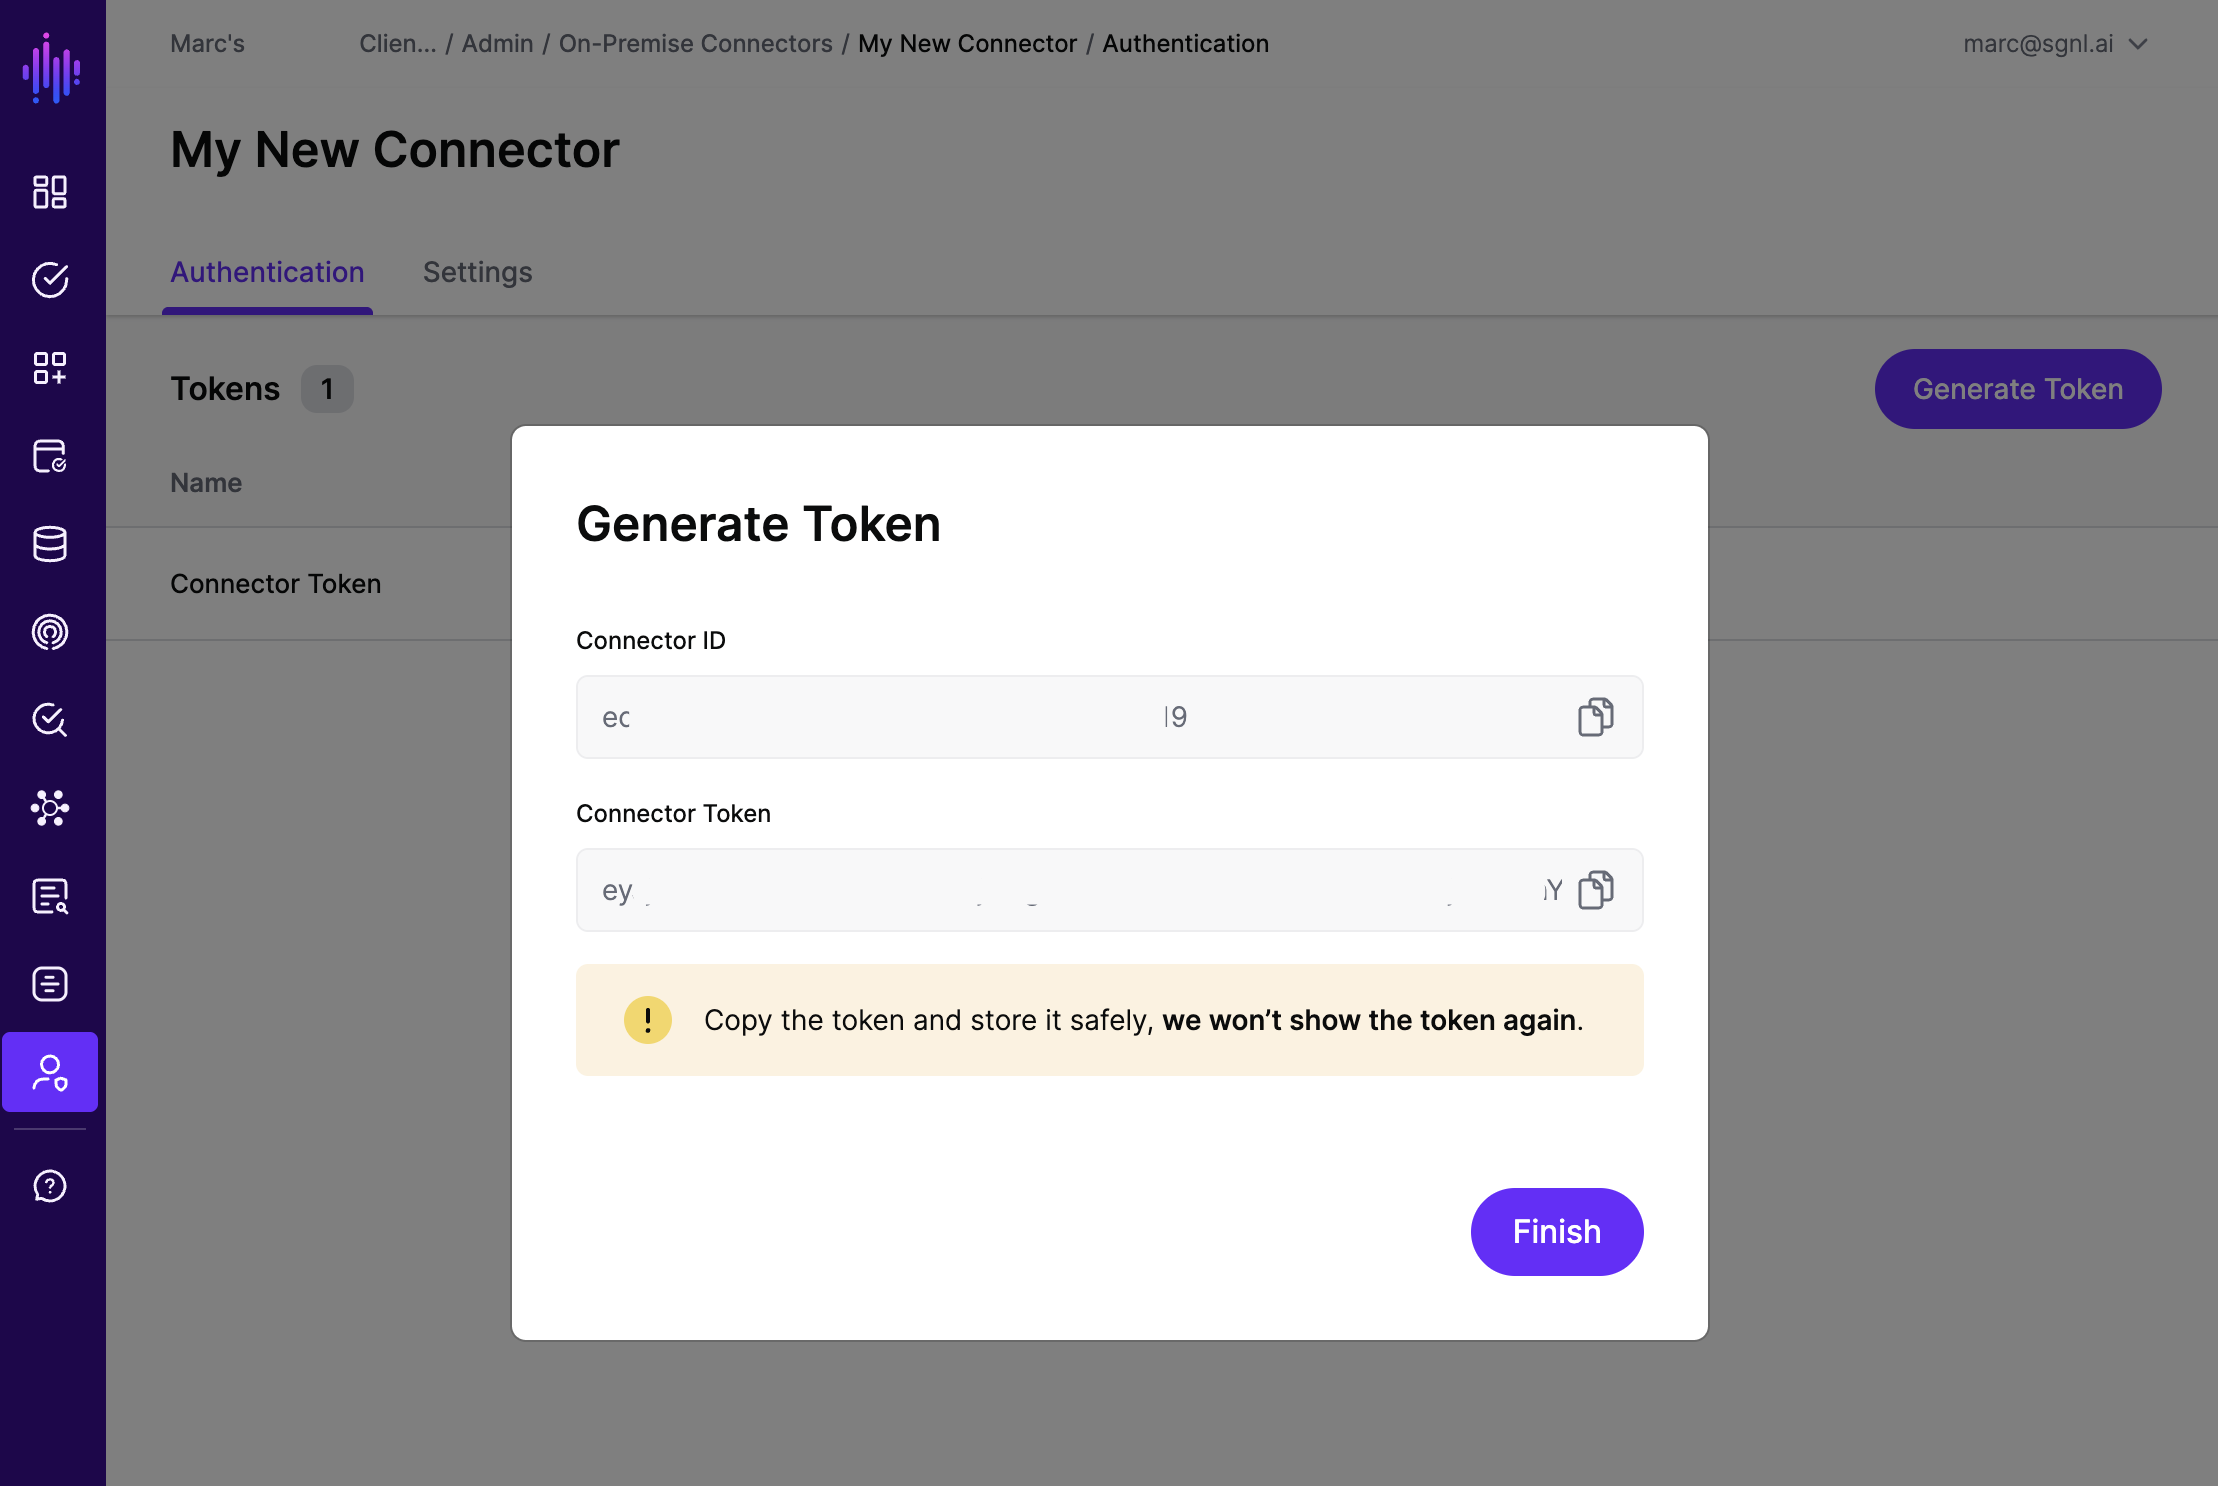
Step 2: Generate Auth Token for a Connector

  • Navigate to the Admin > On-Premises Connector Page and select the specific On-Premises Connector you want to configure.
  • Click on “Generate Token”, provide a descriptive name for the token, and confirm the action.
  • Copy the generated token and store it securely, as it will not be shown again.

Generate a Token

Deploying the On-Premises Connector as a Deployment in Kubernetes Using ACR

This section provides step-by-step instructions for deploying the On-Premises Connector as a Kubernetes Deployment, pulling the image from Azure Container Registry (ACR).

Prerequisites

  • Access to a running Kubernetes cluster (e.g., EKS or self-managed)
  • kubectl CLI configured for your cluster
  • Access to the Azure Container Registry (ACR) containing the Connector’s image
  • Credentials for SGNL ACR (auth token)

Optional: Create a custom image

Create a custom image of the Connector by using a docker multi-stage build. This is optional and not required for the default deployment, but it allows you to customize the Connector image if needed.

For example, you can create a Dockerfile with the following content:

FROM sgnlop.azurecr.io/connector:1.1.0 AS sgnl-image
FROM example.company.com/company/custom-base-image:latest
COPY --from=sgnl-image /sgnl/connector /sgnl/connector

Note that if using a custom image, modify the following steps accordingly to use your custom image instead of the default one.

  • Step 1: Update the docker-registry secret contents to use your custom image registry, username, and password.
  • Step 3: Update spec.template.spec.containers.image to your custom image, and spec.template.spec.imagePullSecrets to your custom image registry secret.

Step 1: Authenticate Kubernetes to Azure Container Registry

Create a Kubernetes pull secret using your ACR credentials for SGNL’s sgnlop-azurecr.io container registry.

kubectl create secret -n sgnl docker-registry sgnl-acr-secret \
    --docker-server=sgnlop.azurecr.io \
    --docker-username="<ACR_USERNAME>" \
    --docker-password="<ACR_TOKEN>"

Step 2: Create ConfigMap and Secret for Connector Configuration

  • Configure the following environment variables for SGNL On-Premises Connector.
    • SGNL_CONNECTOR_SERVER_URL: Set this to your assigned sub-domain with .sgnlapis.cloud as the suffix.
    • SGNL_CONNECTOR_CLIENT_ID: Navigate to Admin > Environment page in the SGNL Console to get the Client ID.
    • SGNL_CONNECTOR_CONNECTOR_ID: Use the Connector ID created on the Admin > On-Premise Connector page in the SGNL Console.
    • SGNL_CONNECTOR_AUTH_TOKEN: Use the authentication token generated from the Connector’s page in the SGNL Console.
  • Create a Kubernetes ConfigMap for no-sensitive configuration values (such as SGNL_CONNECTOR_SERVER_URL, SGNL_CONNECTOR_CLIENT_ID, and SGNL_CONNECTOR_CONNECTOR_ID) and a Kubernetes Secret for sensitive values (such as SGNL_CONNECTOR_AUTH_TOKEN ).
apiVersion: v1
kind: ConfigMap
metadata:
  name: connector-config
  namespace: sgnl
data:
  SGNL_CONNECTOR_SERVER_URL: "<subdomain-prefix>.sgnlapis.cloud"
  SGNL_CONNECTOR_CLIENT_ID: "your-client-id"
  SGNL_CONNECTOR_CONNECTOR_ID: "your-connector-id"
apiVersion: v1
kind: Secret
metadata:
  name: connector-secret
  namespace: sgnl
type: Opaque
stringData:
  SGNL_CONNECTOR_AUTH_TOKEN: "your-connector-auth-token"

Step 3: Create the Deployment YAML

Create a file named sgnl-connector-deployment.yaml with the following content:

apiVersion: apps/v1
kind: Deployment
metadata:
  name: connector
  namespace: sgnl
  labels:
    app: connector
spec:
  replicas: 1
  selector:
    matchLabels:
      app: connector
  template:
    metadata:
      labels:
        app: connector
    spec:
      containers:
        - name: connector
          image: sgnlop.azurecr.io/connector:1.1.0
          imagePullPolicy: IfNotPresent
          resources:
            limits:
              memory: "256Mi"
              cpu: 200m
            requests:
              memory: "128Mi"
              cpu: 50m
          securityContext:
            allowPrivilegeEscalation: false
            runAsGroup: 65532
            runAsNonRoot: true
            runAsUser: 65532
          envFrom:
            - configMapRef:
              name: connector-config
            - secretRef:
              name: connector-secret
      imagePullSecrets:
        - name: sgnl-acr-secret
      restartPolicy: Always
      nodeSelector:
        kubernetes.io/os: linux

Step 4: Deploy the Deployment

Apply the YAML to your cluster:

kubectl apply -f sgnl-connector-deployment.yaml

This will create a Deployment with 1 pod running the Connector container.

Step 5: Verify the Deployment

Check the status of your Deployment and pods:

kubectl get deployment connector -n sgnl
kubectl get pods -l app=connector -n sgnl

You should see 1 pod running.

After deploying the Connector, it will register itself with the SGNL platform. Once registration is complete and the connector is active, you can configure Systems of Record (SoR) from their respective settings pages to use the OnPremises Connector for data synchronization.

Troubleshooting

  • If pods are stuck in ImagePullBackOff, check your ACR secret and credentials.
  • Use kubectl describe pod <pod-name> -n sgnl for detailed error messages.
  • Use kubectl logs pod <pod-name> -n sgnl for the log messages from the Connector’s pod.

References

Enable On-Premises Connector for a SoR

  • Navigate to a SoR or Add a new SoR from the “Identity Data Fabric” Page.
  • Select a Connector from the drop-down list of registered On-Premises Connectors in the “Settings”.

Detach On-Premises Connector for a SoR

  • Navigate to the “Identity Data Fabric” page and select the relevant SoR, or add a new SoR as needed.
  • In the SoR settings, select “No Connector” from the drop-down list of registered On-Premises Connectors to detach any connector from this SoR.