Configuring SGNL for SSO with Google Workspace
Prerequisites
- A SGNL user with an Admin role
- User accounts created in SGNL for any user wanting to perform SSO
- An understanding of the ‘Authentication’ steps detailed for Google Workspace
- A user with permissions in Google Workspace to configure OAuth Consent and an OAuth Client, as detailed in the above guide
Configuring Google Workspace
Google Workspace details the steps necessary to get going with Authentication for users in your Workspace domain, however we’ll cover them briefly in this guide for completeness
- As a first step, you’ll need to create a Google Cloud Project
- You’ll then need to configure the OAuth Consent Screen for your project
- The Consent Screen should feel trusted by your users when they sign-in to SGNl the first time, so some suggested values for the details on this page include:
- App Name: SGNL
- User Support Email: The email for your helpdesk, or the team supporting SGNL
- App Logo: If you’d like to use a SGNL Logo, it’s available from https://sgnl.ai/media/SGNL-Media-Kit.zip
- App Home Page: This will vary depending on your deployment topology, but for SGNL SaaS, this will be https://{clientname}.sgnl.cloud
- Application privacy policy link: https://sgnl.ai/privacy/
- Application terms of service link: https://sgnl.ai/terms-of-use/
- Authorized Domains: https://{clientname}.sgnl.cloud and https://sgnl.ai
- Developer Contact Info: The email for your helpdesk, or the team supporting SGNL
- Continue to configure your OAuth Scopes
- You need only two, non-sensitive scopes to integrate with SGNL, these are the /auth/userinfo.profile and openid scopes
- Verify your configuration and go back to the Dashboard
- Next, you should configure your OAuth Client, this will involve creating a new OAuth Client with the below suggested details:
- Save the configuration and download or save your Client Id and Client Secret, you’ll need these in a moment
Configuring SGNL
In SGNL, using the navigation pane, browse to Admin → Security
Test the connection to verify your configuration was successful
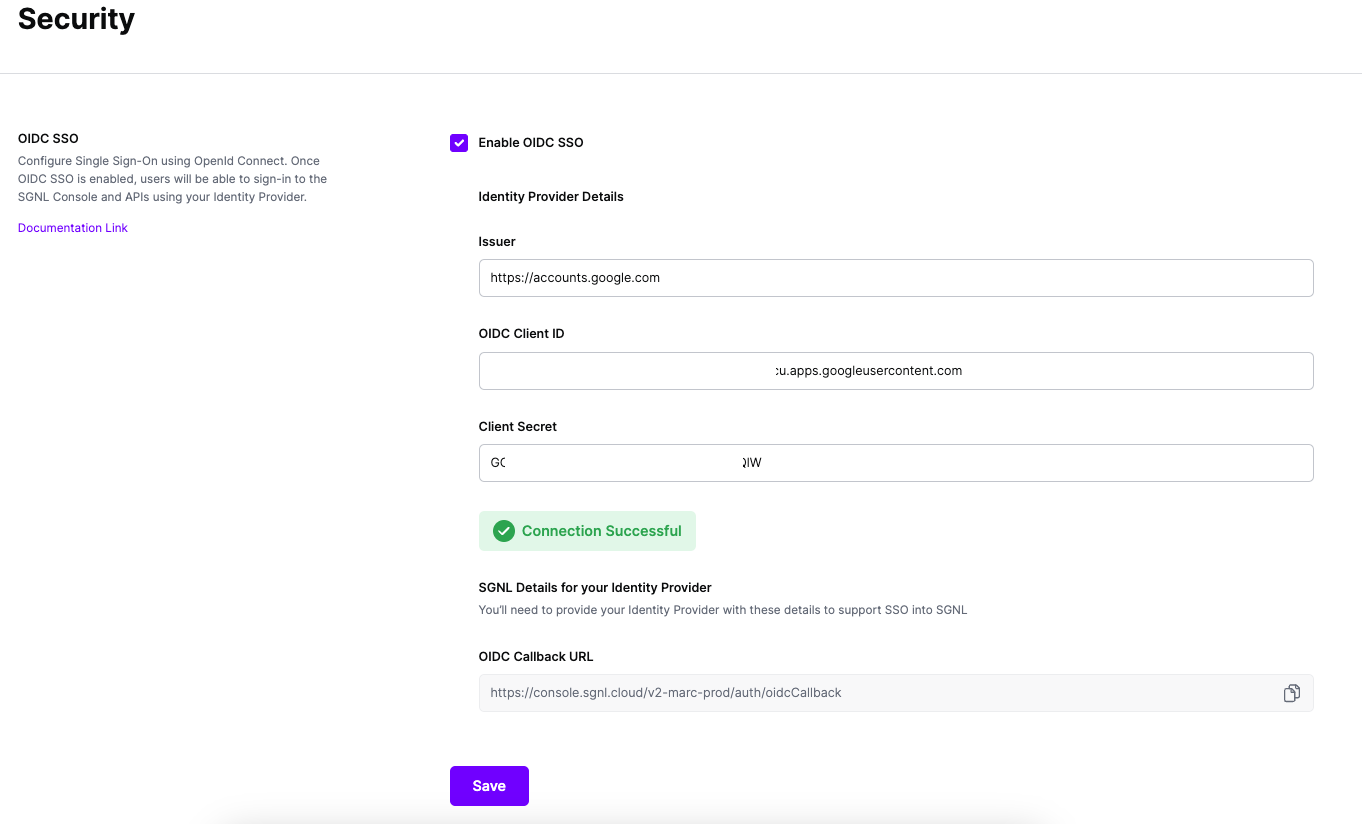
Save your settings
Testing
- Once SSO is configured, that will be the only way to sign-in, so if you want to do additional testing beyond the Test Sign-In button, you can do so with a new browser window
- Browse to your SGNL Sign-On Page, e.g. https://console.sgnl.cloud/WholesaleChips
- Click to ‘Sign-in with your Identity Provider’, you will be redirected to your Identity Provider to authenticate
- After authentication, you should be redirected to SGNL and be signed-in, by default onto the dashboard