Configuring SGNL for SSO with OpenID Connect

Prerequisites

  • A SGNL user with an Admin role
  • User accounts created in SGNL for any user wanting to perform SSO
  • A user with permissions in your IdP to add and configure an OpenId Connect (OIDC) integration, e.g.
  • Other pre-requisites as defined by your Identity Provider (IdP)

Configuring your Identity Provider

  1. Within your Identity Provider, you’ll need to register a new OpenId Connect Integration - the process for this varies wildly across Identity Providers, however steps for common IdP’s are included below.
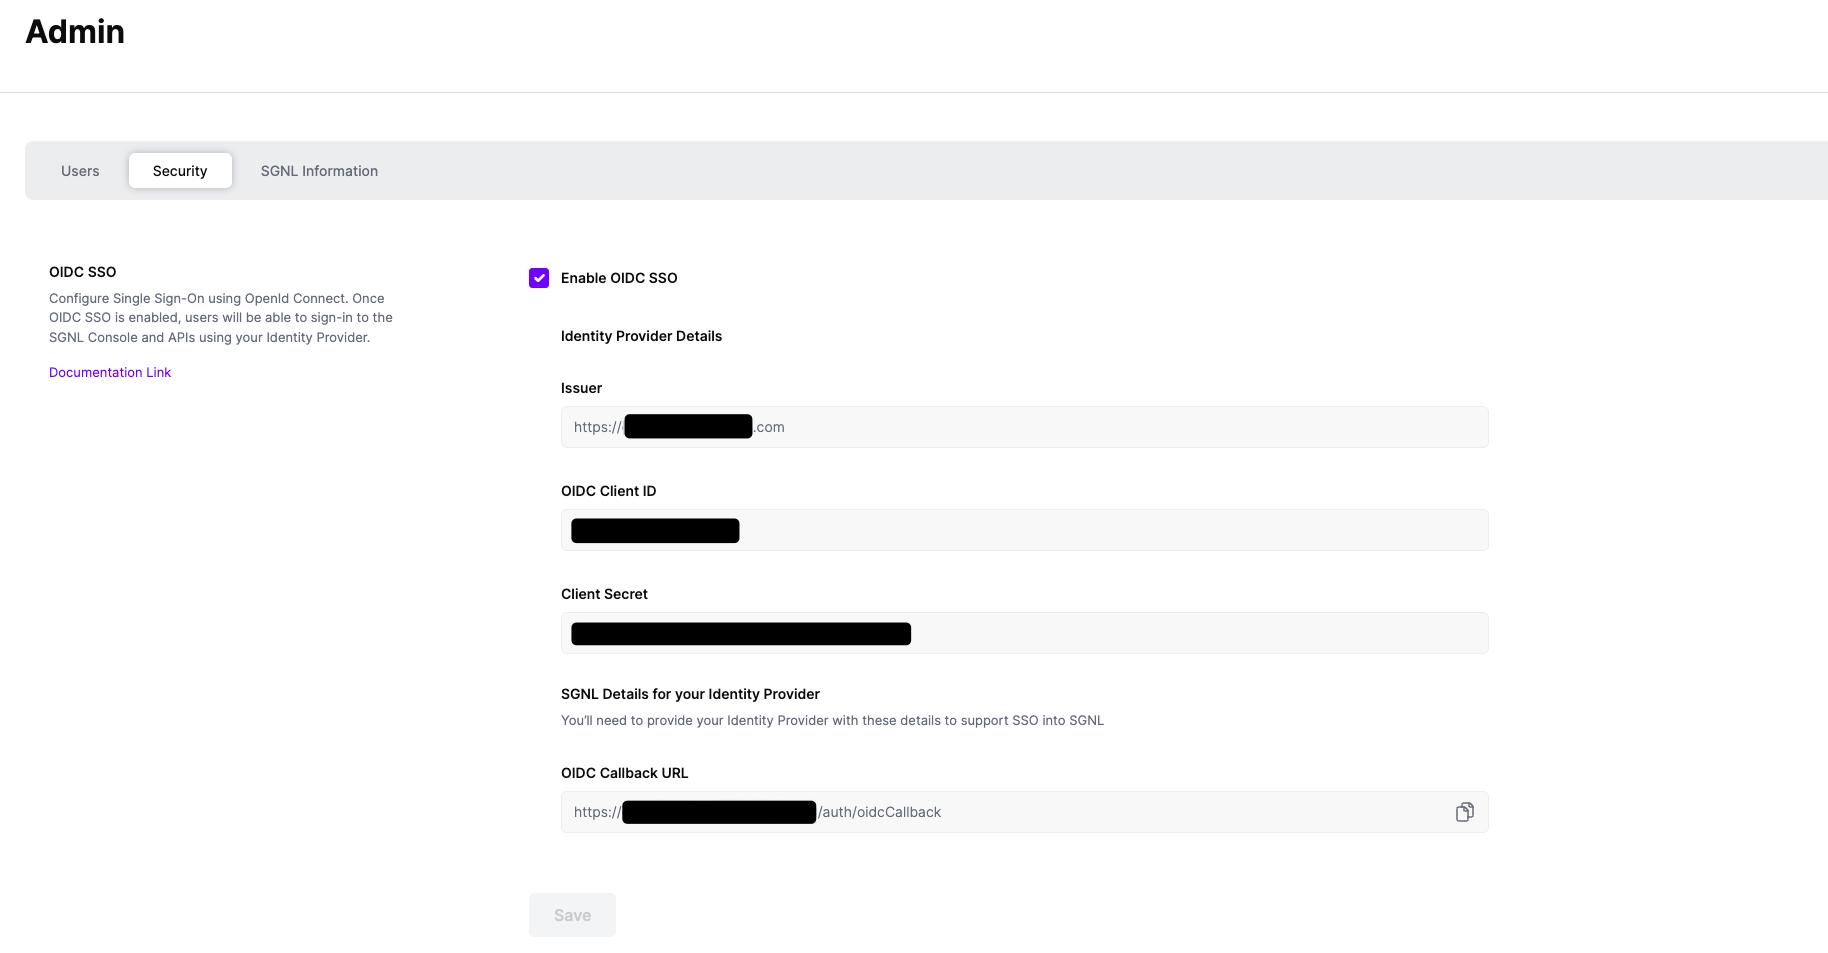
  2. To complete this configuration, you’ll need to know your SGNL OIDC Callback URL - this is available from the SGNL Console within Admin → Security, and takes the form of:
  3. From your IdP, you’ll need to copy and securely store your:

Configuring SGNL

  1. In SGNL, using the navigation pane, browse to Admin → Security

  2. Enter the Issuer, the Client ID, and the Client Secret into SGNL

    Admin - SGNL

  3. If you need, return to your identity provider and update your OIDC Callback URL

  4. Save your settings

Testing

  1. It’s recommended to maintain your existing, signed-on session inside of SGNL and open a new browser/browser window
  2. Browse to your SGNL Sign-On Page, e.g. https://console.sgnl.cloud/WholesaleChips
  3. Click to ‘Sign-in with your Identity Provider’, you will be redirected to your Identity Provider to authenticate
  4. After authentication, you should be redirected to SGNL and be signed-in, by default onto the dashboard