Go to Atlassian ID Portal and login with an account you will use to synchronize data from Jira to SGNL
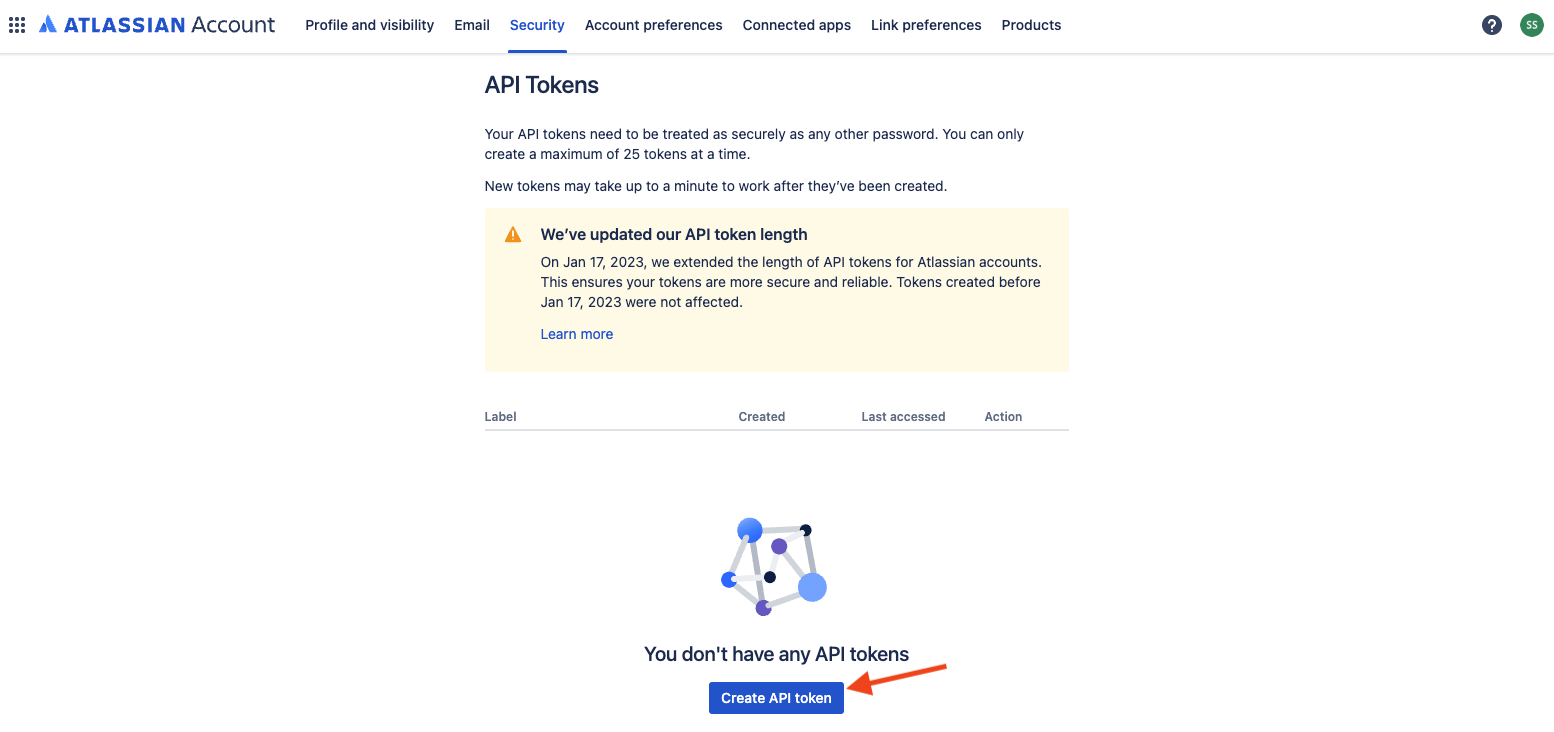
Enter a label for the API key, click Create, and copy the API token that is created
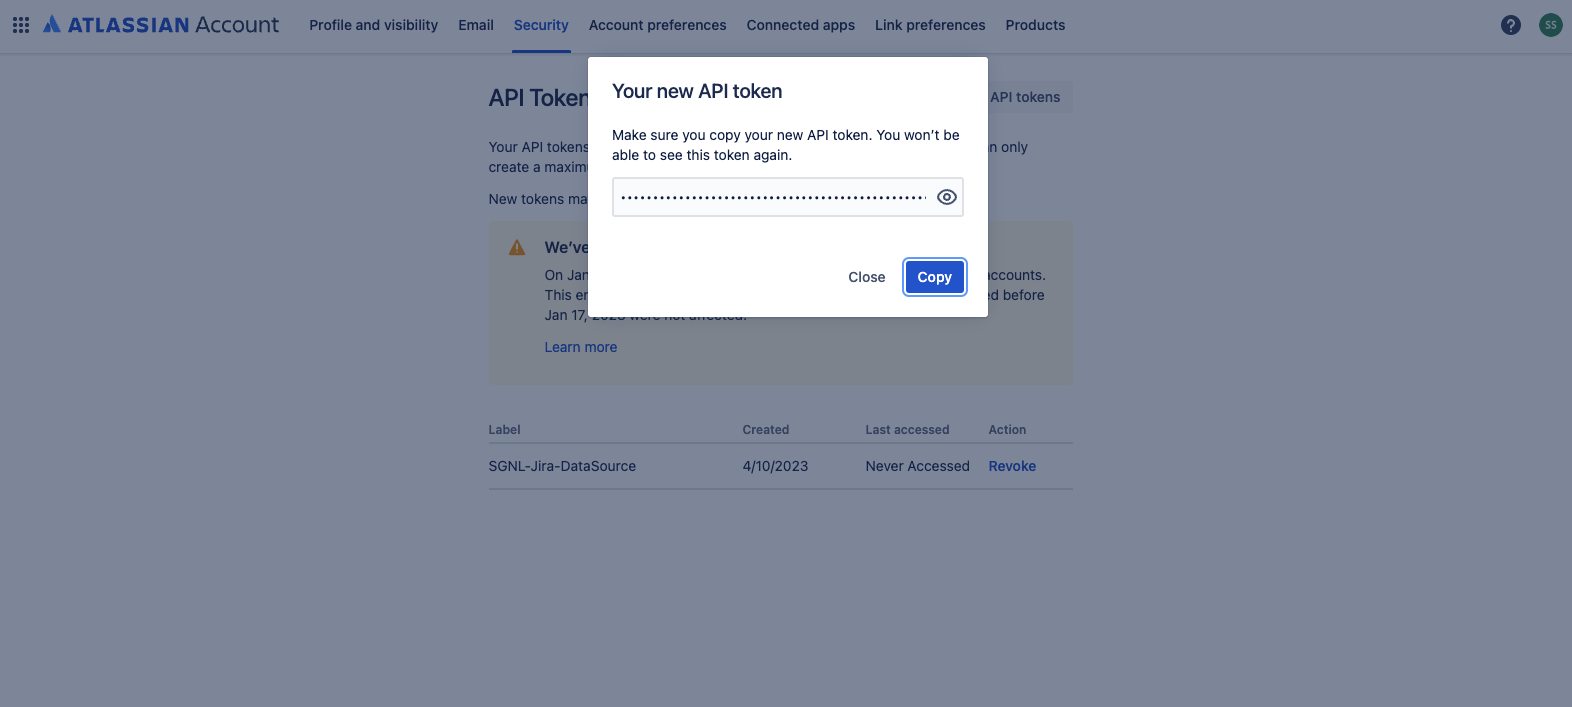
Save the API key in a temporary location. You will need this API key for completing configuration in SGNL
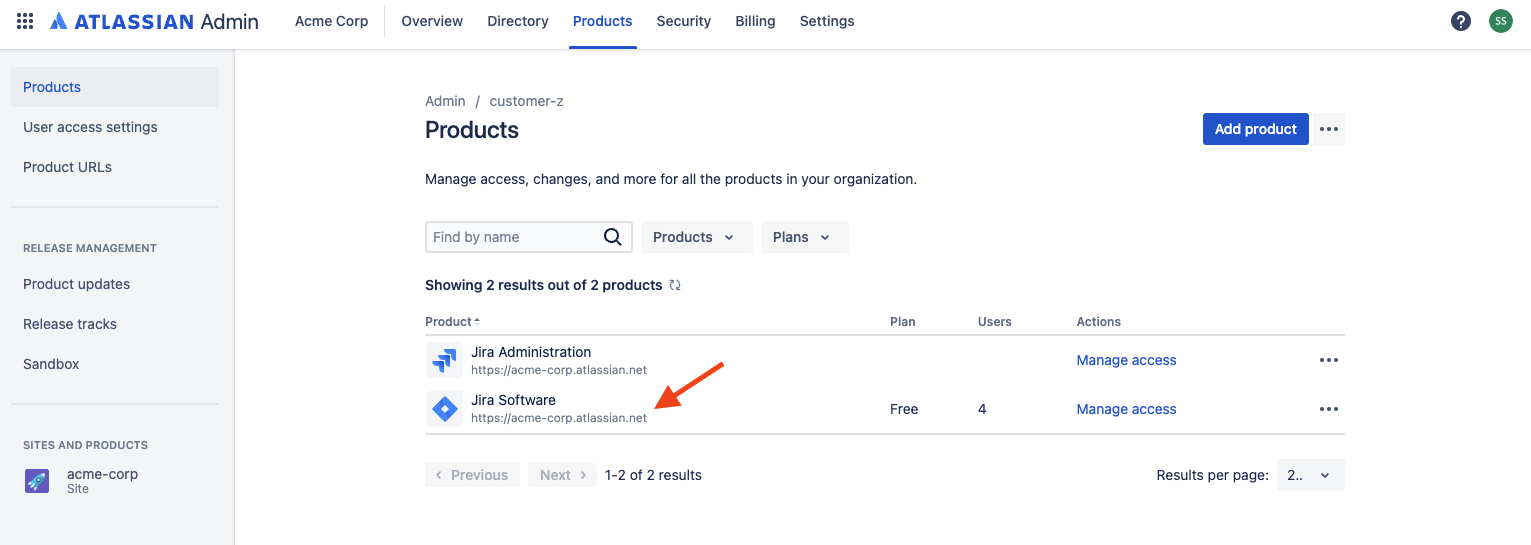
In the Atlassian Admin app, browse to Products and note the Base URL for the Jira Software
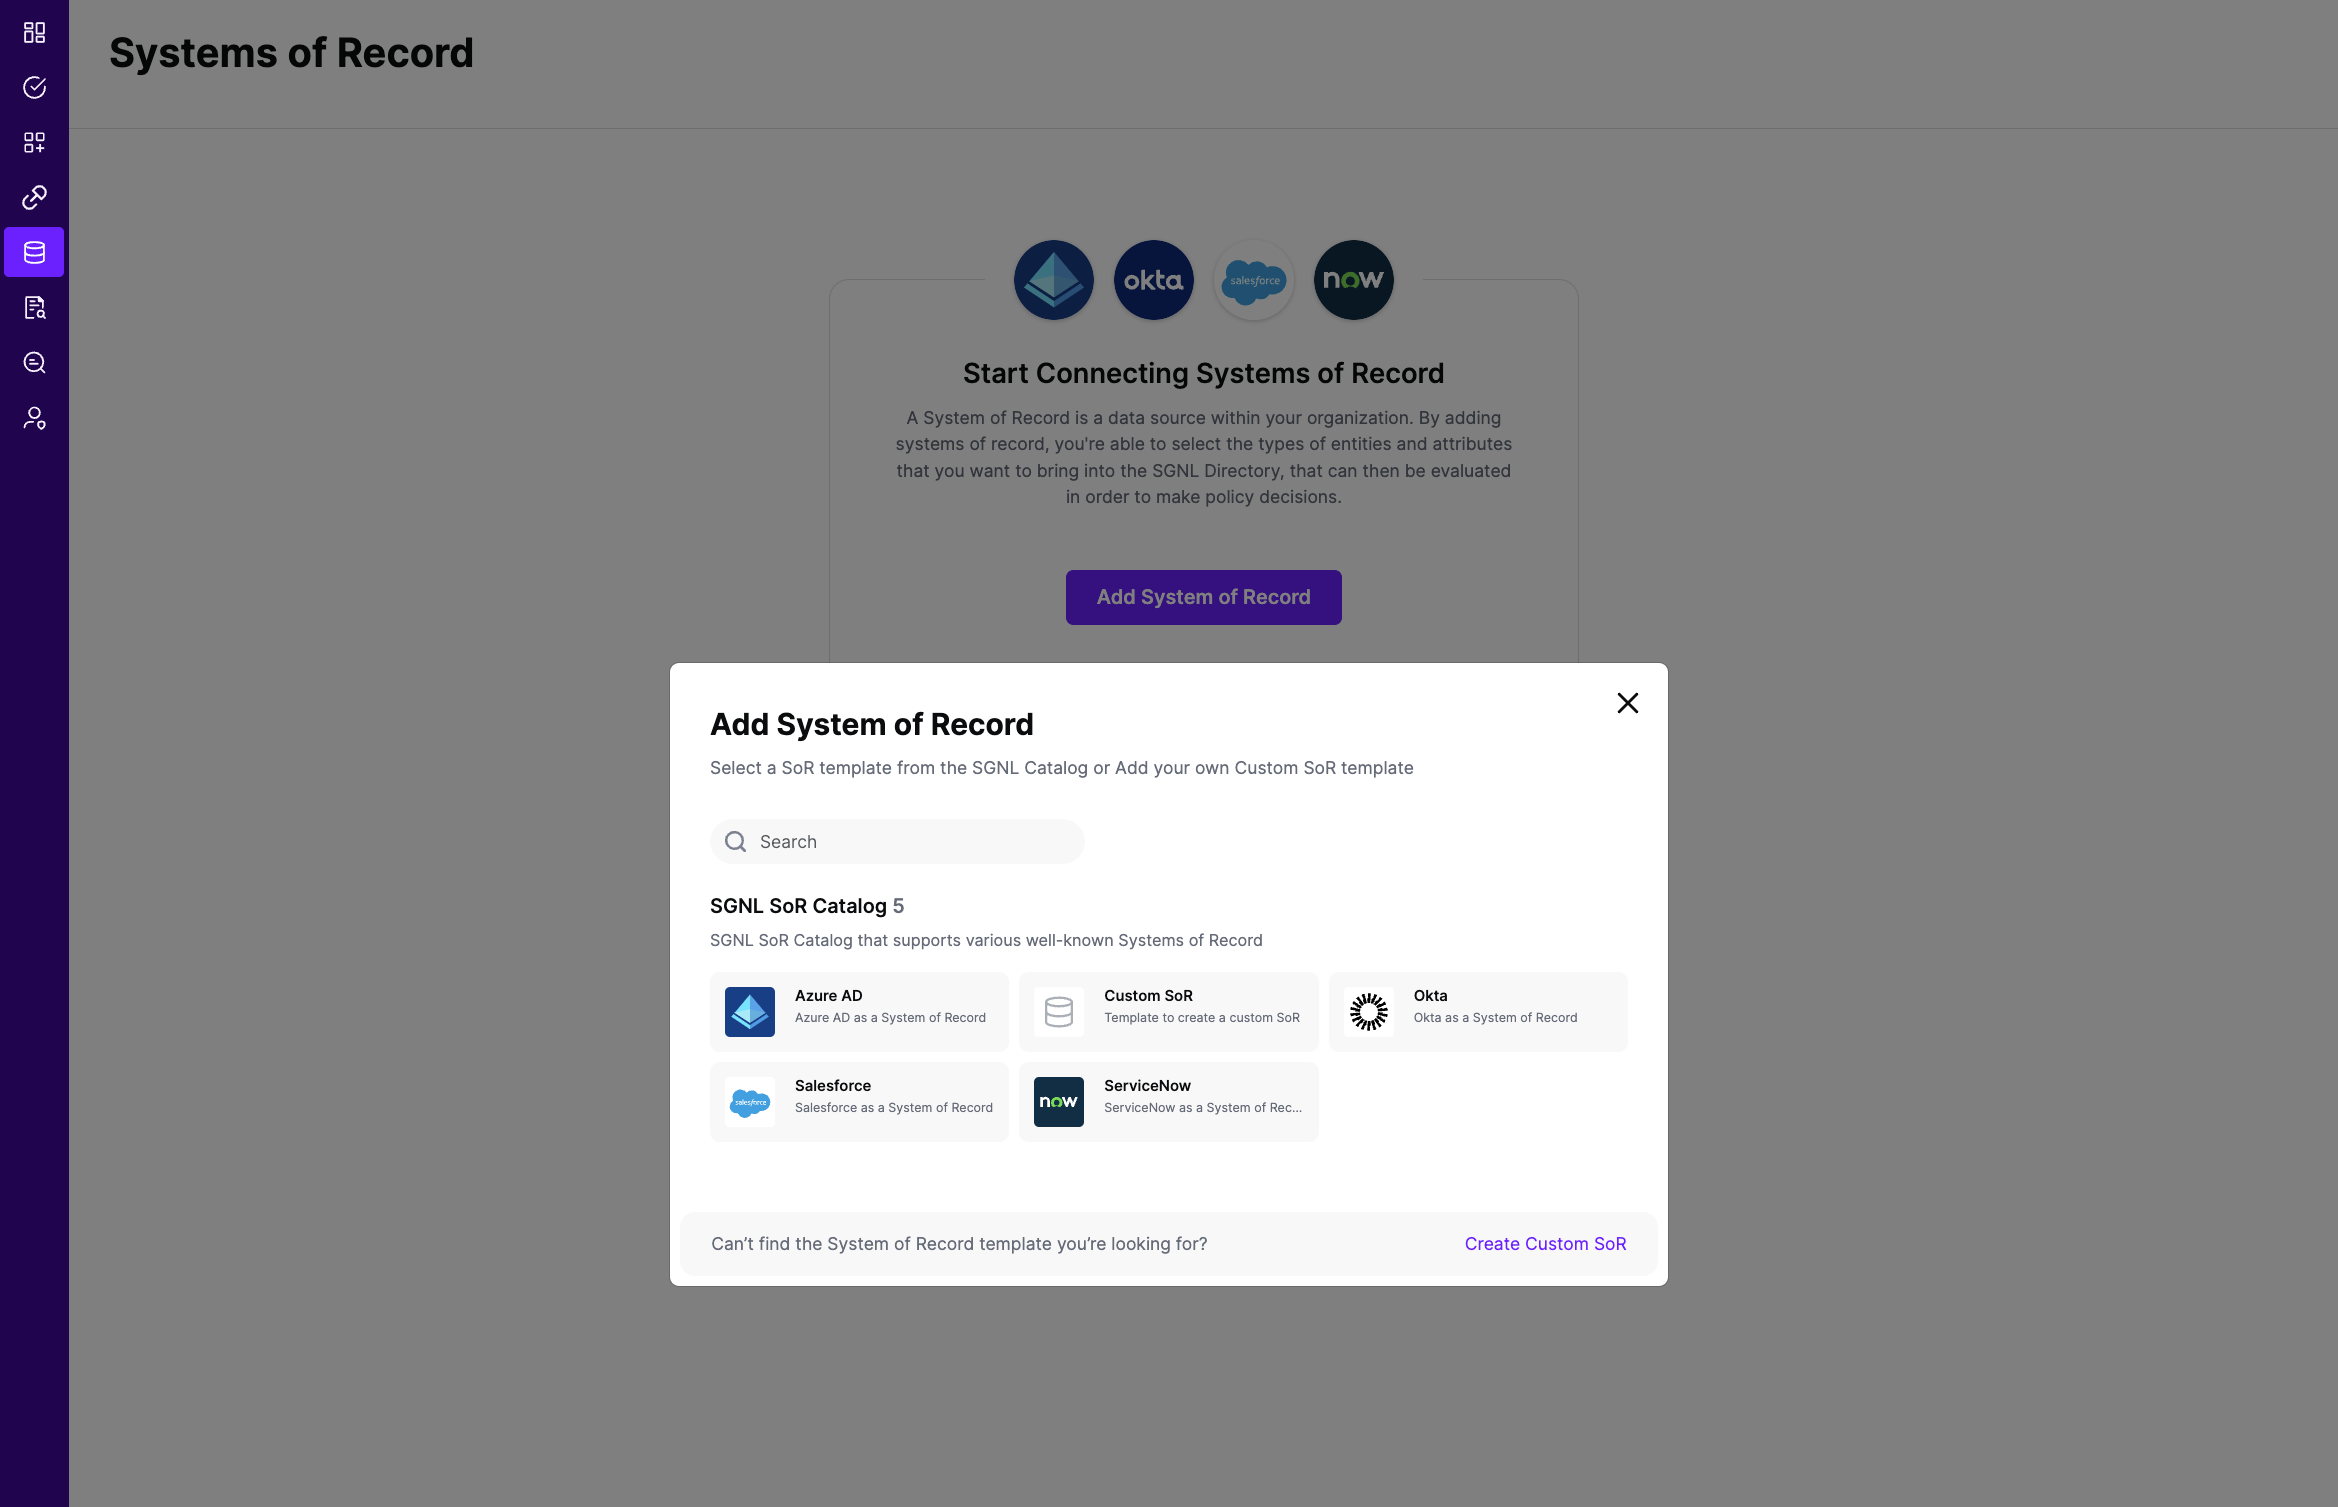
Login to the SGNL Console
From the left menu, select Data Sources
Add a New Data Source and select Jira
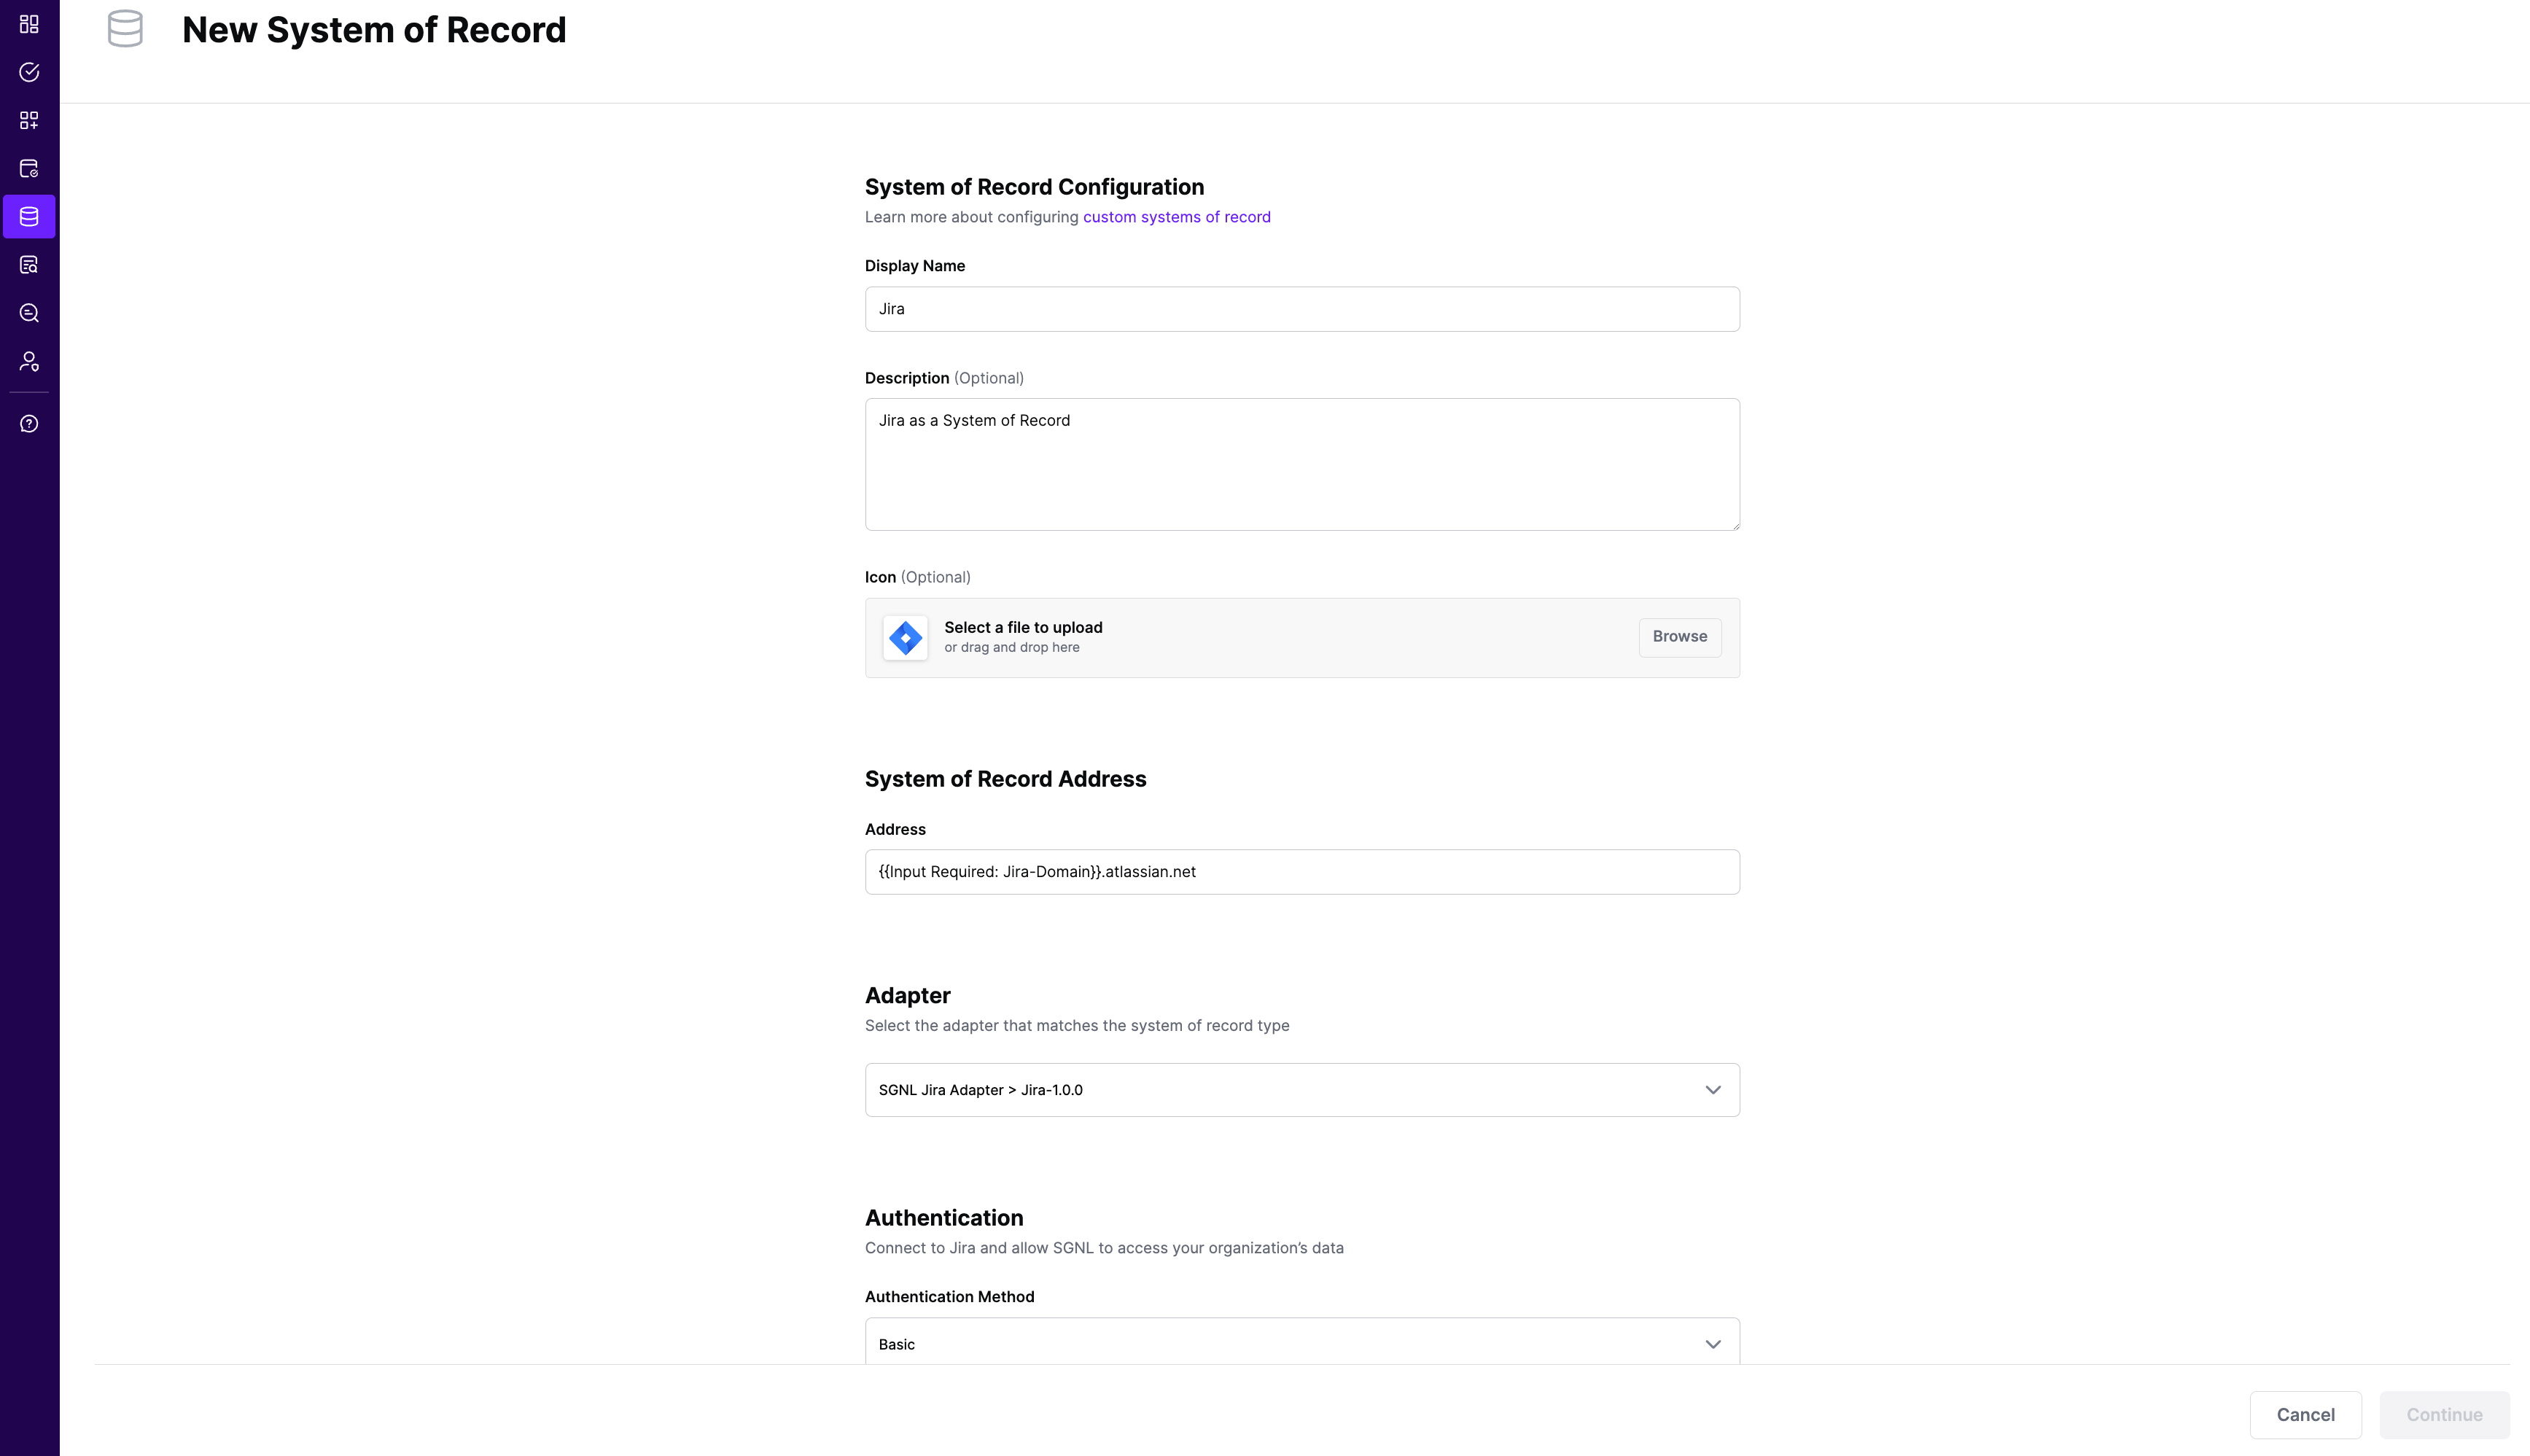
Enter the following data into SGNL:
Save the configuration
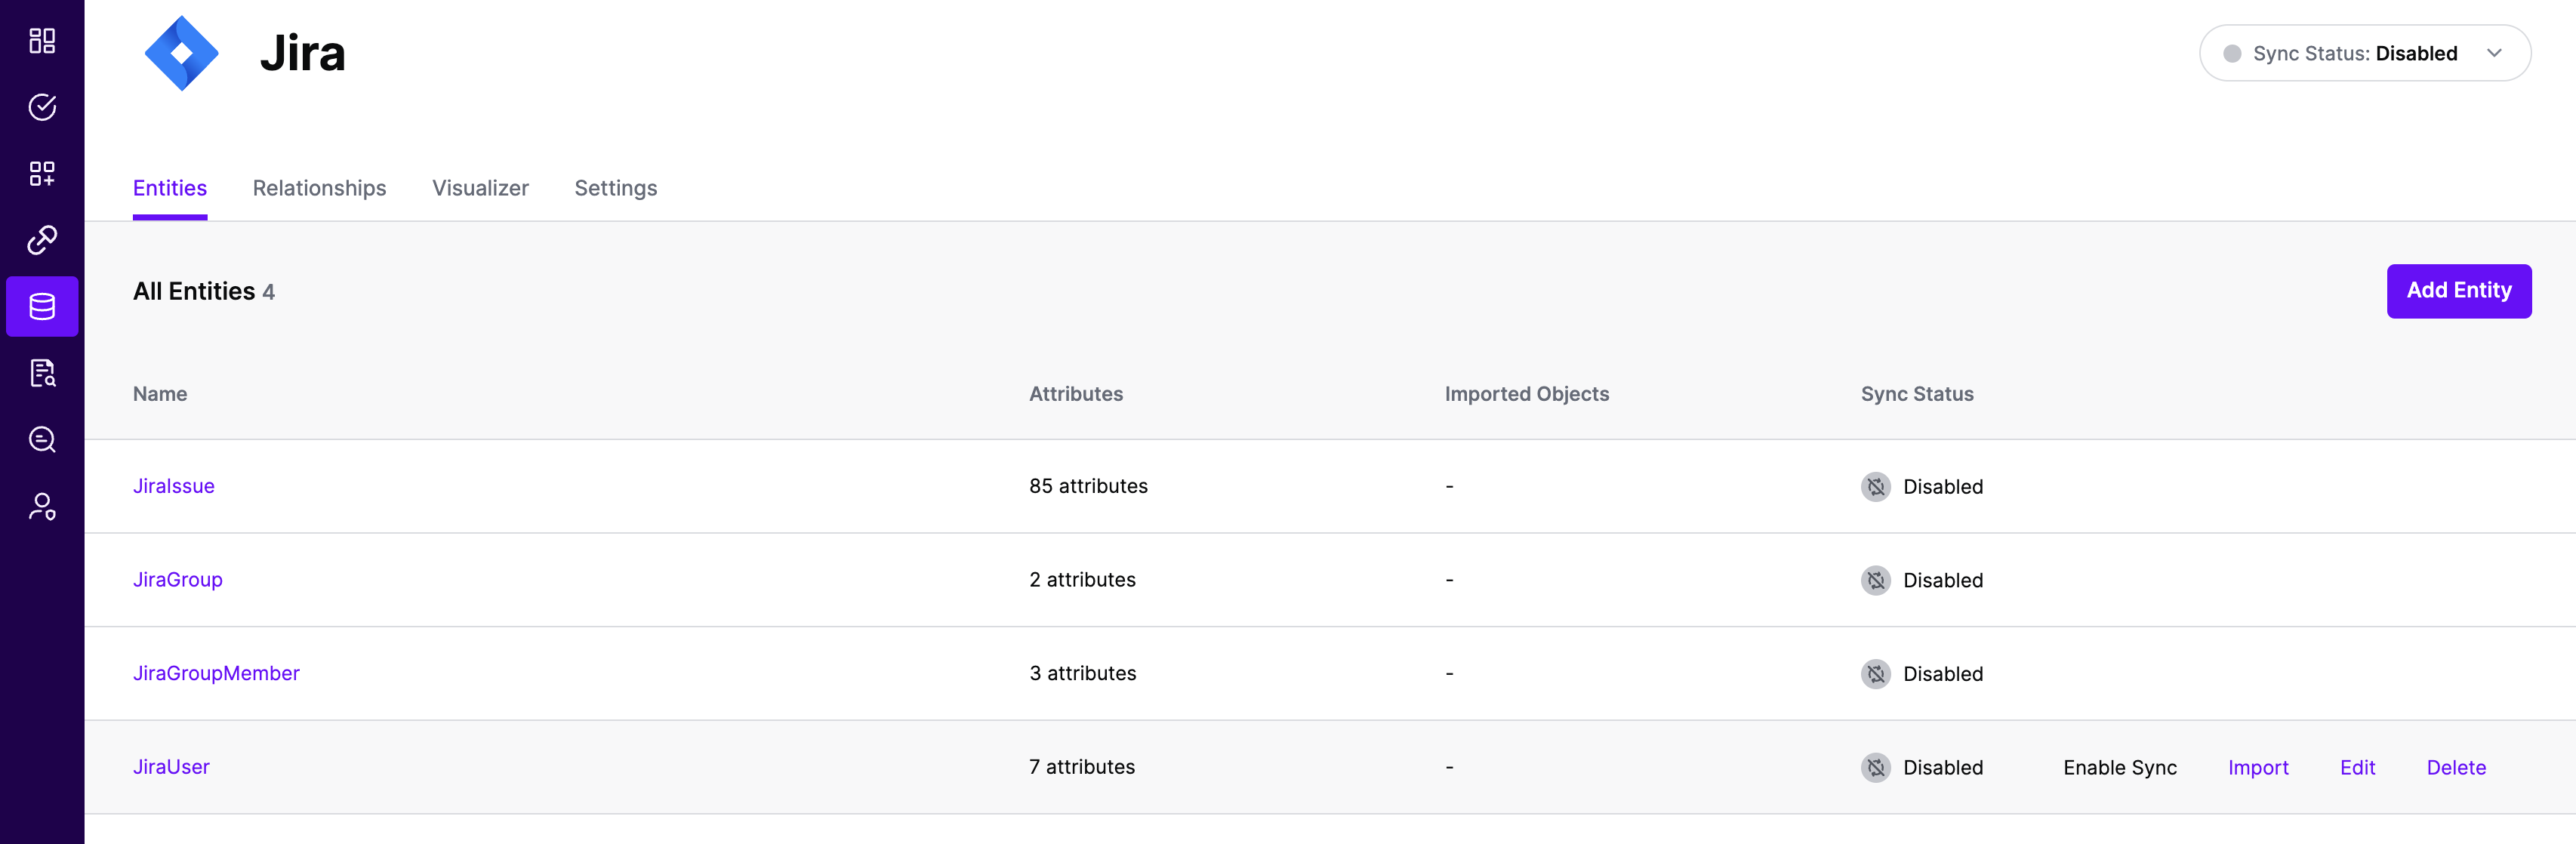
From the Entities tab, select Configure Entities, which should open the Unconfigured Entities section
Select the entity JiraIssue and the relevant attributes you need synchronized into SGNL, and Save
Repeat (7) ofr JiraUser
(If applicable) Specify the attribute(s) that will join the entities you have configured to synchronize from Jira to other entities in the SGNL Graph
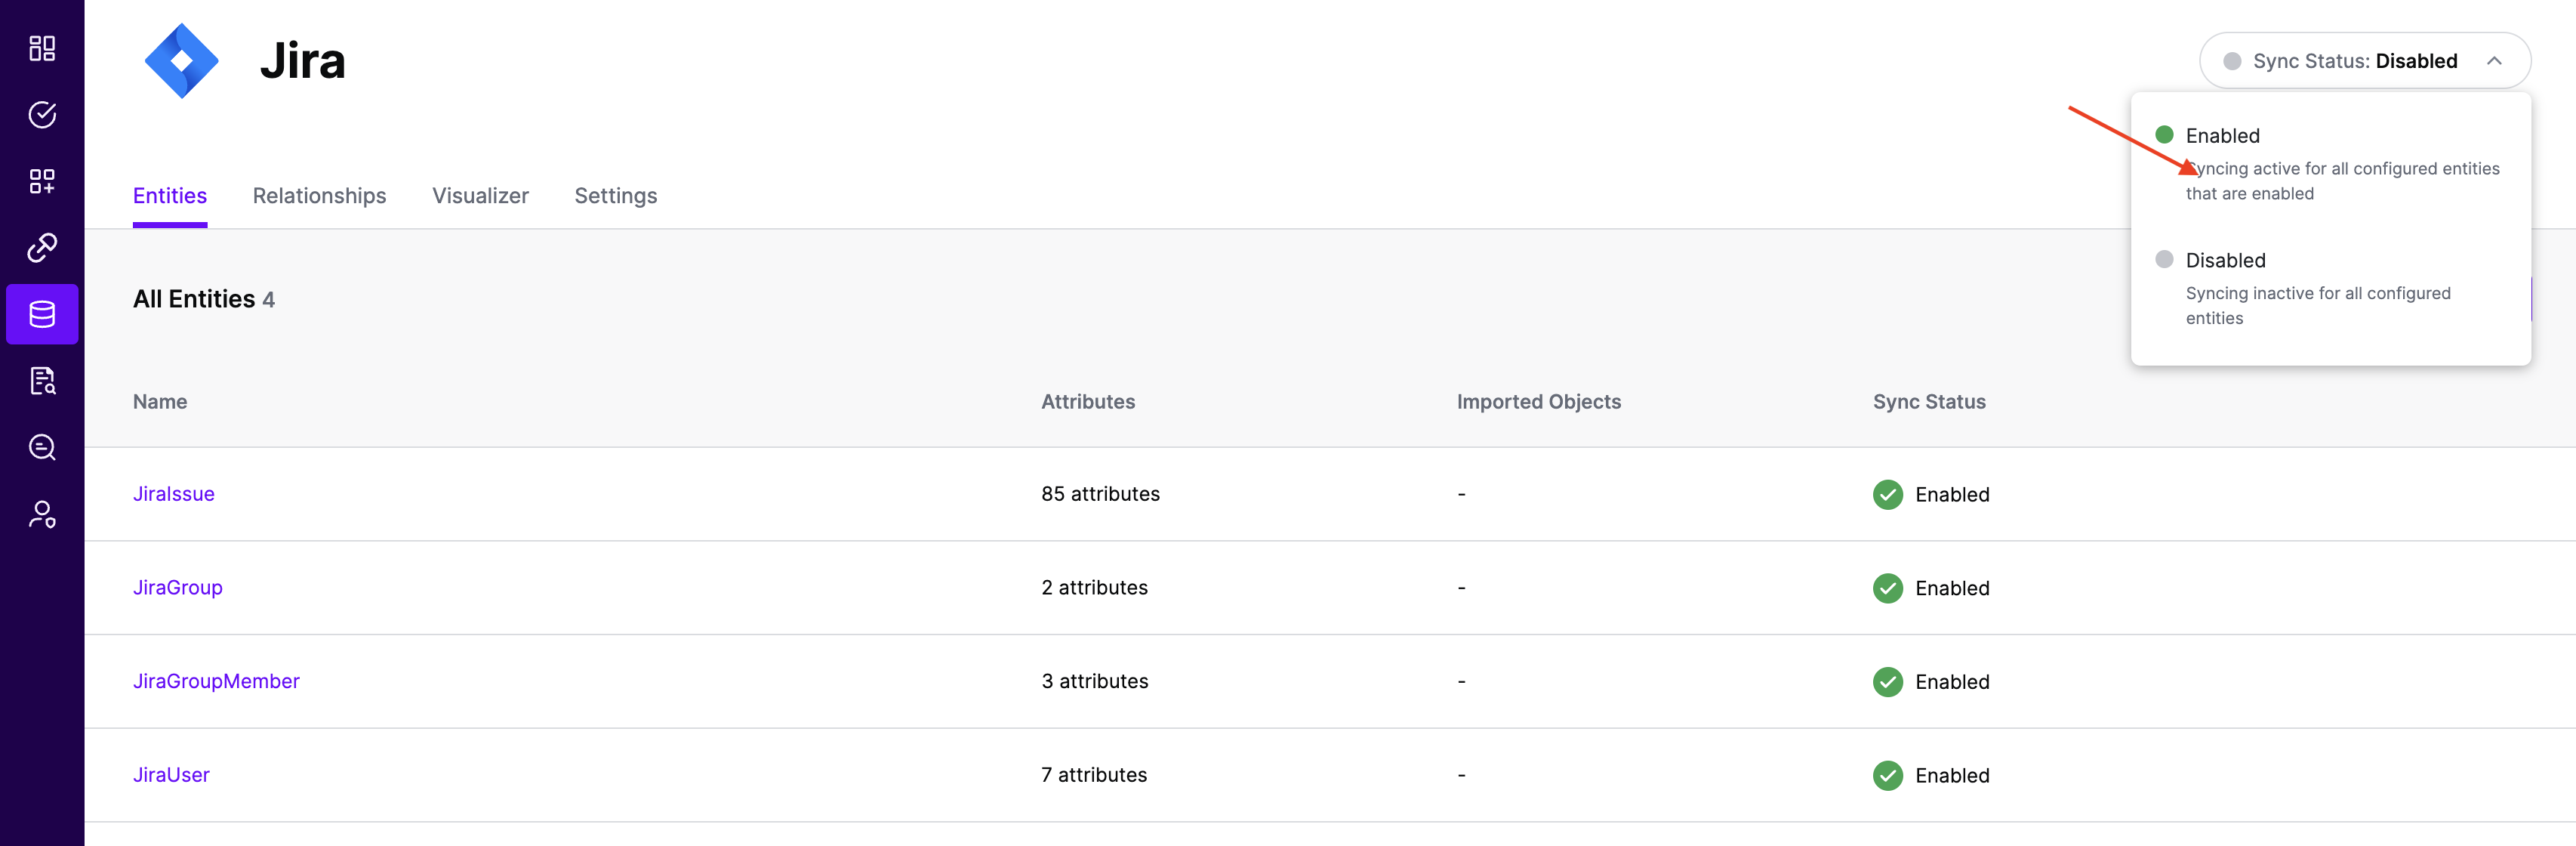
Save the configuration
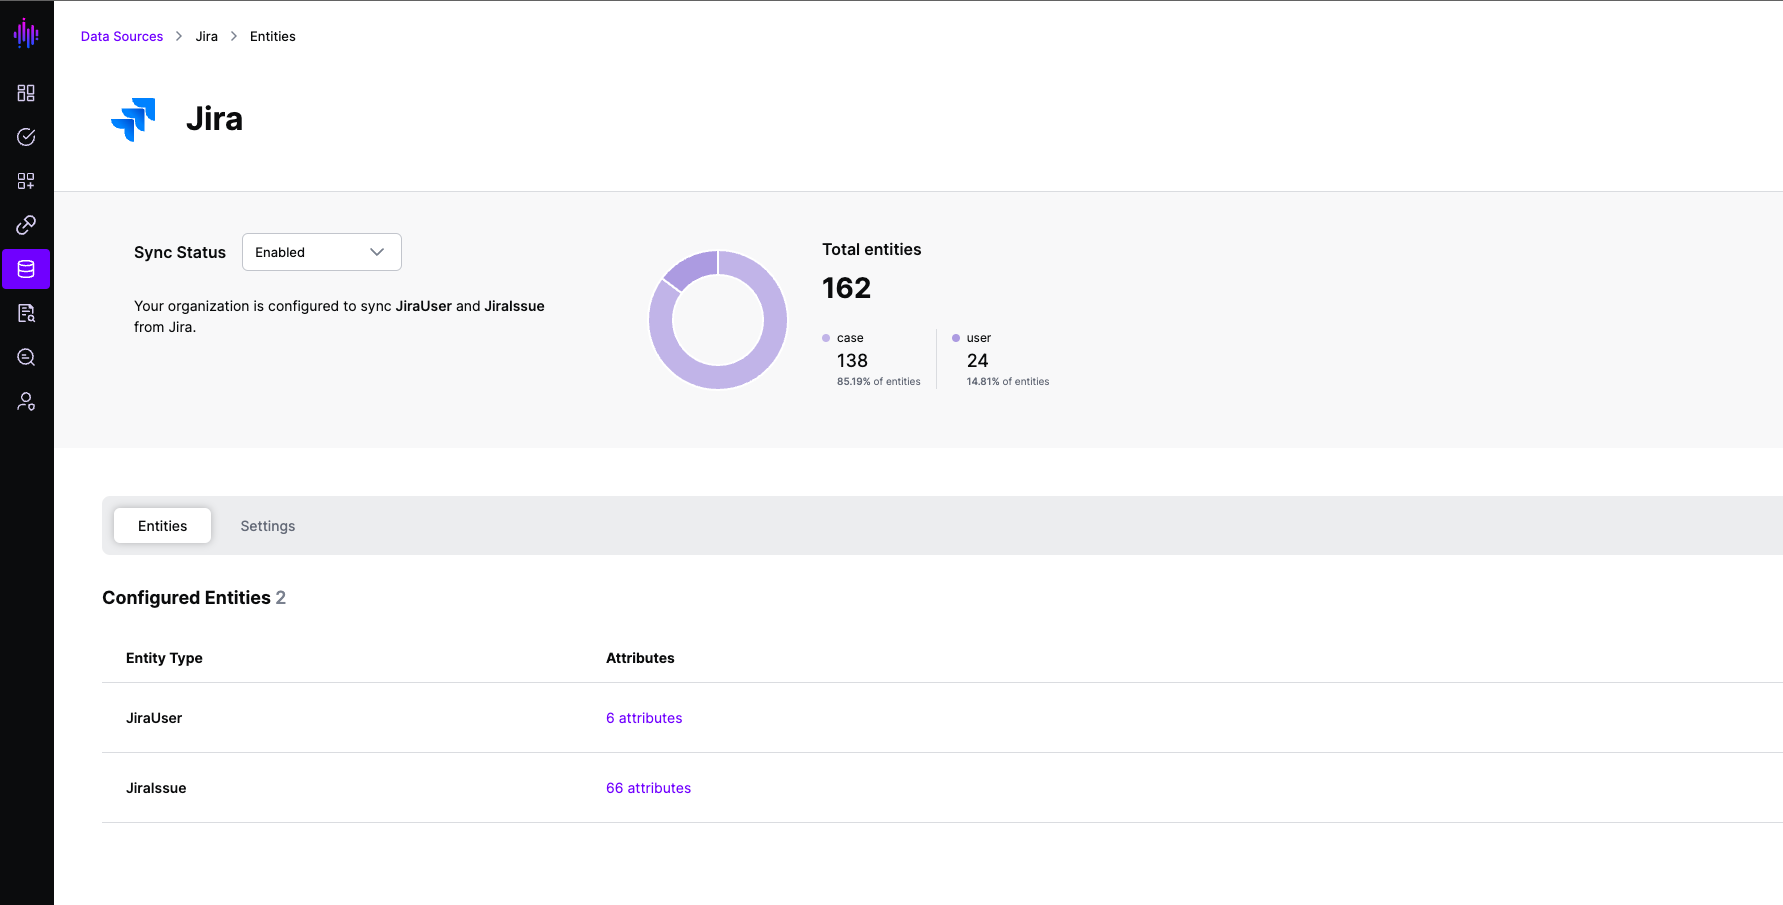
Once SGNL ingests User and Issue data from Jira, the number of Users and Issues should be displayed in the SGNL dashboard as shown below