Creating and Configuring a Salesforce Data Source

Prerequisites

Permissions Required

  • A service account with permissions to read any of the objects that need to be synchronized to SGNL
  • Permissions to access the Salesforce API

Configuring Salesforce

  1. As a first step, identify your unique Salesforce sub-domain, this should form part of the URL you use to access salesforce, such as https://acme-corp.my.salesforce.com - note this sub-domain for configuring SGNL

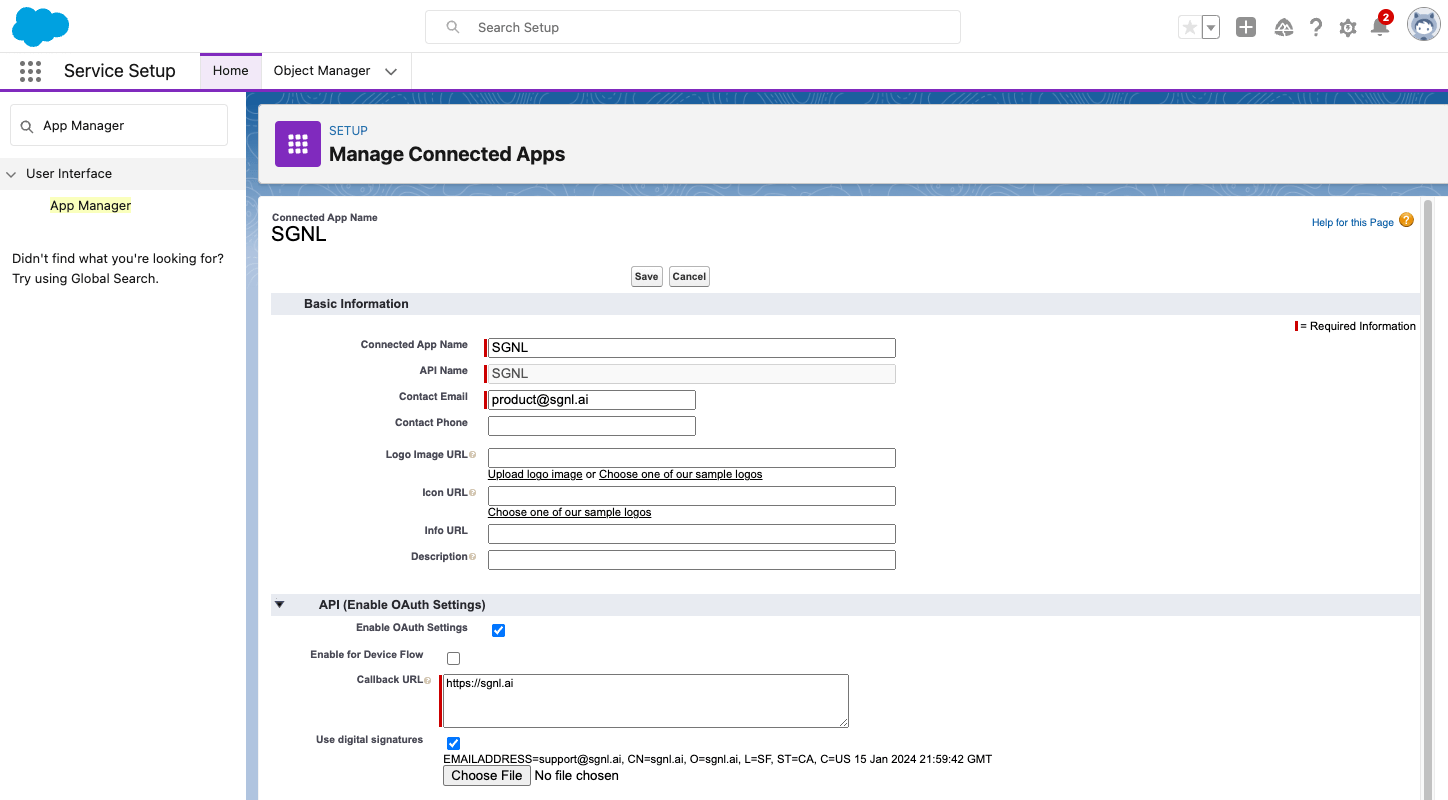
  2. Create a new Connected App within your Salesforce Instance based on your desired configuration settings

  3. Enable the Connected App to use the JWT OAuth Flow by selecting to “Use Digital Certificates” - upload your Public Certificate to the Connected App

    Salesforce - Use Digital Certificates

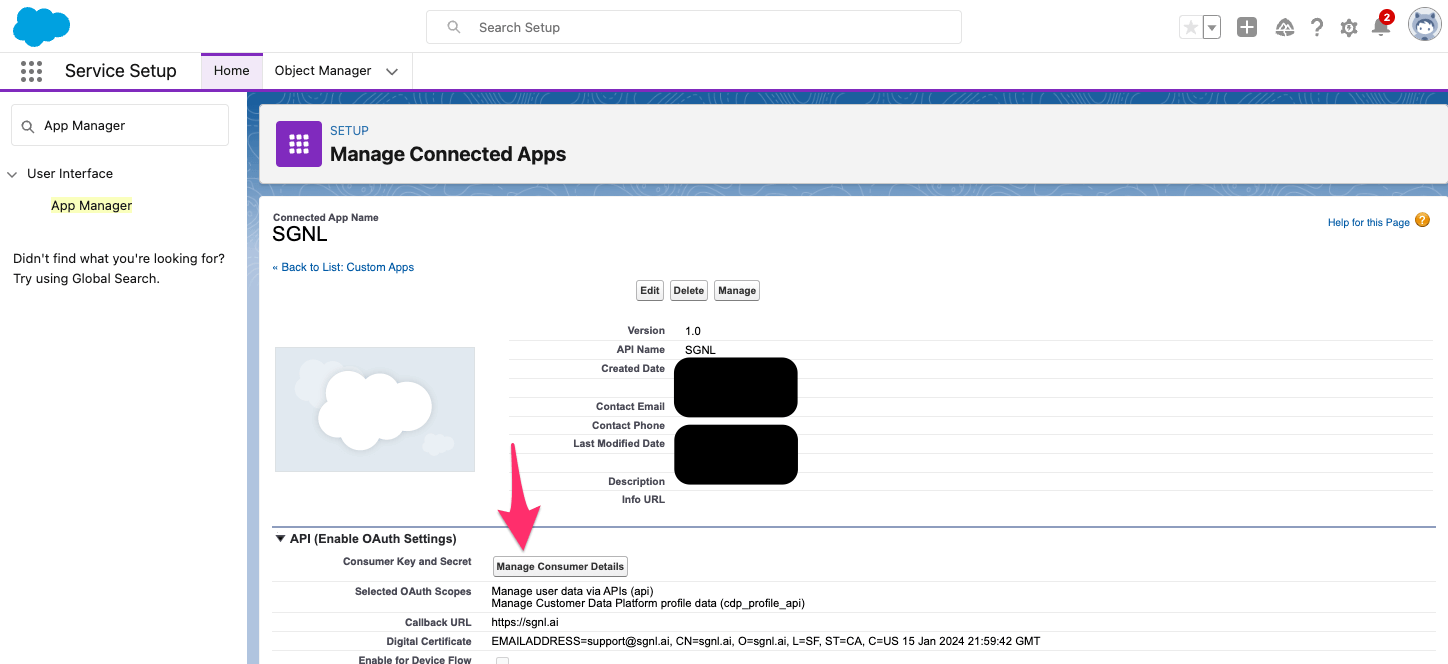
  4. Choose to “Manage Consumer Details”, and copy the Consumer Key (OAuth Client Id) - note this for use in SGNL

    Salesforce - Copy Consumer Key

Configuring SGNL

  1. Login to the SGNL Console

  2. From the left menu, select Data Sources

  3. Add a New Data Source and select Salesforce

  4. Give the new Data Source a friendly Display Name and helpful Description

  5. Enter the following data into SGNL:

    • My Domain Name: Your Salesforce sub-domain (e.g. acme-corp)
    • OAuthClientId: The Consumer Key you copied above
    • OAuthServer: Unless otherwise known, use https://login.salesforce.com
    • OAuthSubject: The Username of the user account that will be used to synchronize data to SGNL
    • OAuthTimeout: Set this to 300s unless otherwise specified
    • PrivateKey: The Private Key you will use to sign the Salesforce JWT, starting with -----BEGIN PRIVATE KEY----- and ending with -----END PRIVATE KEY-----
  6. Once configured, click Continue to save your Data Source and move on to configuring Entities

  7. From the Entities tab, click on ‘Edit Attributes’ to select the entities and attributes you will need synchronized into SGNL to be used in your specified SGNL policies

    • Refer to Salesforce’s documentation for descriptions of the attributes you choose to synchronize into SGNL: Account, Case, Customer, User
    • E.g. If you want to create a policy that Salesforce Users of Title: Customer Support and with isActive: TRUE are allowed to access certain assets, you will need to select the following attributes from the Salesforce User entity: Title, isActive in addition to principal identifiers such as Email or EmployeeNumber
  8. (If applicable) If you will be synchronizing entities and attributes from 2+ different data sources into SGNL to define policies, click on Add join rule to specify the attribute(s) that will join the entities you’ve configured to synchronize from Salesforce to other entities in the SGNL Graph

    • You only have to specify a join rule from one Data Source. For instance, if you specify a join rule between Salesforce Accounts and ServiceNow Accounts, you only need to configure the relationship from either the Salesforce or ServiceNow Data Source
    • E.g. If Account Numbers are found in your Salesforce and CSM system and are consistent, you can choose the Account Number Attribute in this Salesforce Instance and the Account Number Attribute in your CSM Data Source to join these entities together
    • Join rules should only be used for entities that represent the same object across 2+ different data sources. For instance, if an Account in Salesforce represents the same Account as one in ServiceNow, it is a good candidate for a join rule
      • However, a User in Azure Active Directory and a Group in ServiceNow represent different objects and are therefore not good candidates for join rules, and instead should have custom relationships created via the Relationships API. Additionally, if a User in Azure Active Directory is not the same User as one in ServiceNow, it is not a good candidate for a join rule
  9. Save the Configuration