Protected Systems are applications, services, or infrastructure that you want to protect with SGNL. In this guide, we’ll explore how to enhance the access control being delivered through OPA, with a continuous, centralized access management platform like SGNL. If you’re wondering whether an integration between your OPA-enabled applications and SGNL is right for your enterprise, you can learn more on the Implementing Adaptive Access Management with OPA Blog.
With this integration, your OPA-enabled Apps need not know about the policies, systems of record, or any of the data in SGNL - it simply needs to pass to SGNL:
Authentication ensures that only authorized systems can make requests into SGNL, as well as verifying the identity of an integration in order to effectively evaluate Policies - to access Authentication settings, open your OPA-enabled protected system and select the Authentication tab
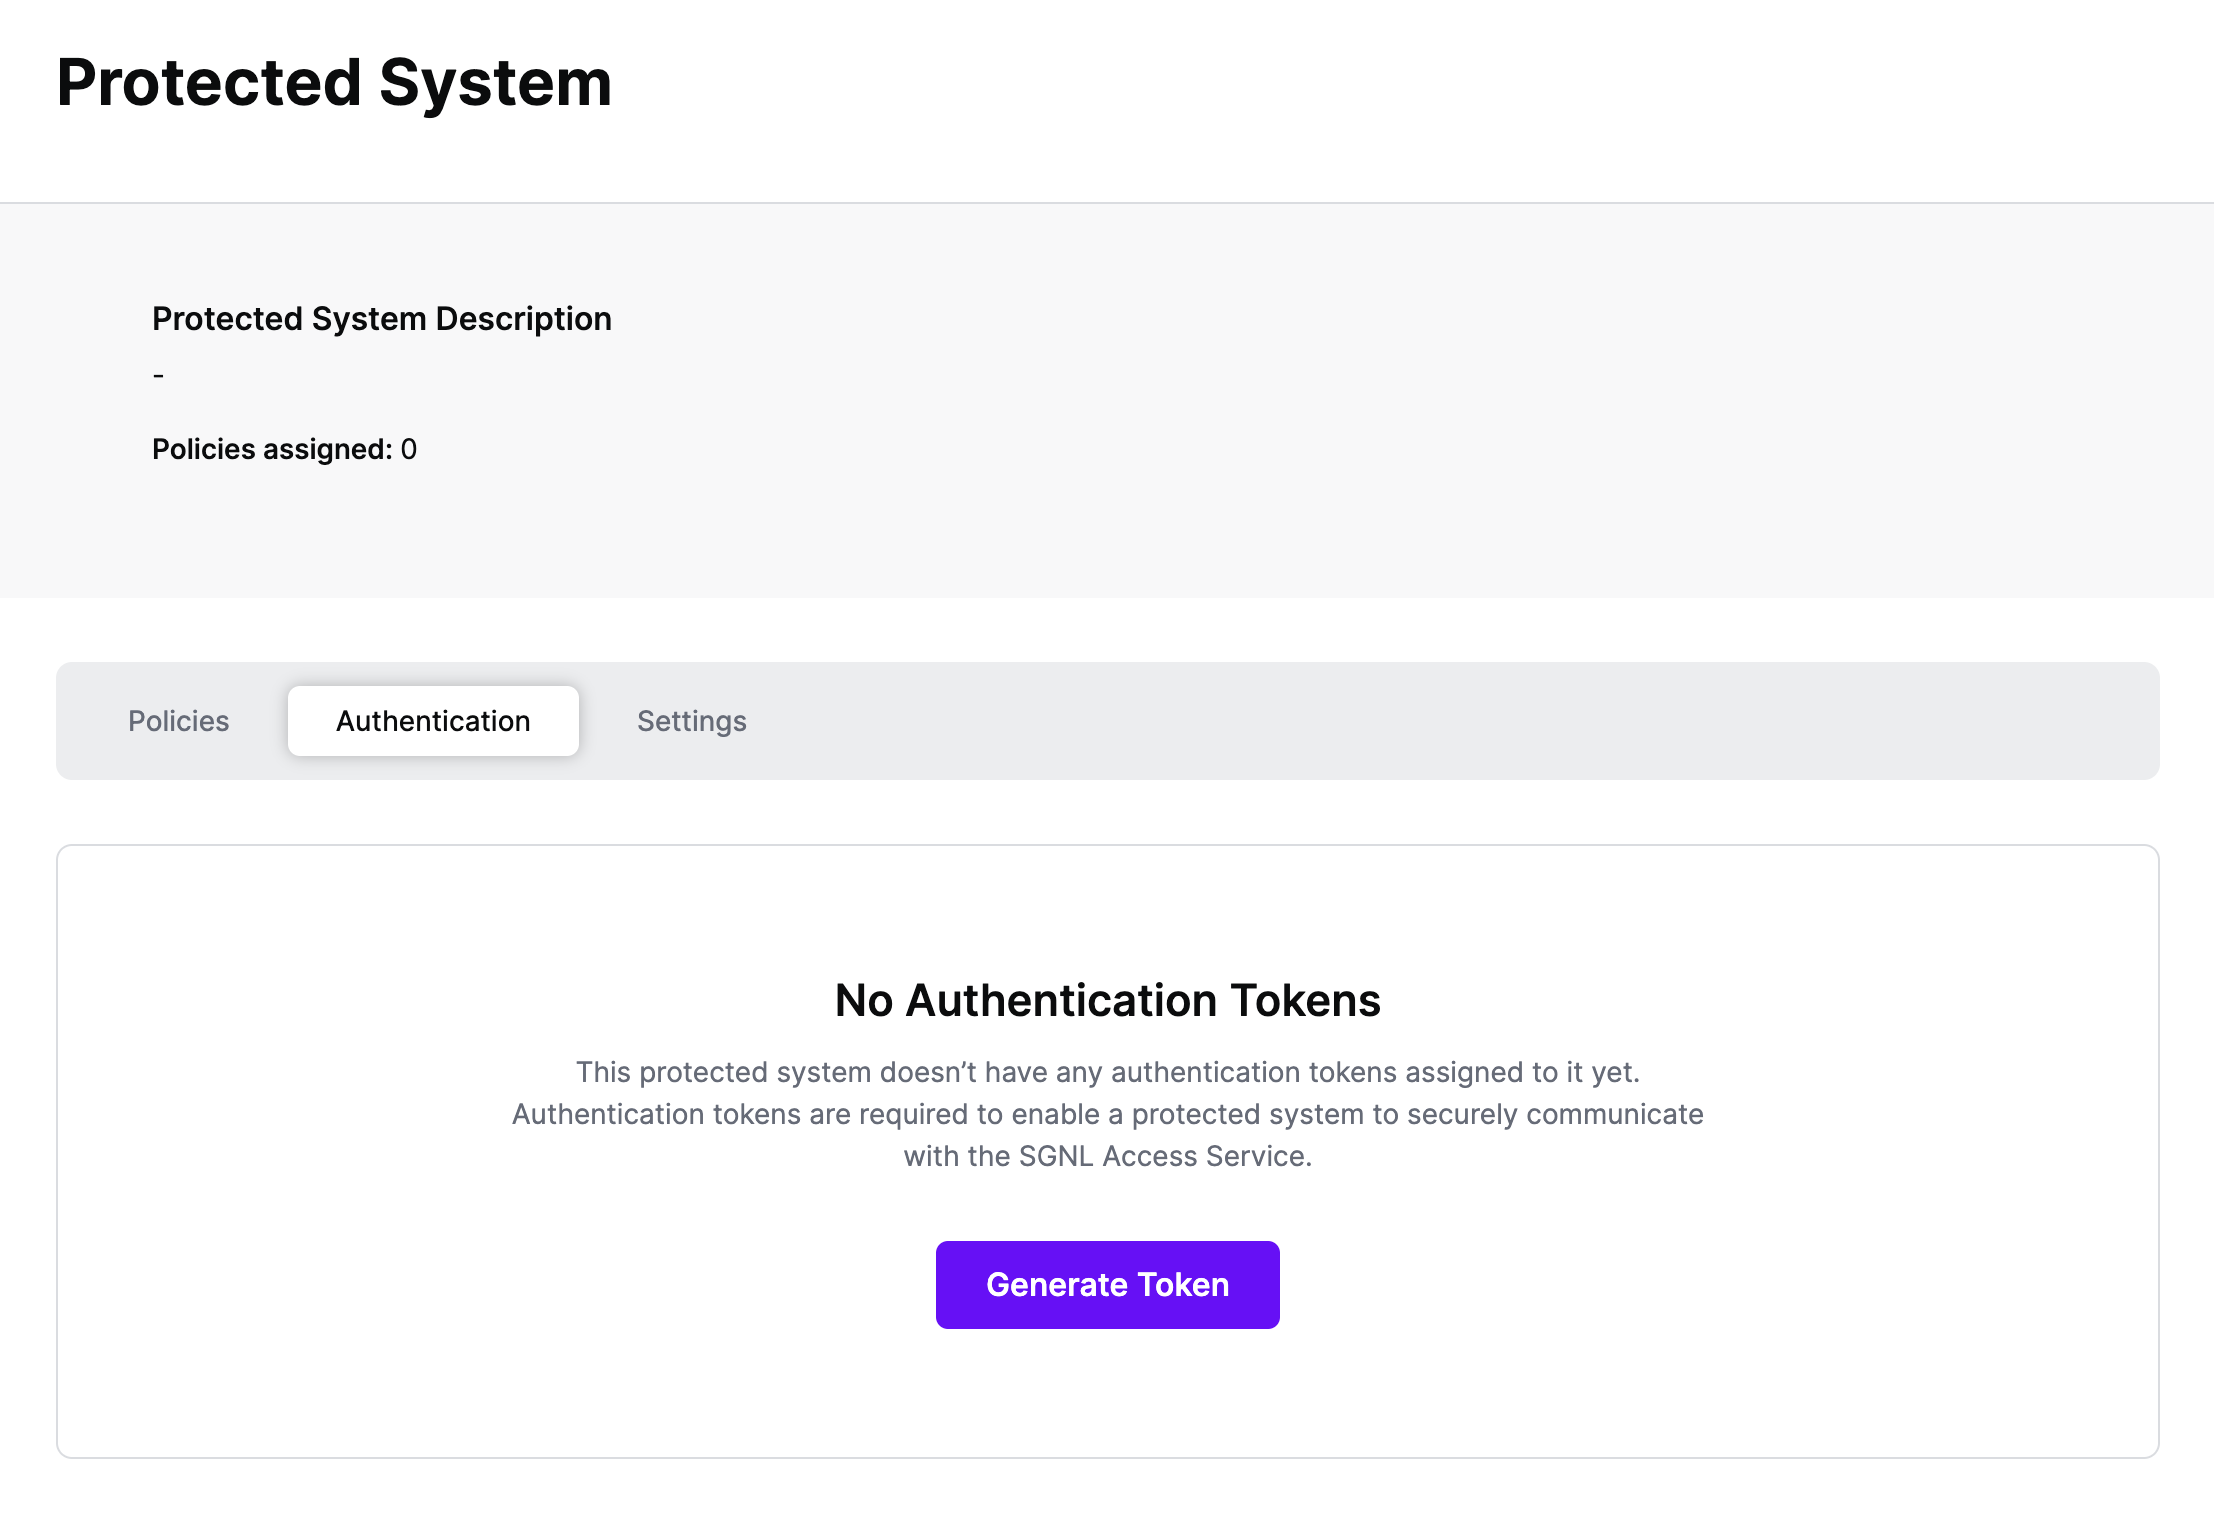
Click Generate Token
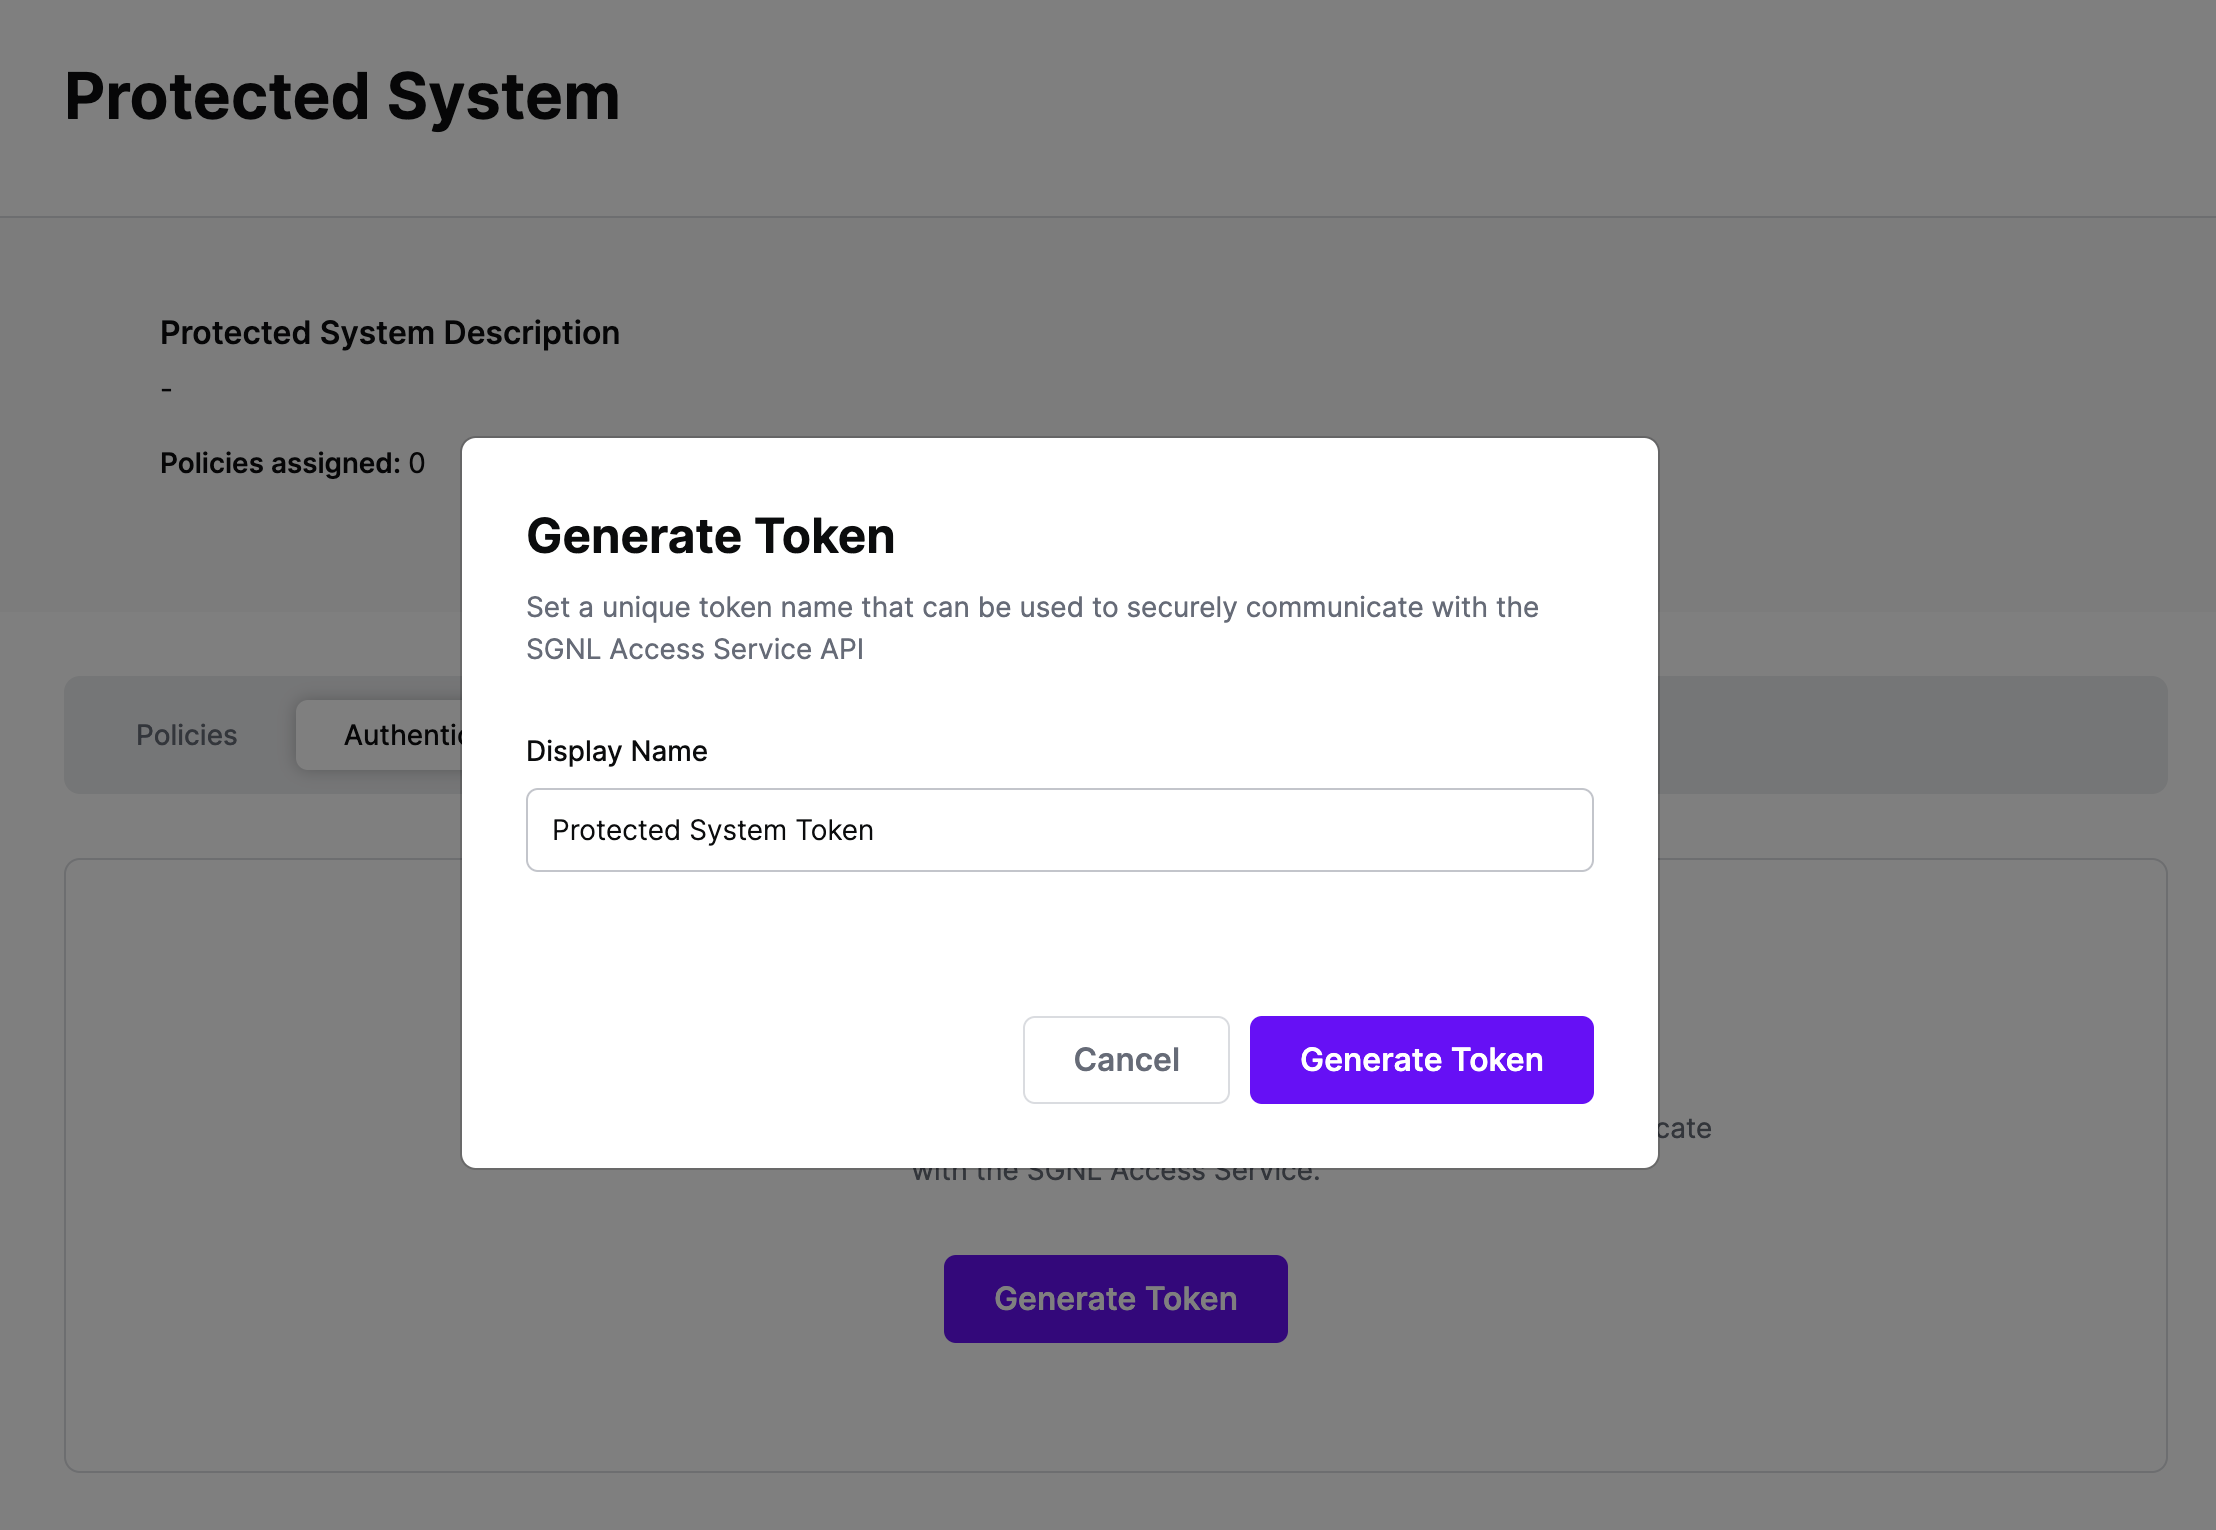
Give your token a descriptive name so that you know how it’s being used in the future and click to Generate Token
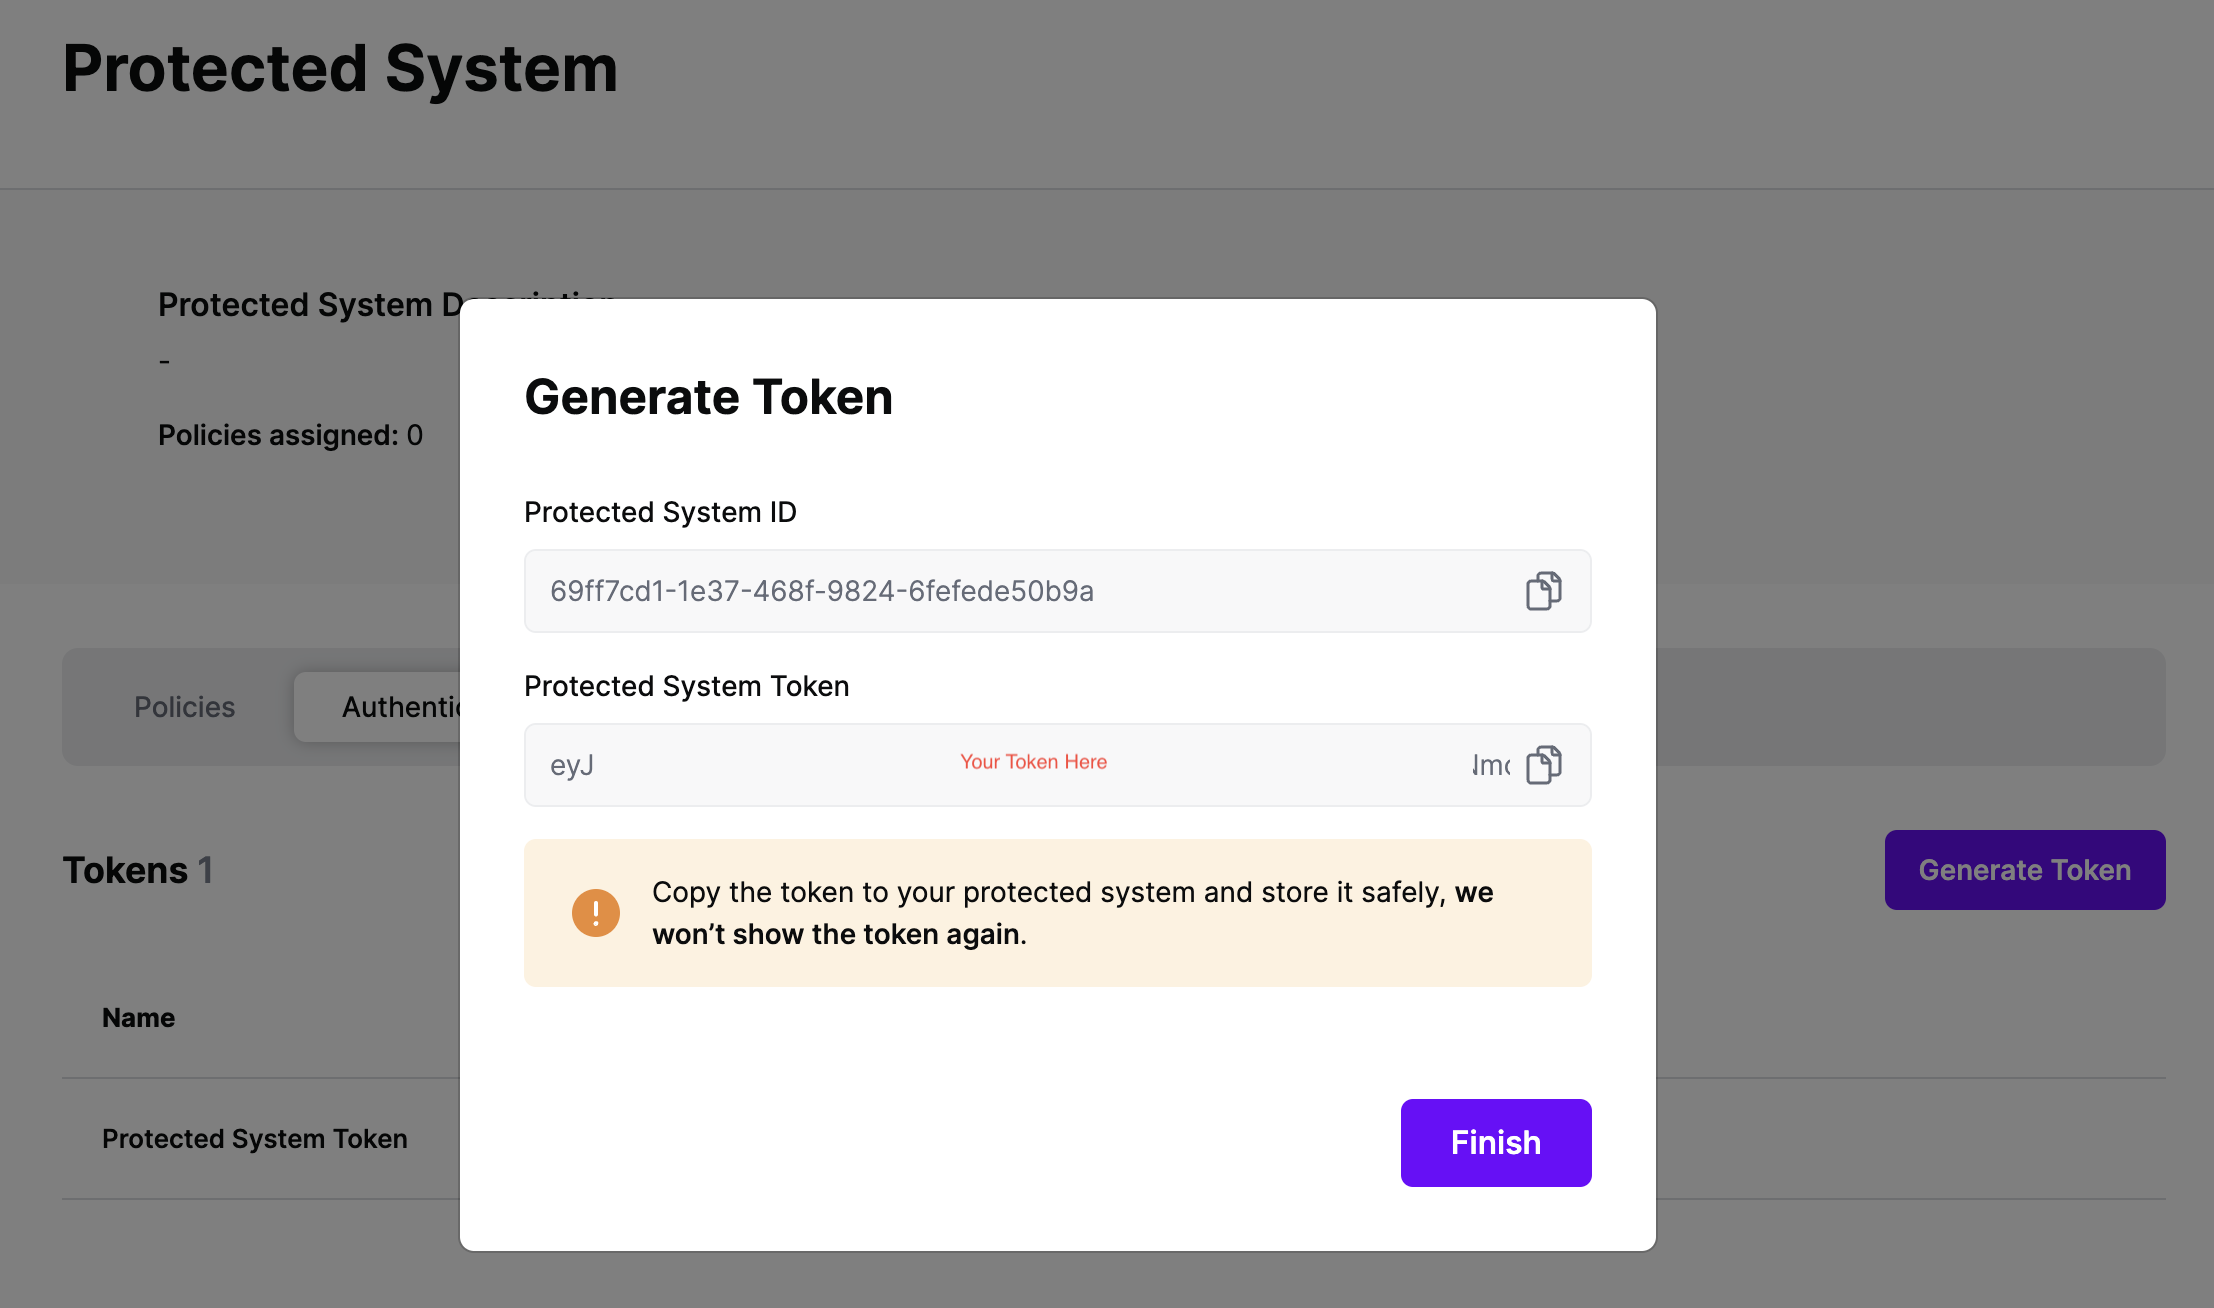
On the next screen, copy the token - this will be used by OPA to make access requests to SGNL using the SGNL Access Service API
Note: The value of this token is not available again after this screen, so ensure you securely store it for steps later in this guide
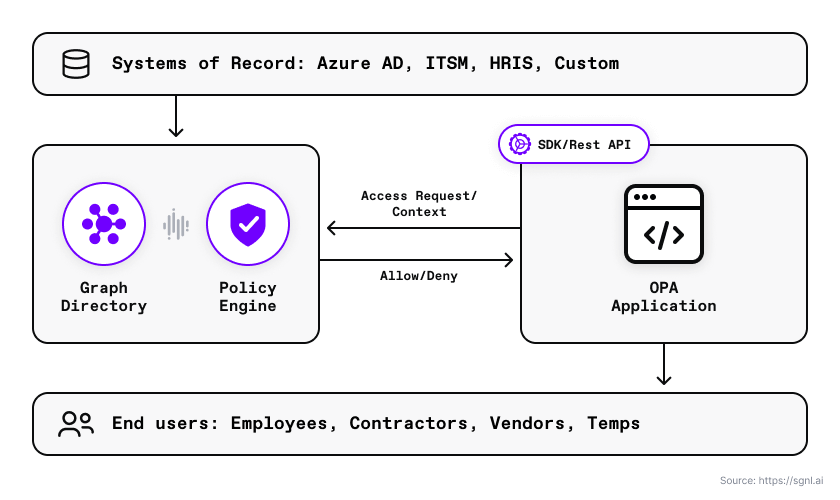
With SGNL, you can integrate your sources of record and synchronize the business context you need to evaluate human-readable policies. The diagram below shows how SGNL can ingest data from a range of Systems of Record, and then be used across the enterprise by hundreds or thousands of applications in order to make continuous access decisions based on this context
In your OPA-enabled application, you can make use of OPA’s built-in httpd.send function to send an authorization request to SGNL for policy evaluation. The SGNL Access Service response looks like the following:
{
  "decisions": [
    {
      "action": "{{action}}",
      "assetId": "{{assetId}}",
      "decision": "Deny"
    }
  ],
  "evaluationDuration": "6",
  "issuedAt": "2023-05-28T20:35:50.760129172Z",
  "principalId": "{{principalId}}"
}
The OPA engine interprets the Allow or Deny decisions and returns the appropriate Rego policy evaluation result (true/false). See the Rego policy below for more details.
In the example below, we use a Go example to show how to integrate OPA as a library. We then call the SGNL Access API using the http.send built-in function.
package main

import (
	"context"
	"fmt"
	"log"
	"os"

	"github.com/open-policy-agent/opa/rego"
)

func main() {

	// Set Go context for Rego
	ctx := context.Background()

	// Construct a Rego object that can be prepared or evaluated.
	r := rego.New(
		rego.Query("data.example.authz.allow"),
		rego.Load([]string{os.Args[1]}, nil))

	// Create a prepared query that can be evaluated.
	query, err := r.PrepareForEval(ctx)
	if err != nil {
		log.Fatal(err)
	}

	// Input map to evaluate against policy.
	// There is no input since we are delegating
	// authorization decisions to SGNL.

	input := map[string]interface{}{
		"values": map[string]interface{}{},
	}

	// Evaluate OPA policy through SGNL Access
	// Service API and get the results.

	results, err := query.Eval(ctx, rego.EvalInput(input))

	// The Rego results set contains a helper function to
	// determine if there is a true/false in expression evaluation.

	if err != nil {
		log.Fatal(err)
	}

	if !results.Allowed() {
		fmt.Println("SGNL:OPA Authorization decision is Deny.")
	} else {
		fmt.Println("SGNL:OPA Authorization decision is Allow.")
	}
}
Policies in OPA are written in Rego. The sample Rego policy below calls the SGNL Access Service with a principal, asset, and action. There is no need to send an input document. SGNL holds all data and relationships centrally.
package sgnl.authz

default allow := false

allow {
	response := http.send({
		"method": "POST",
		"url": "{{SGNL access service URL}}",
		"tls_use_system_certs": true,
		"headers": {
			"Authorization": "Bearer {{SGNL token}}",
			"Content-type": "application/json",
		},
		"body": {
			"principal": {
				"id": "{{principal id}}"
			},
			"queries": [{
				"assetId": "{{asset Id}}",
				"action": "{{action}}"
			}]
		},
		"force_cache": false,
		"force_json_decode" : true
	})
	response.body.decisions[0].decision = "Allow"
}
Once the call to the SGNL Access Service API completes, the Rego policy engine checks to see if the SGNL response is an allow or deny. The SGNL decision is in the body of the HTTP response object and the JSON decisions array.
At this point, it’s likely that all decisions will either be Allow or Deny, based on the Default Decision you’ve selected for the OPA Integration - if that’s the case, you’re ready to start assigning policies.
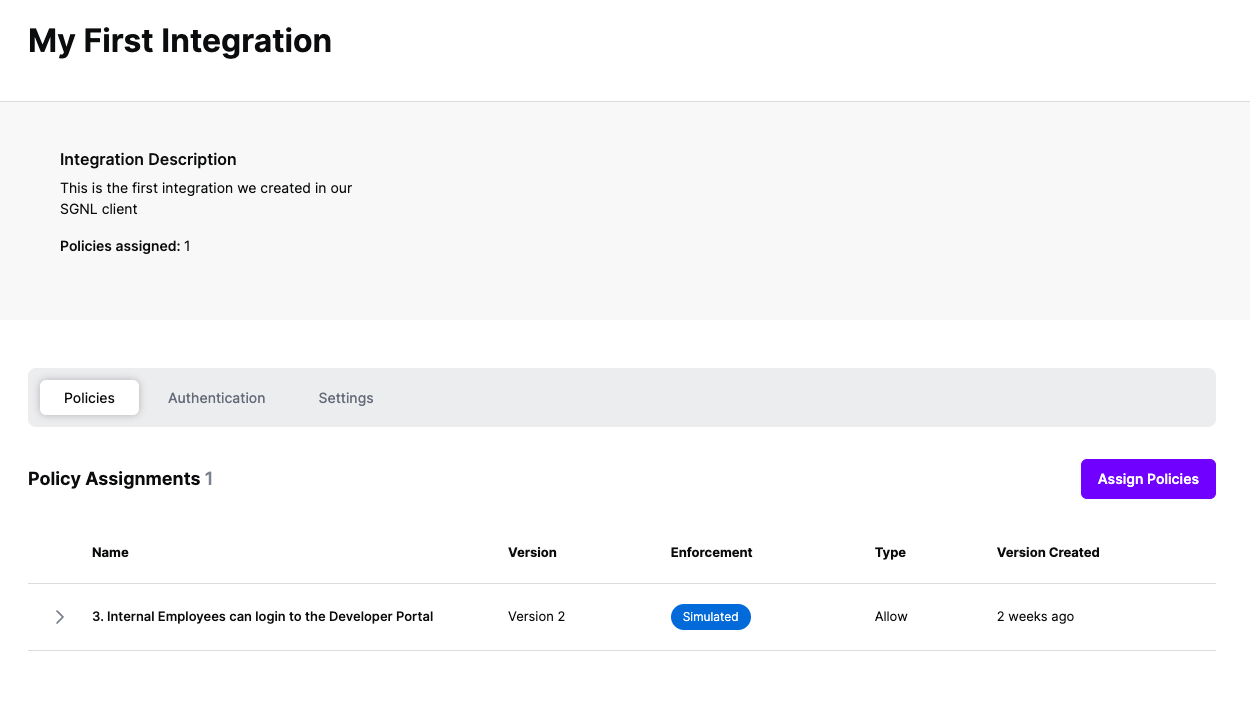
Once the OPA integration is created, you can start assigning versions of Policies - to get started, select Policies from the tabs in your newly created integration
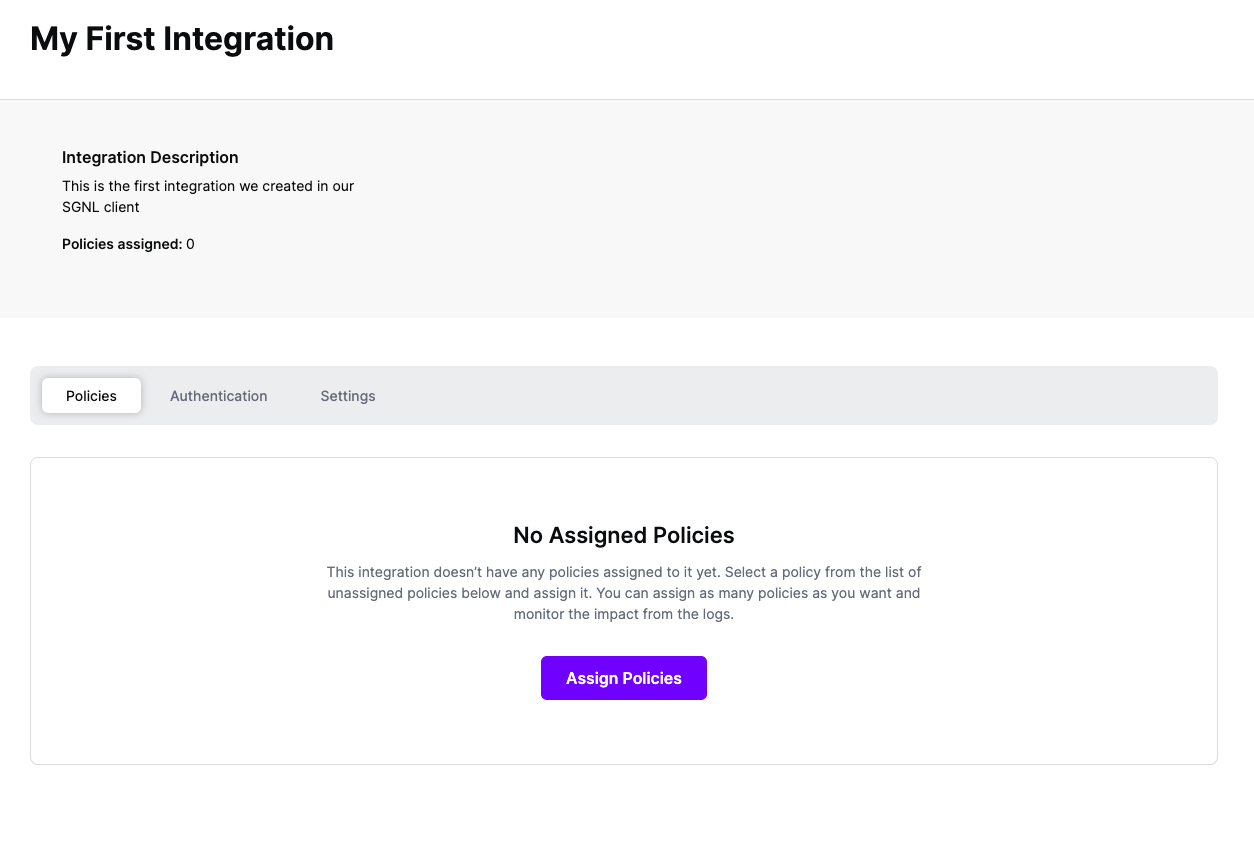
Select ‘Assign Policies’
Select:
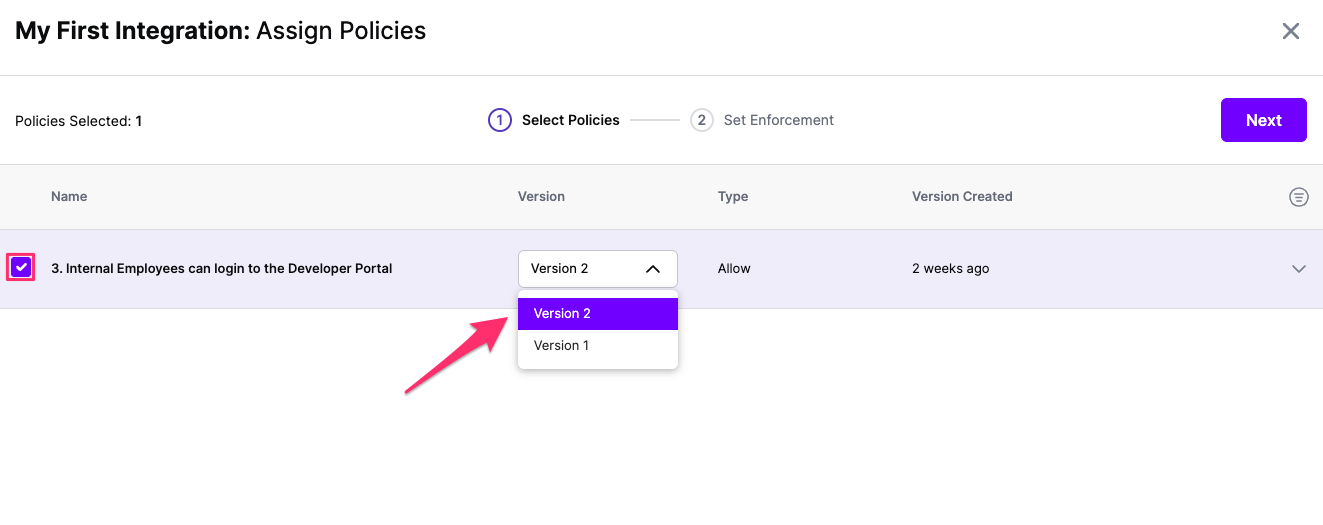
Click Next once you have the Policies and Versions configured as is appropriate
Select the Enforcement mode for the Policies you chose in the previous step
Simulated: Policy Versions that are being simulated will only log their access decision in the SGNL logs and will not impact the access decision that SGNL hands back to an integration. Simulated policies are useful for performing what-if analysis of new policy versions as well as debugging policy changes.
Note: It’s considered best practice to start with policies in Simulated mode, to verify that policies have been created an applied as expected
Enforced: Policy Versions that are being enforced will impact the access decisions that SGNL hands back to an integration. Enforced Policies will determine access for an integration
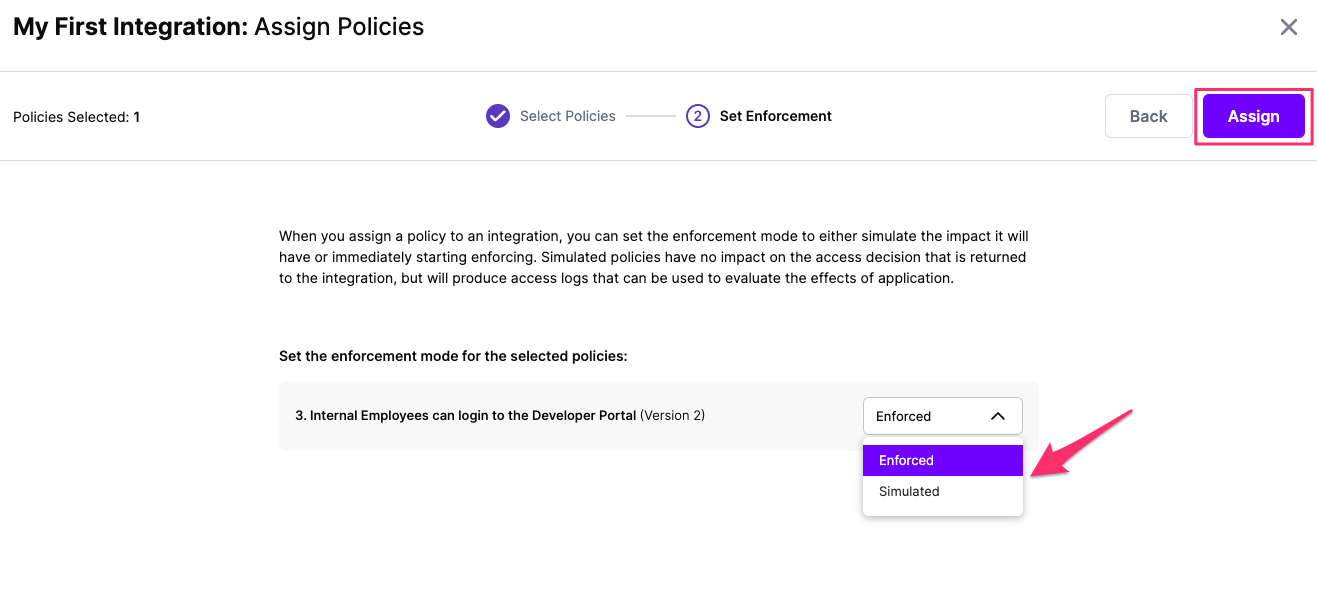
Select your desired Enforcement mode and select Assign
Versions of Policies will now be Assigned to your integration