Protected Systems are applications, services, or infrastructure that you want to protect with SGNL. In this guide, we’ll describe how to achieve fine-grained access control inside of AWS with your Identity Provider (IdP) and SGNL, enabling the right amount of access to infrastructure and data inside of AWS. This guide supports integration with Okta, and Microsoft Entra ID. If you’d like to learn more about whether securing AWS with SGNL is right for your enterprise, visit our Securing AWS Blog or watch the video below to learn more.
With this integration, AWS and your Identity Provider need not know about the policies, systems of record, or any of the data in SGNL - it simply needs to pass to SGNL:
Authentication ensures that only authorized systems can make requests into SGNL, as well as verifying the identity of an integration in order to effectively evaluate Policies - to access Authentication settings, open your AWS protected system and select the Authentication tab
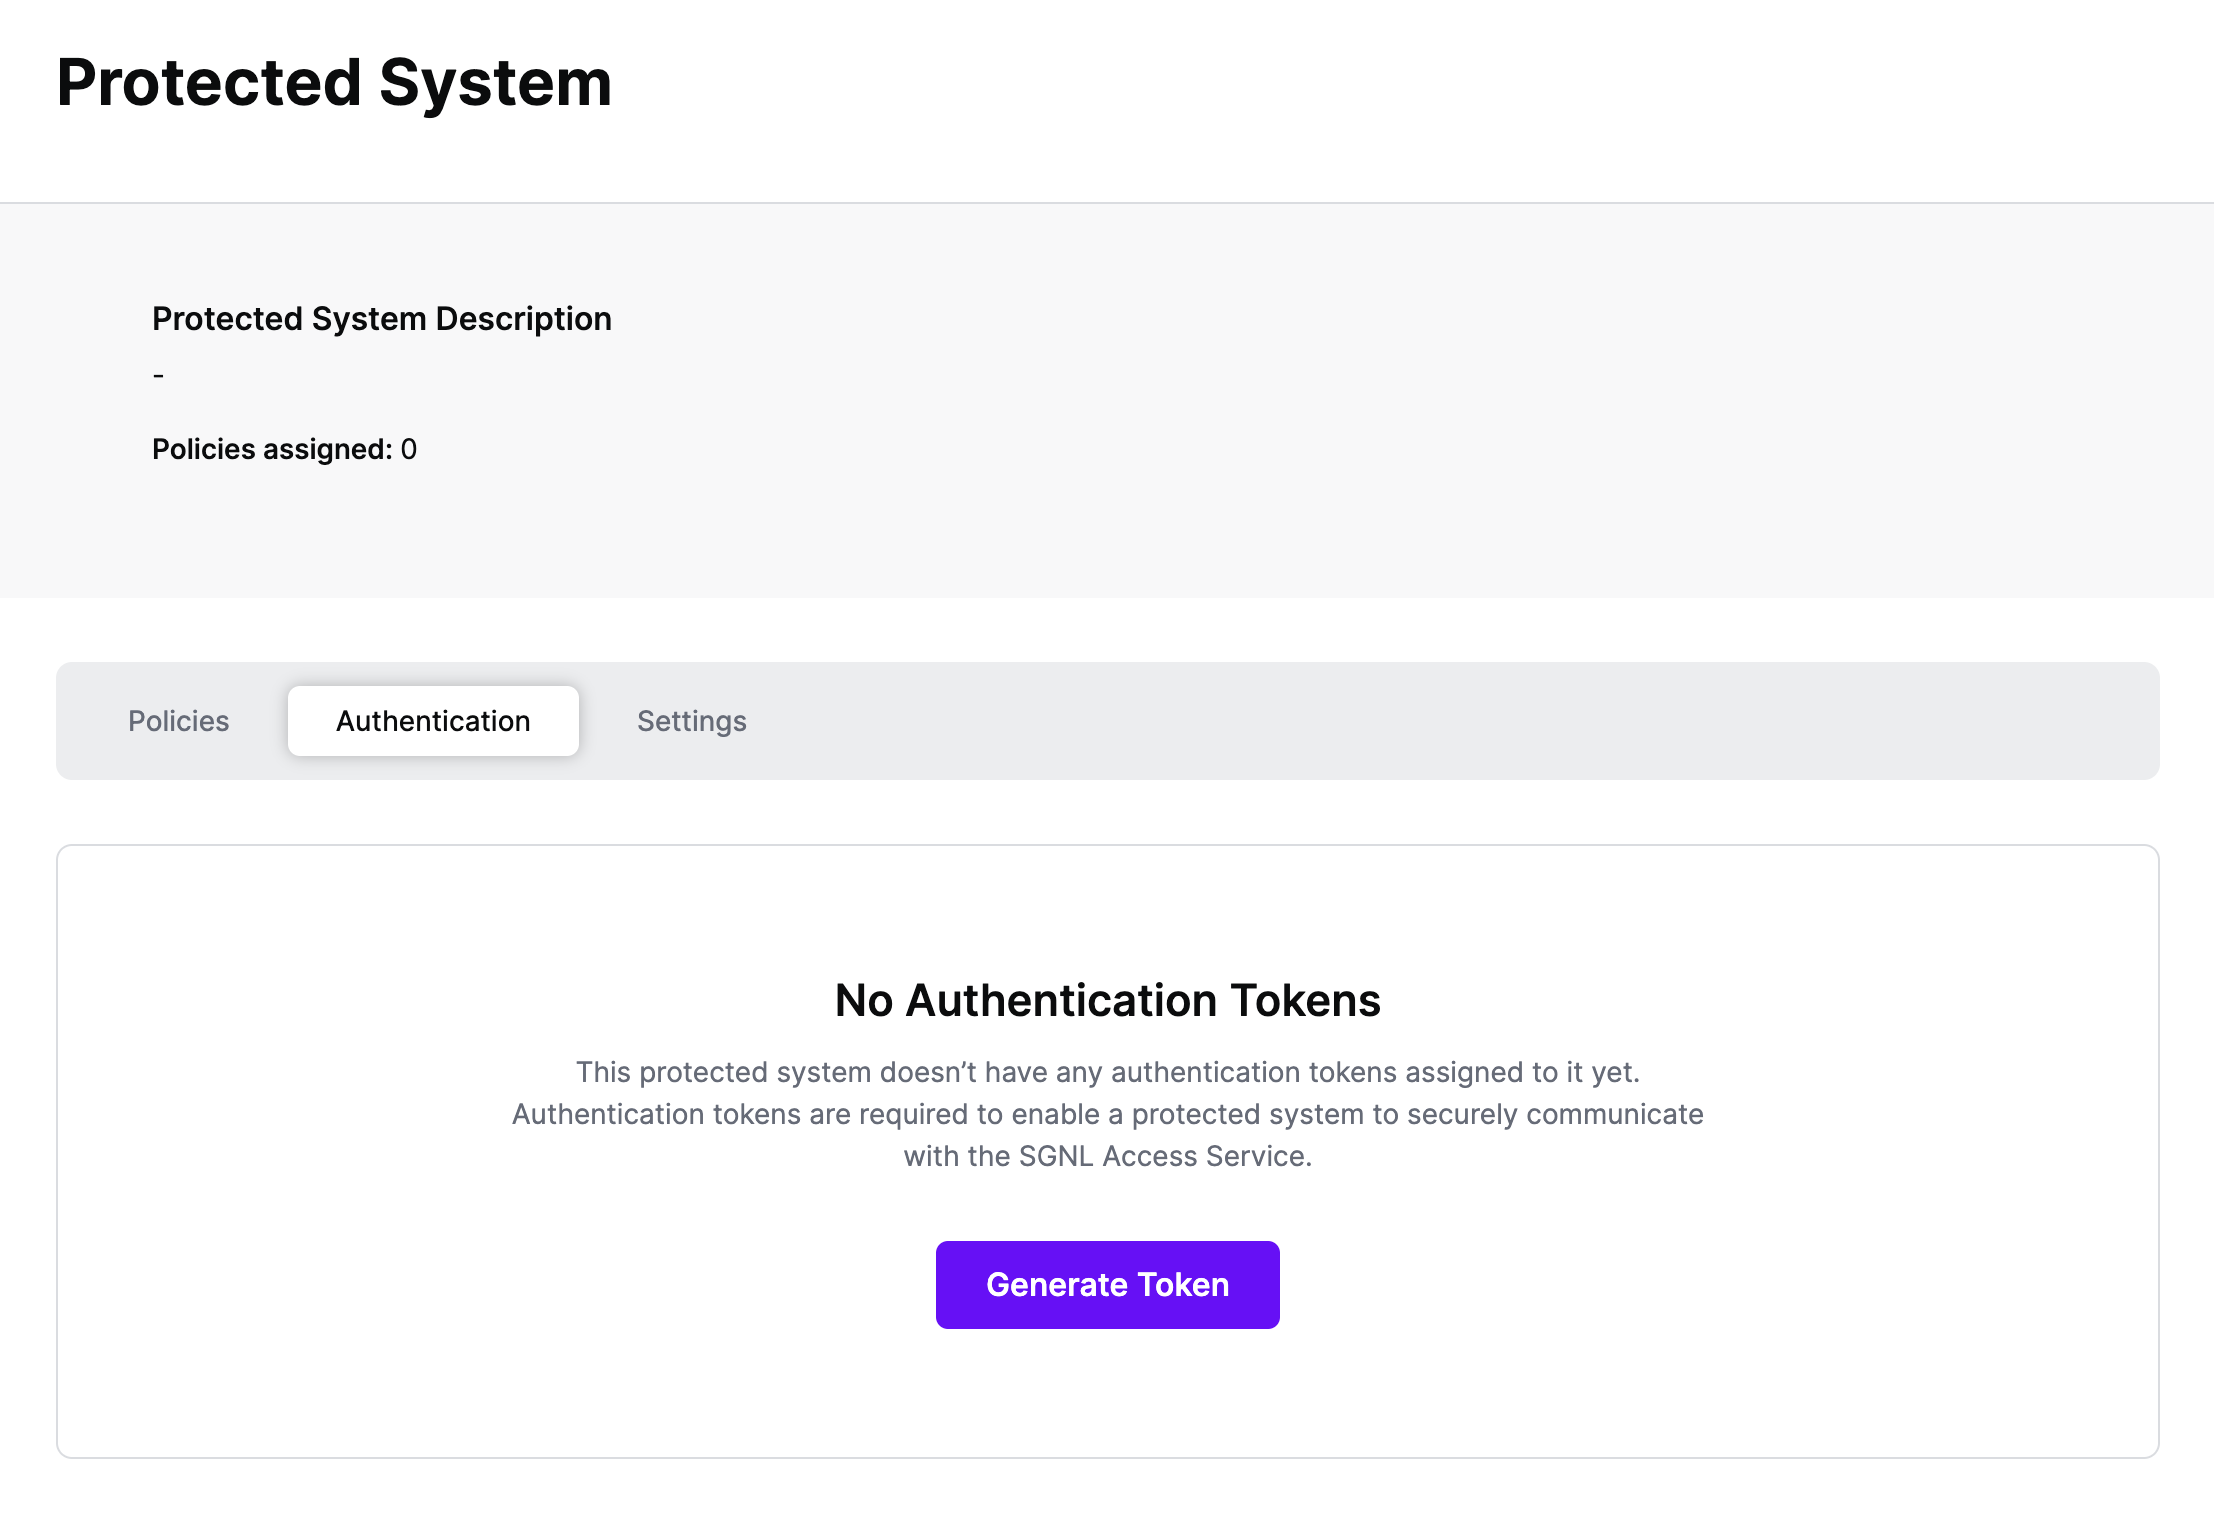
Click Generate Token
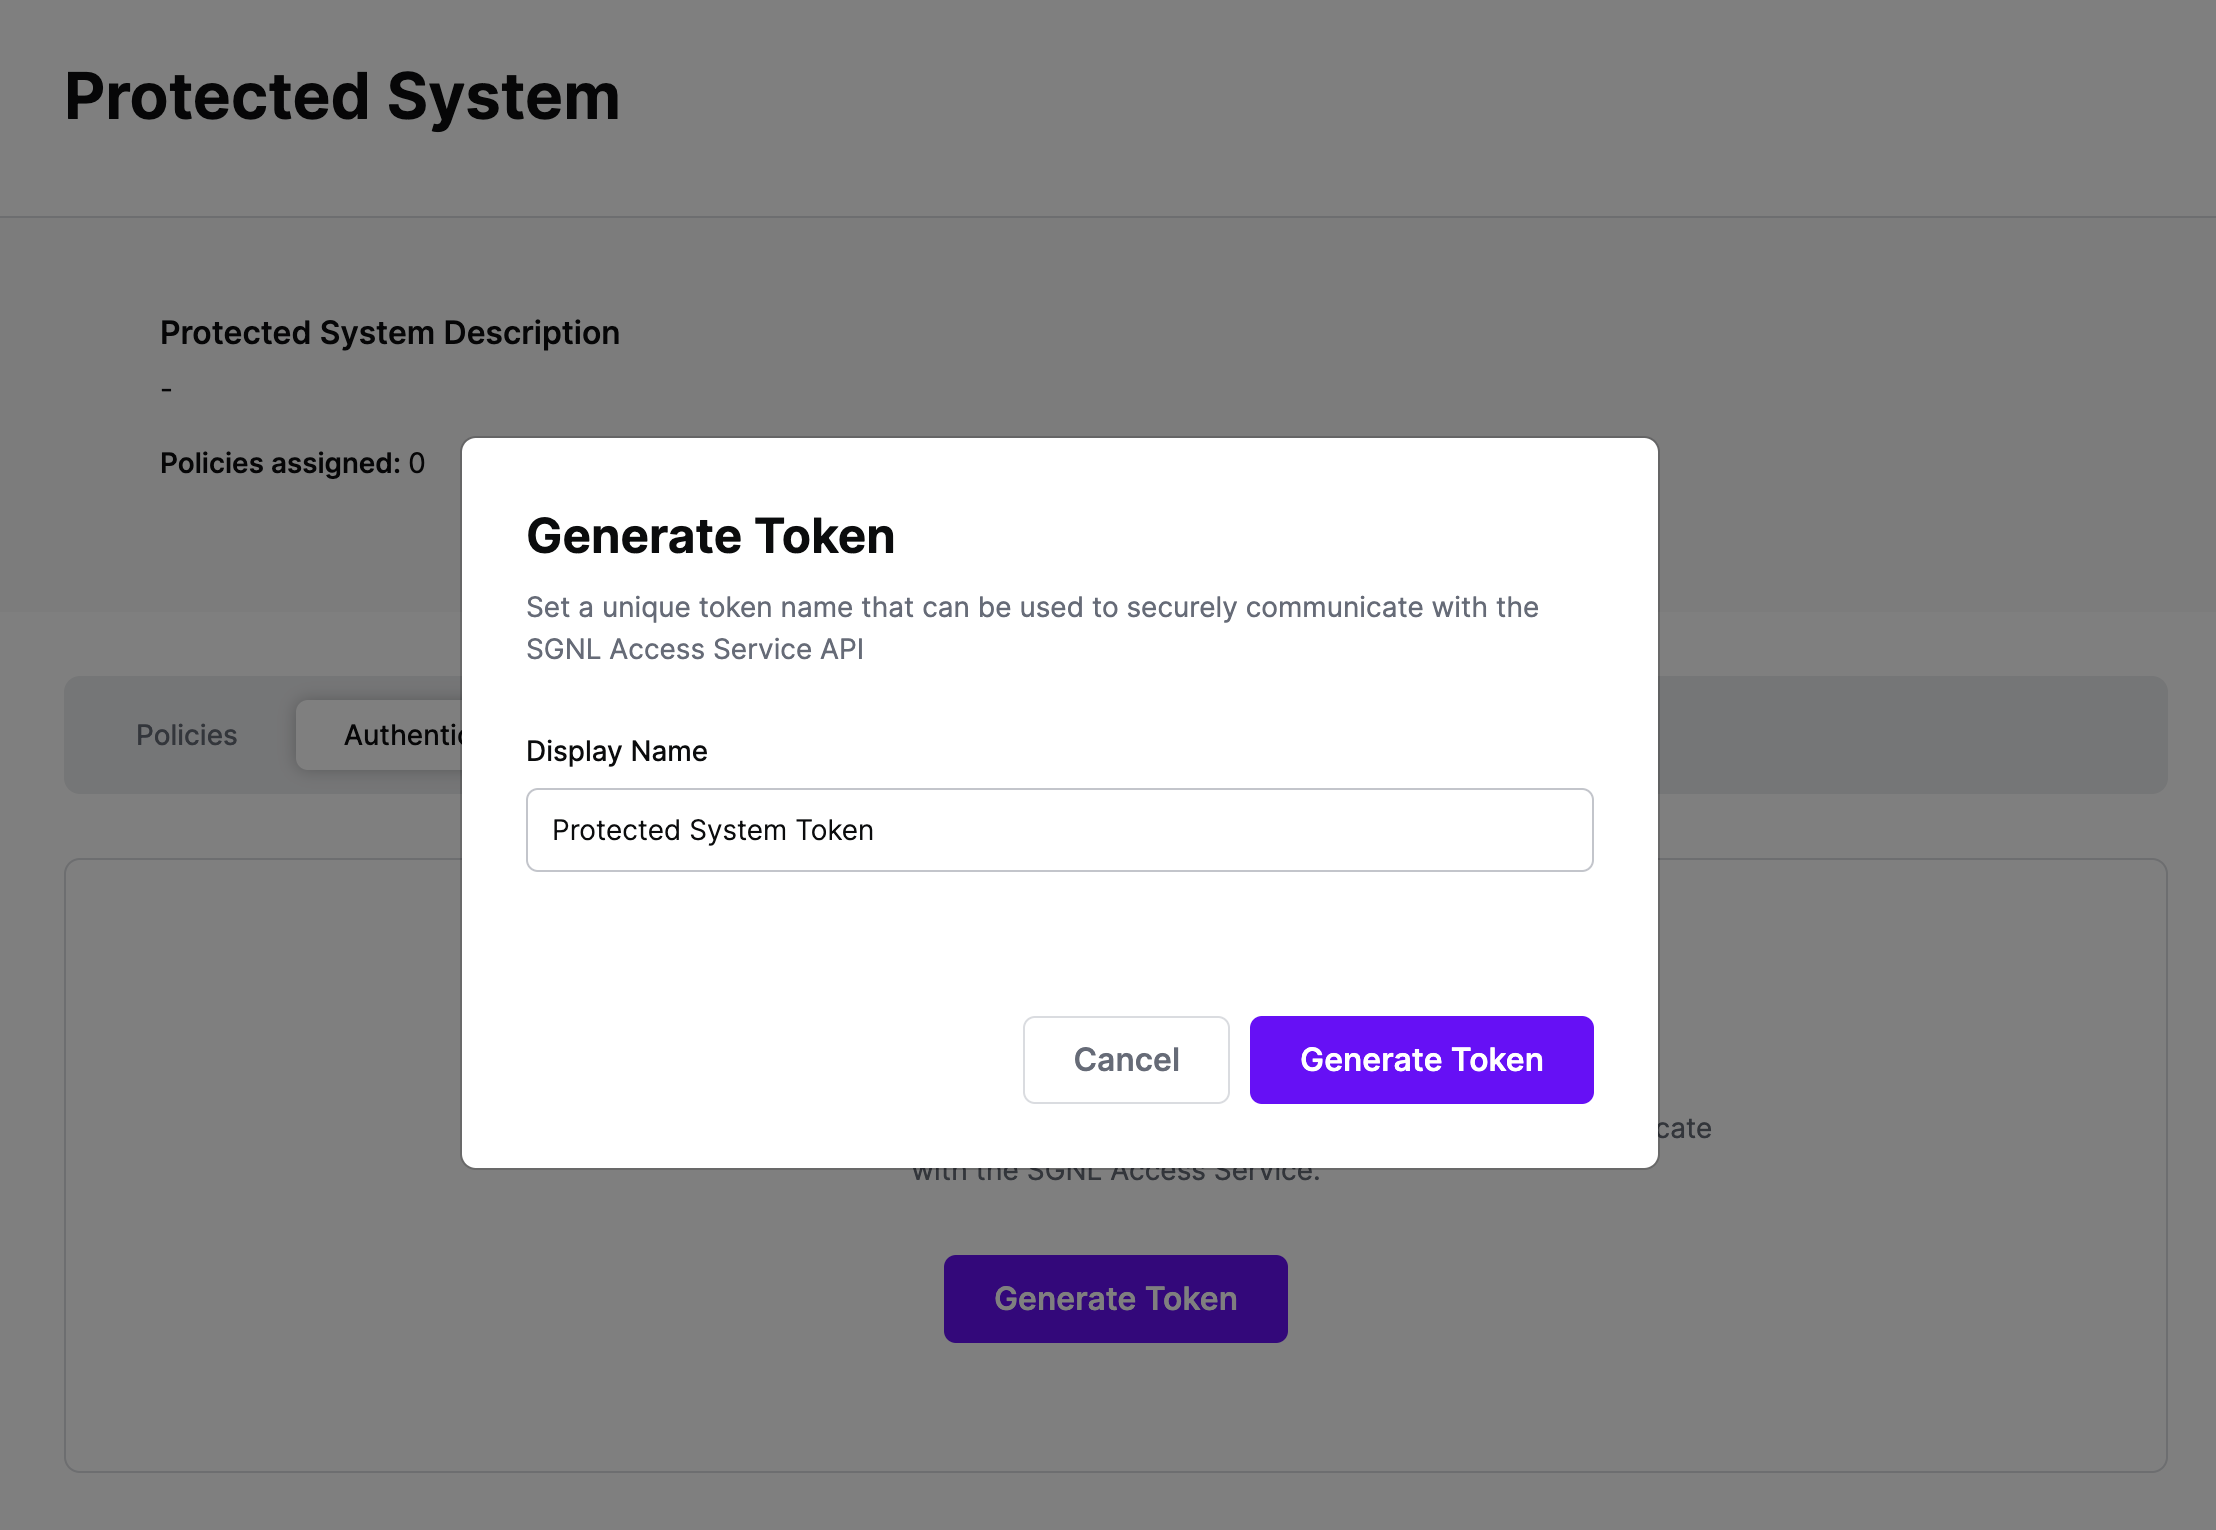
Give your token a descriptive name so that you know how it’s being used in the future and click to Generate Token
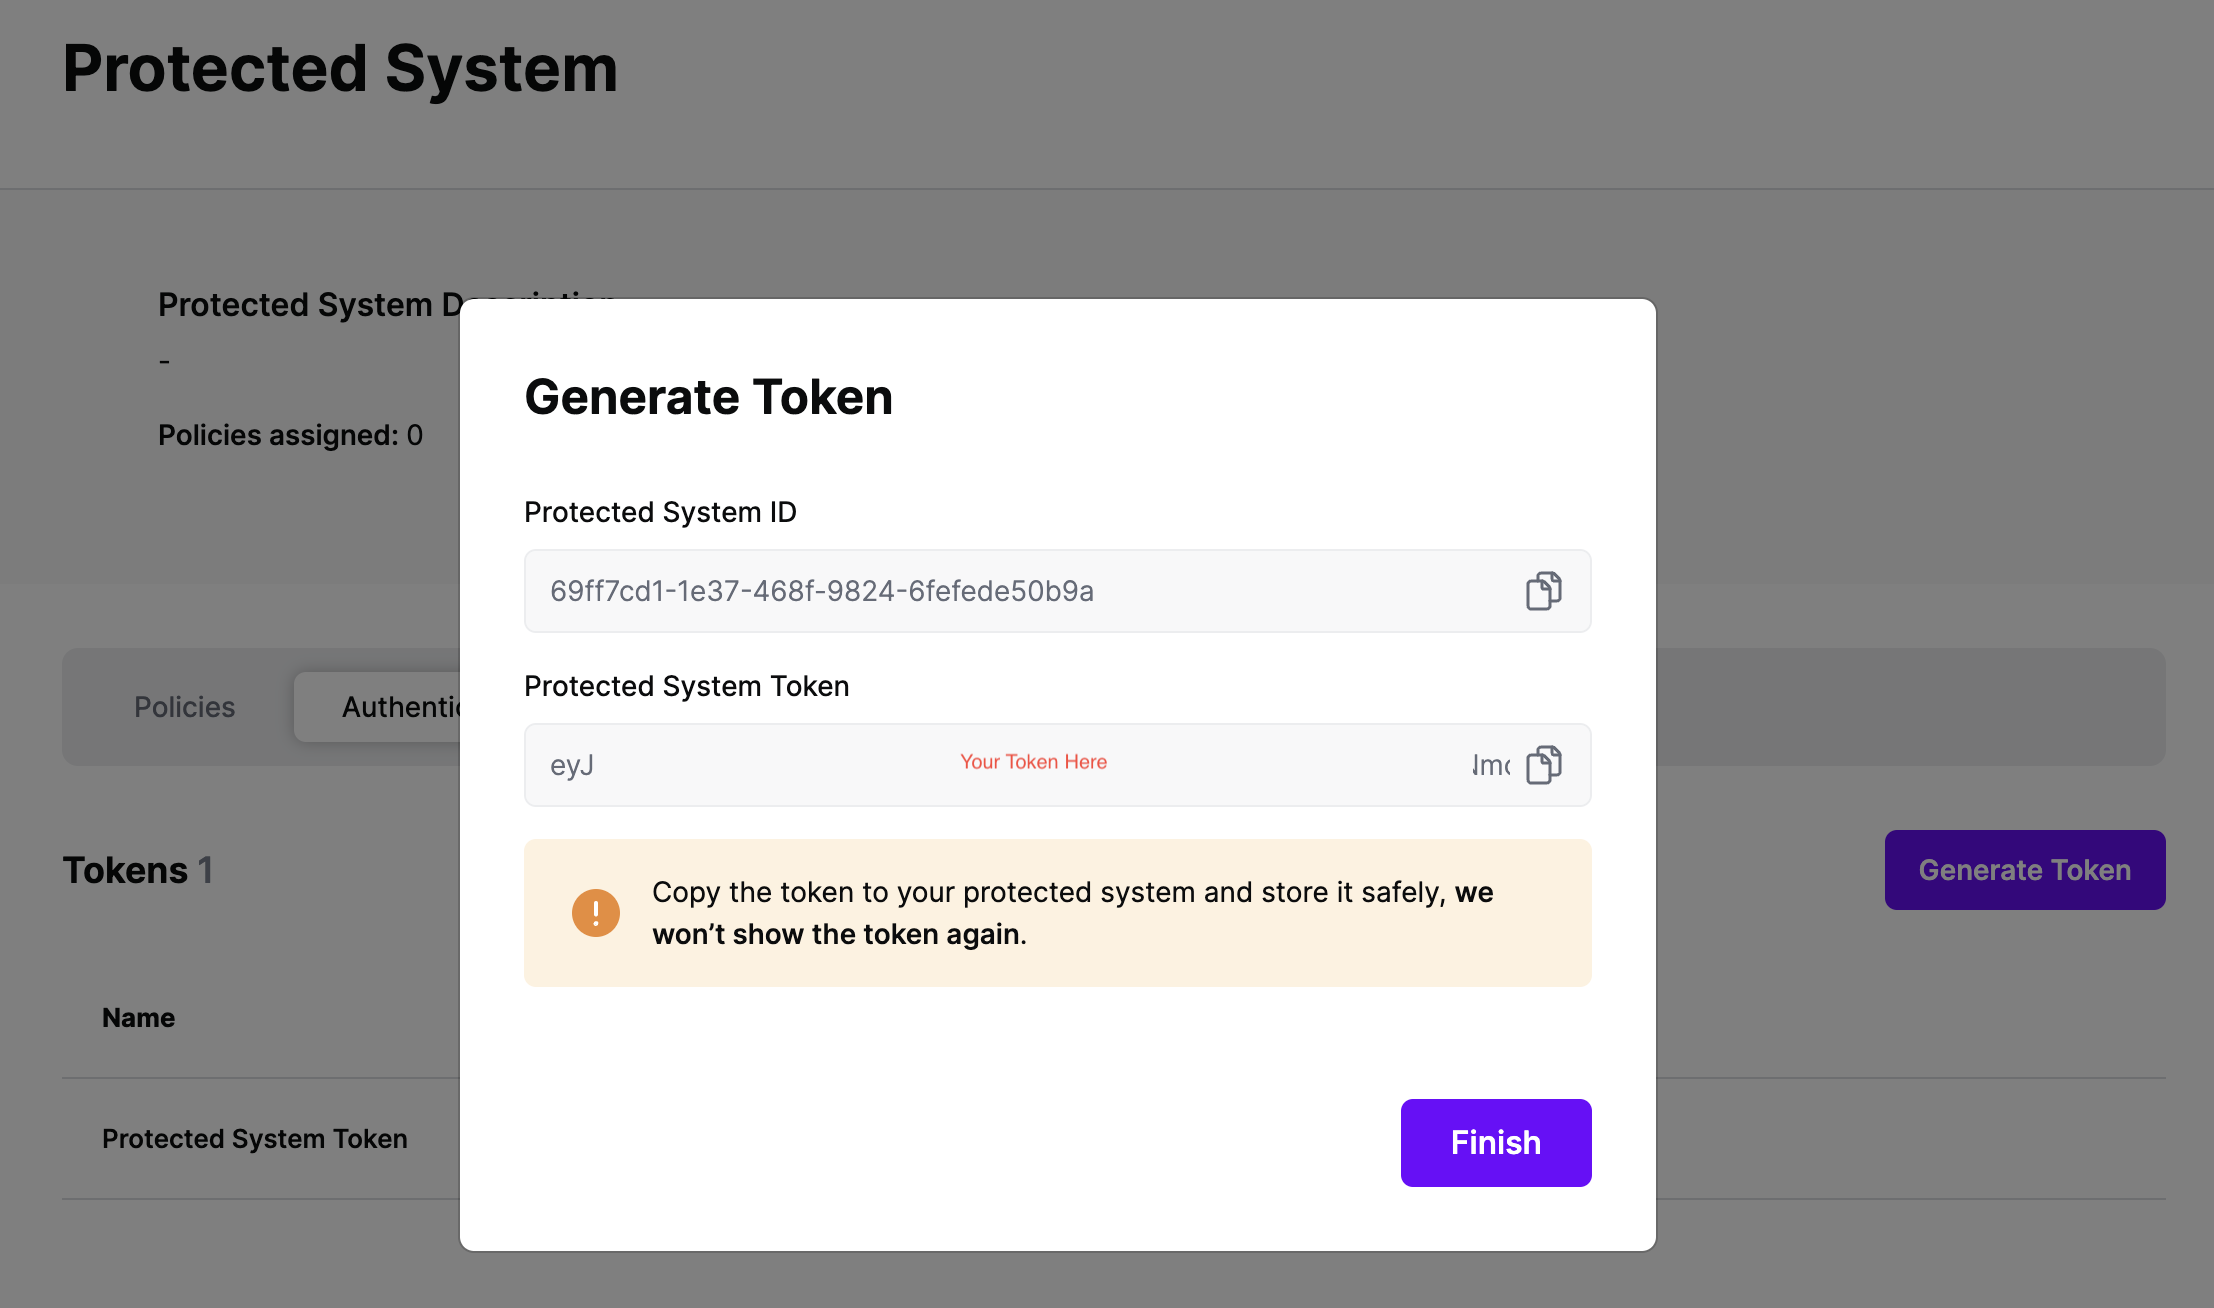
On the next screen, copy the token - this will be used by your Identity Provider to make access requests to SGNL using the SGNL Access Service API
Note: The value of this token is not available again after this screen, so ensure you securely store it for steps later in this guide
SGNL integrates with Identity Providers at sign-in time to dynamically assign permissions, roles, tags, or other permission granting objects for AWS Access. We provide support across Okta, Entra ID, and Ping Identity to dynamically assign these permissions.
Choose your Identity Provider to get started:
This guide assumes you already have Okta integrated with AWS for SAML SSO. If that’s not the case, refer to AWS Documentation to get that configured.
Once configured, SGNL integrates with Okta via Inline Hooks on the Okta side, and SGNL Transforms (and optionally, Provider Hooks) on the SGNL side.
SGNL Transforms are available on the Protected System you created above, within the ‘Transforms’ Menu. To create a transform suitable for an Okta Inline Hook, you’ll want to:
{$.data.context.user.profile.login}) or email ({$.data.context.user.profile.email}) other common options are available in the + menu{$.data.context.request.ipAddress}access or assumeRole, but it could be any of the attributes in the hook payload, using a method similar to the above/claims/https:~1~1aws.amazon.com~1SAML~1Attributes~1Role into this section, following the response samples in Okta’s Documentation, note that this field supports parameters from your asset response, so for something more complex like tags, you can dynamically set any part of this Path with a parameter, e.g. /claims/https:~1~1aws.amazon.com~1SAML~1Attributes~1{$.SNOWCI.Category}{$.AWSRole.arn},arn:aws:iam::{$.AWSRole.accountId}:saml-provider/okta-samlOnce your SGNL Transform is configured, you can proceed to configure the Inline Hook within Okta, using the Token you copied from your Protected System above. Steps to create the Okta Inline Hook are available in Okta’s Help Documentation, ensuring that you specify HTTP Header Authentication with a Header name of ‘Authorization’ and a value that contains ‘Bearer ’ and then the token you copied from your Protected System. You’ll need to enter the SGNL Asset Search Endpoint as the target for the request in the Okta Inline Hook, for SGNL SaaS customers, this will be https://{your-client-name}.sgnlapis.cloud/access/v2/search/assets?transform=true&pageSize=1000. You can find further information at SGNL’s API Documentation.

The first step is to configure Transforms for Entra ID
Settings tab, and ensure that the Asset(s) being returned in the Request Configuration section are those that you want handed back to Entra ID during SSOTransforms tab in the Protected SystemSearch Transform using Entra ID, you first need to configure the fields to map from the request, SGNL uses JSONPath to find the right values in Entra ID’s JSON request, or you can enter your own static values just by typing them in as-is – a sample request can be found in Microsoft’s Help Documentation, some sample values are provided in the console via the (+) Icon, including:sign-onWe provide significant flexibility in how to transform the response to Entra - before you get started, a couple of things to note:
<entity or node name>.<attribute name>}”To configure the response transforms:
Name and Value parameters, but change this to whatever suits your needs, it’s used only in this configurationName field, specify the Claim Name you want to return, this might be as simple as something like Role or Group, but could be far more complex, such as :/claims/https:~1~1aws.amazon.com~1SAML~1Attributes~1Role/claims/https:~1~1aws.amazon.com~1SAML~1PrincipalTag:cost-center
Note: The most important thing to note here is that whatever Claim Name you return, you must have a matching Claim Name configured in the Entra ID Custom Claim Provider, you’ll get to that as part of the Provider Hook ConfigurationValue field, specify the value of the claim that you want passed in this path, while you’re testing, this could just be a static string, but SGNL’s customers often use one or more parameters to configure the returned value, some examples:{$.AWSIAMRole.arn},arn:aws:iam::111111111111:saml-provider/Entra-IdP{$.AWSPermittedRole.arn}{$.AWSIAMRole.arn},arn:aws:iam::{$.AWSIAMRole.account}:saml-provider/Entra-IdPIf users are unable to sign in to AWS via Entra ID SAML, work through the following checks in order.
This is the most common cause of sign-in failures after initial setup or after a certificate rotation. The X.509 signing certificate uploaded to the AWS IAM Identity Provider must exactly match the certificate Entra ID is using to sign assertions.
To check:
<your-provider> and update the metadata document with the downloaded fileA mismatch here will cause AWS to fail signature validation with a generic “invalid SAML response” error, with no clear indication of the root cause.
If you are using a unique ACS URL (format: https://signin.aws.amazon.com/saml/acs/<ID>), that ID is tied to a specific IAM SAML provider. The SAML provider referenced in the Role ARN attribute of the assertion must match the provider that owns the ACS URL.
To verify, go to IAM → Identity providers → <your-provider> and confirm the ACS URL shown there matches the Reply URL configured in the Azure enterprise app.
The IAM role being assumed must have a trust policy statement that allows sts:AssumeRoleWithSAML from the SAML provider used in the assertion. For a unique ACS URL, scope the condition to match:
{
    "Effect": "Allow",
    "Principal": {
        "Federated": "arn:aws:iam::<account-id>:saml-provider/<provider-name>"
    },
    "Action": "sts:AssumeRoleWithSAML",
    "Condition": {
        "StringEquals": {
            "SAML:aud": "<the configured audience in the SAML Assertion>"
        }
    }
}
For custom claims (including the AWS Role and RoleSessionName attributes) to be passed correctly, the Entra ID application manifest must have the following values set:
"acceptMappedClaims": true,
"accessTokenAcceptedVersion": 2,
To update: in the Azure portal, open the enterprise app → Manifest, locate these fields, update their values, and save.
The following attributes must be present in the assertion for AWS sign-in to succeed:
| Attribute Name | Required Value |
|---|---|
https://aws.amazon.com/SAML/Attributes/Role | arn:aws:iam::<account>:role/<role>,arn:aws:iam::<account>:saml-provider/<provider> |
https://aws.amazon.com/SAML/Attributes/RoleSessionName | A valid session name (e.g. the user’s UPN) |
The Role attribute must include both the role ARN and the SAML provider ARN, separated by a comma, with no leading or trailing whitespace.
Use your browser’s developer tools or a browser extension (such as SAML-tracer) to capture and decode the base64-encoded SAML response posted to the ACS URL. This lets you confirm the exact values AWS is receiving for Audience, Recipient, Role, and RoleSessionName before investing time in configuration changes.
For detailed sign-in failure reasons, check AWS CloudTrail for the failed AssumeRoleWithSAML event — it contains the specific rejection reason that AWS does not surface in the browser error page.
Once the AWS integration is created, you can start assigning versions of Policies - to get started, select Policies from the tabs in your newly created integration
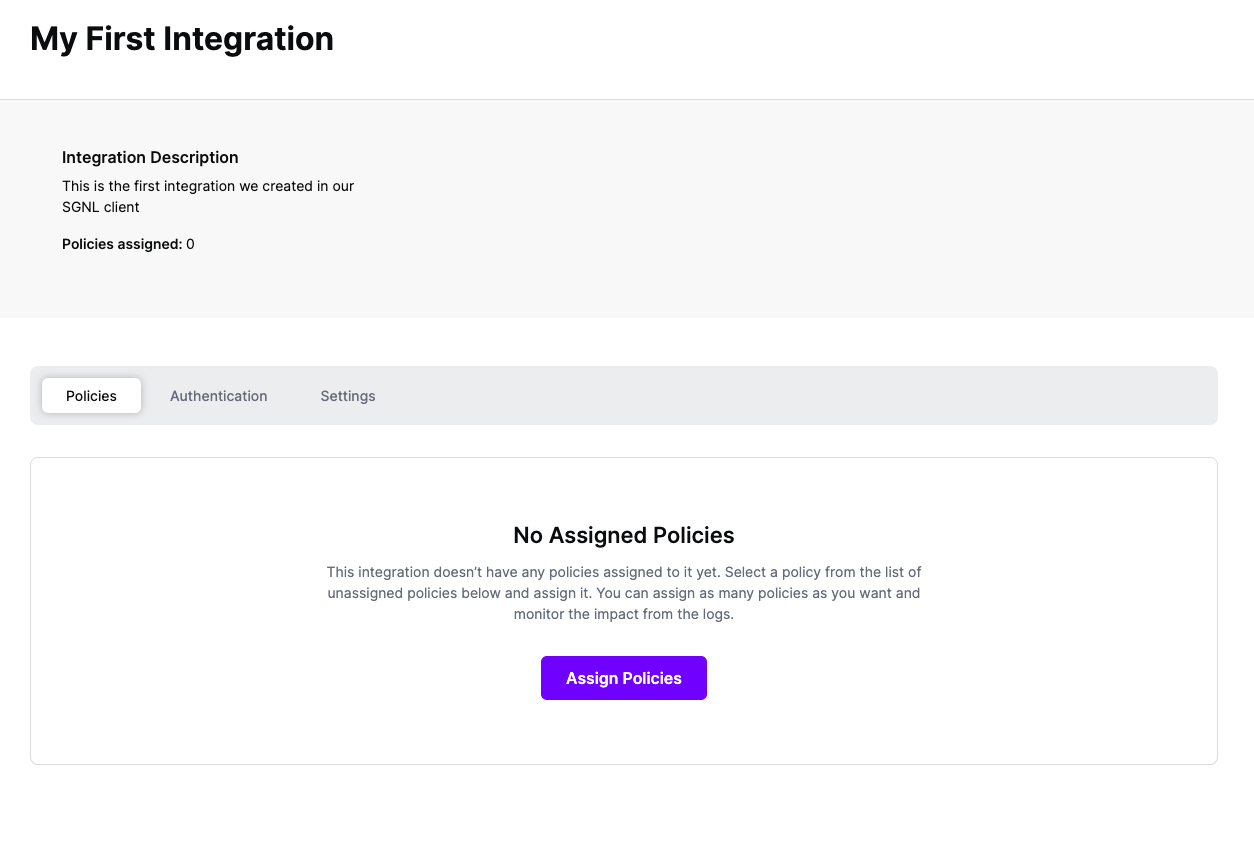
Select ‘Assign Policies’
Select:
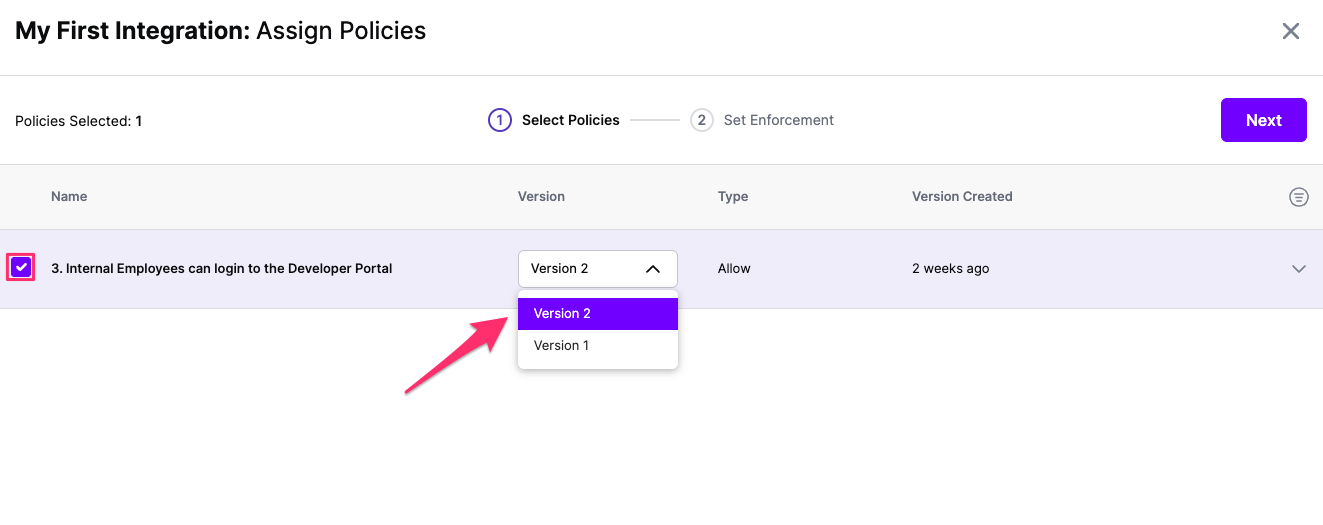
Click Next once you have the Policies and Versions configured as is appropriate
Select the Enforcement mode for the Policies you chose in the previous step
Simulated: Policy Versions that are being simulated will only log their access decision in the SGNL logs and will not impact the access decision that SGNL hands back to an integration. Simulated policies are useful for performing what-if analysis of new policy versions as well as debugging policy changes.
Note: It’s considered best practice to start with policies in Simulated mode, to verify that policies have been created an applied as expected
Enforced: Policy Versions that are being enforced will impact the access decisions that SGNL hands back to an integration. Enforced Policies will determine access for an integration
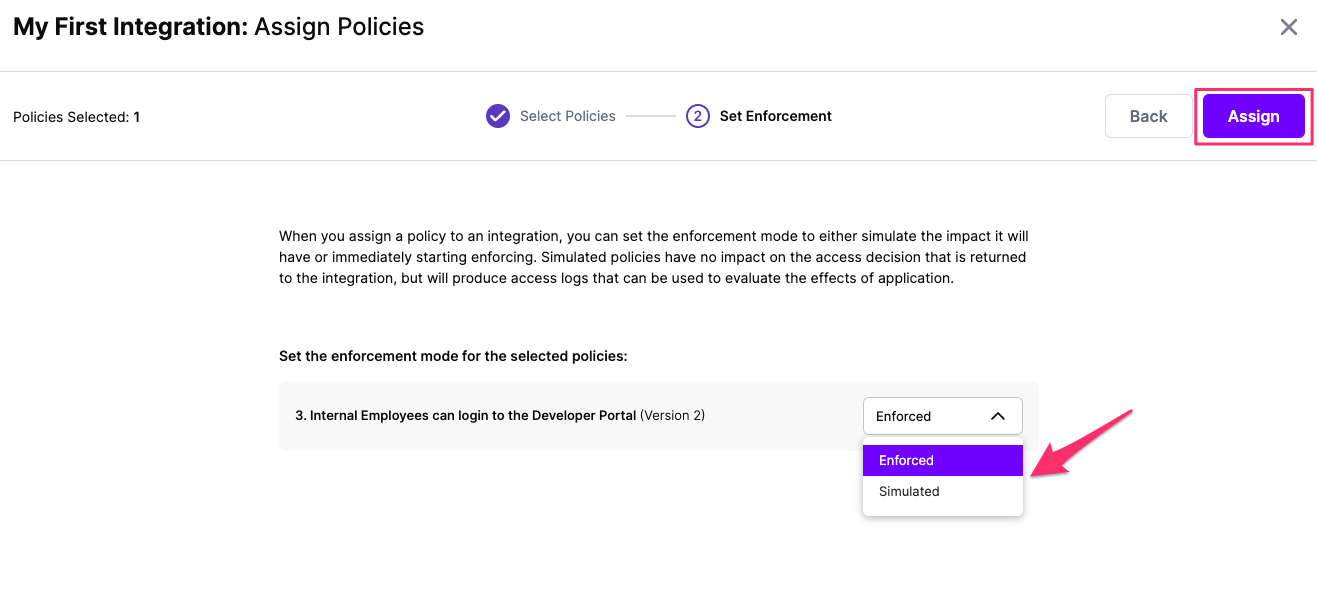
Select your desired Enforcement mode and select Assign
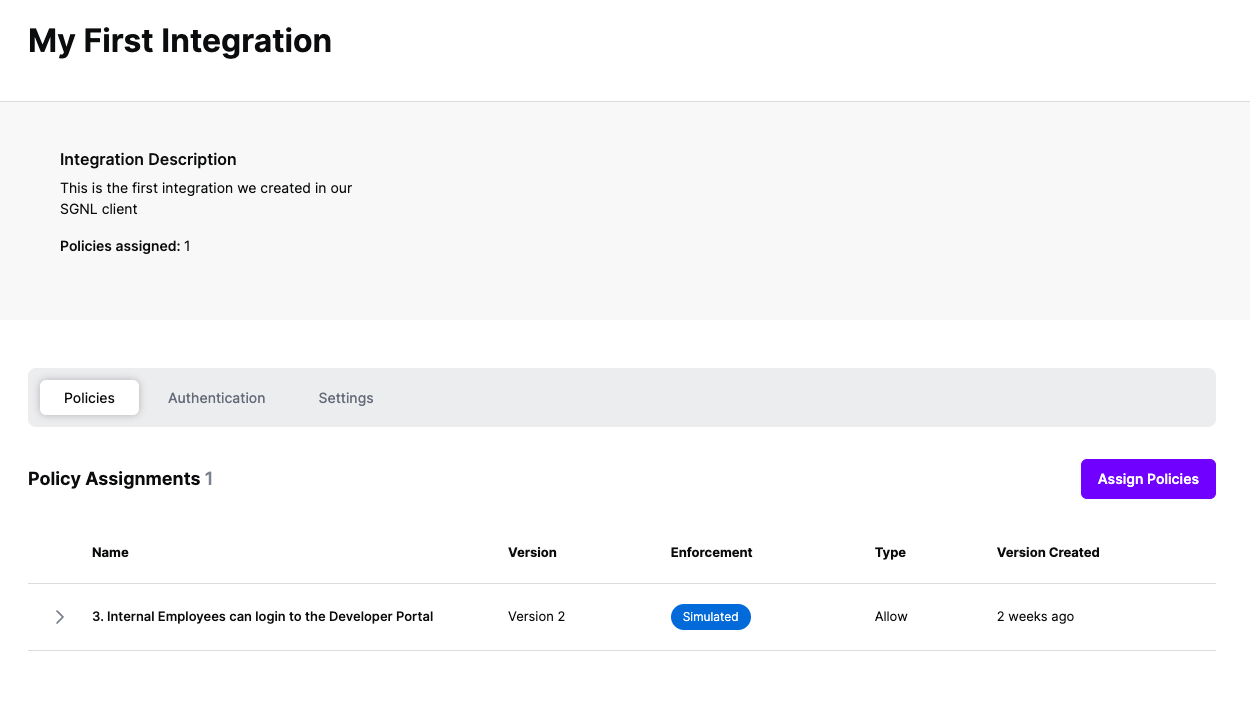
Versions of Policies will now be Assigned to your integration
As part of the SGNL CAEP Hub, AWS can be configured to receive session revocation events and other actions from SGNL. This enables real-time access control actions such as revoking AWS sessions when policy conditions change. Follow the steps below to configure AWS to enable this integration.
For all authentication methods for AWS, it is required that a Role is created for SGNL to use that gives Actions the ability to make changes to you AWS Account.
iam:PutRolePolicy for session revocation)SGNL-Actions-Role) and create itExample Trust Relationship. The principal will vary based on the authentication method (Access Key or Assume Role with Web Identity)
{
    "Version": "2012-10-17",
    "Statement": [
        {
            "Effect": "Allow",
            "Principal": {
                "AWS": [
                    "arn:aws:iam::782955330740:user/sgnl"
                ]
            },
            "Action": "sts:AssumeRole",
            "Condition": {}
        }
    ]
}
Example permission policy. Based on the actions used, the permissions may vary:
{
    "Version": "2012-10-17",
    "Statement": [
        {
            "Effect": "Allow",
            "Action": "iam:PutRolePolicy",
            "Resource": "*"
        }
    ]
}
AWS-1.0.0), select Actionshttps://aws.amazon.comSave to store the configurationFor this example, we will be using Microsoft Entra ID as an Identity Provider.
sts.windows.net/{entra-tenant-id}/Web Identity as the trusted entity typeSGNL-Actions-Role) and create itiam:PutRolePolicy for session revocation)Example Trust Relationship for Assume Role with Web Identity
{
    "Version": "2012-10-17",
    "Statement": [
        {
            "Effect": "Allow",
            "Principal": {
                "Federated": "arn:aws:iam::{iam-account}:oidc-provider/sts.windows.net/{entra-tenant-id}/"
            },
            "Action": "sts:AssumeRoleWithWebIdentity",
            "Condition": {
                "StringEquals": {
                    "sts.windows.net/{entra-tenant-id}/:aud": "{entra-application-client-id}"
                }
            }
        }
    ]
}
Example permission policy. Based on the actions used, the permissions may vary:
{
    "Version": "2012-10-17",
    "Statement": [
        {
            "Effect": "Allow",
            "Action": "iam:PutRolePolicy",
            "Resource": "*"
        }
    ]
}
AWS-1.0.0), select Actionshttps://aws.amazon.comapi://{entra-application-client-id}/.defaulthttps://login.microsoftonline.com/{entra-tenant-id}/oauth2/v2.0/tokenan:aws:iam:{account-id}:role/{role-name}us-east-1Save to store the configurationFrom within SGNL you can configure any change in the graph to trigger actions that are directed to downstream systems. For general documentation on how to configure Triggers and Rules that match your use-case, refer to our CAEP Hub documentation. In an example scenario, you may want to trigger an AWS Session Revocation event when an end-user’s access request expires or when a policy violation is detected. To complete this example integration, we assume someone has already configured the necessary Systems of Record in SGNL:
status equals “expired”)principalId field, input the value for the Principal ID (e.g., {$.User.email})roleArn field, input the AWS Role ARN that should be revokedThat’s it. Once you’ve finished configuring your rule, SGNL will automatically perform the configured actions in AWS when the trigger conditions are met.