Protected Systems are applications, services, or infrastructure that you want to protect with SGNL. In this guide, we’ll describe how to enhance access control for your Microservice infrastructure via an integration betweem SGNL and Envoy Proxy. In doing so, we’ll enable continuous, centralized access management that leverages a central set of human-readable policies.
With this integration, your Microservice Infrastructure need not know about the policies, systems of record, or any of the data in SGNL - it simply needs to pass to SGNL:
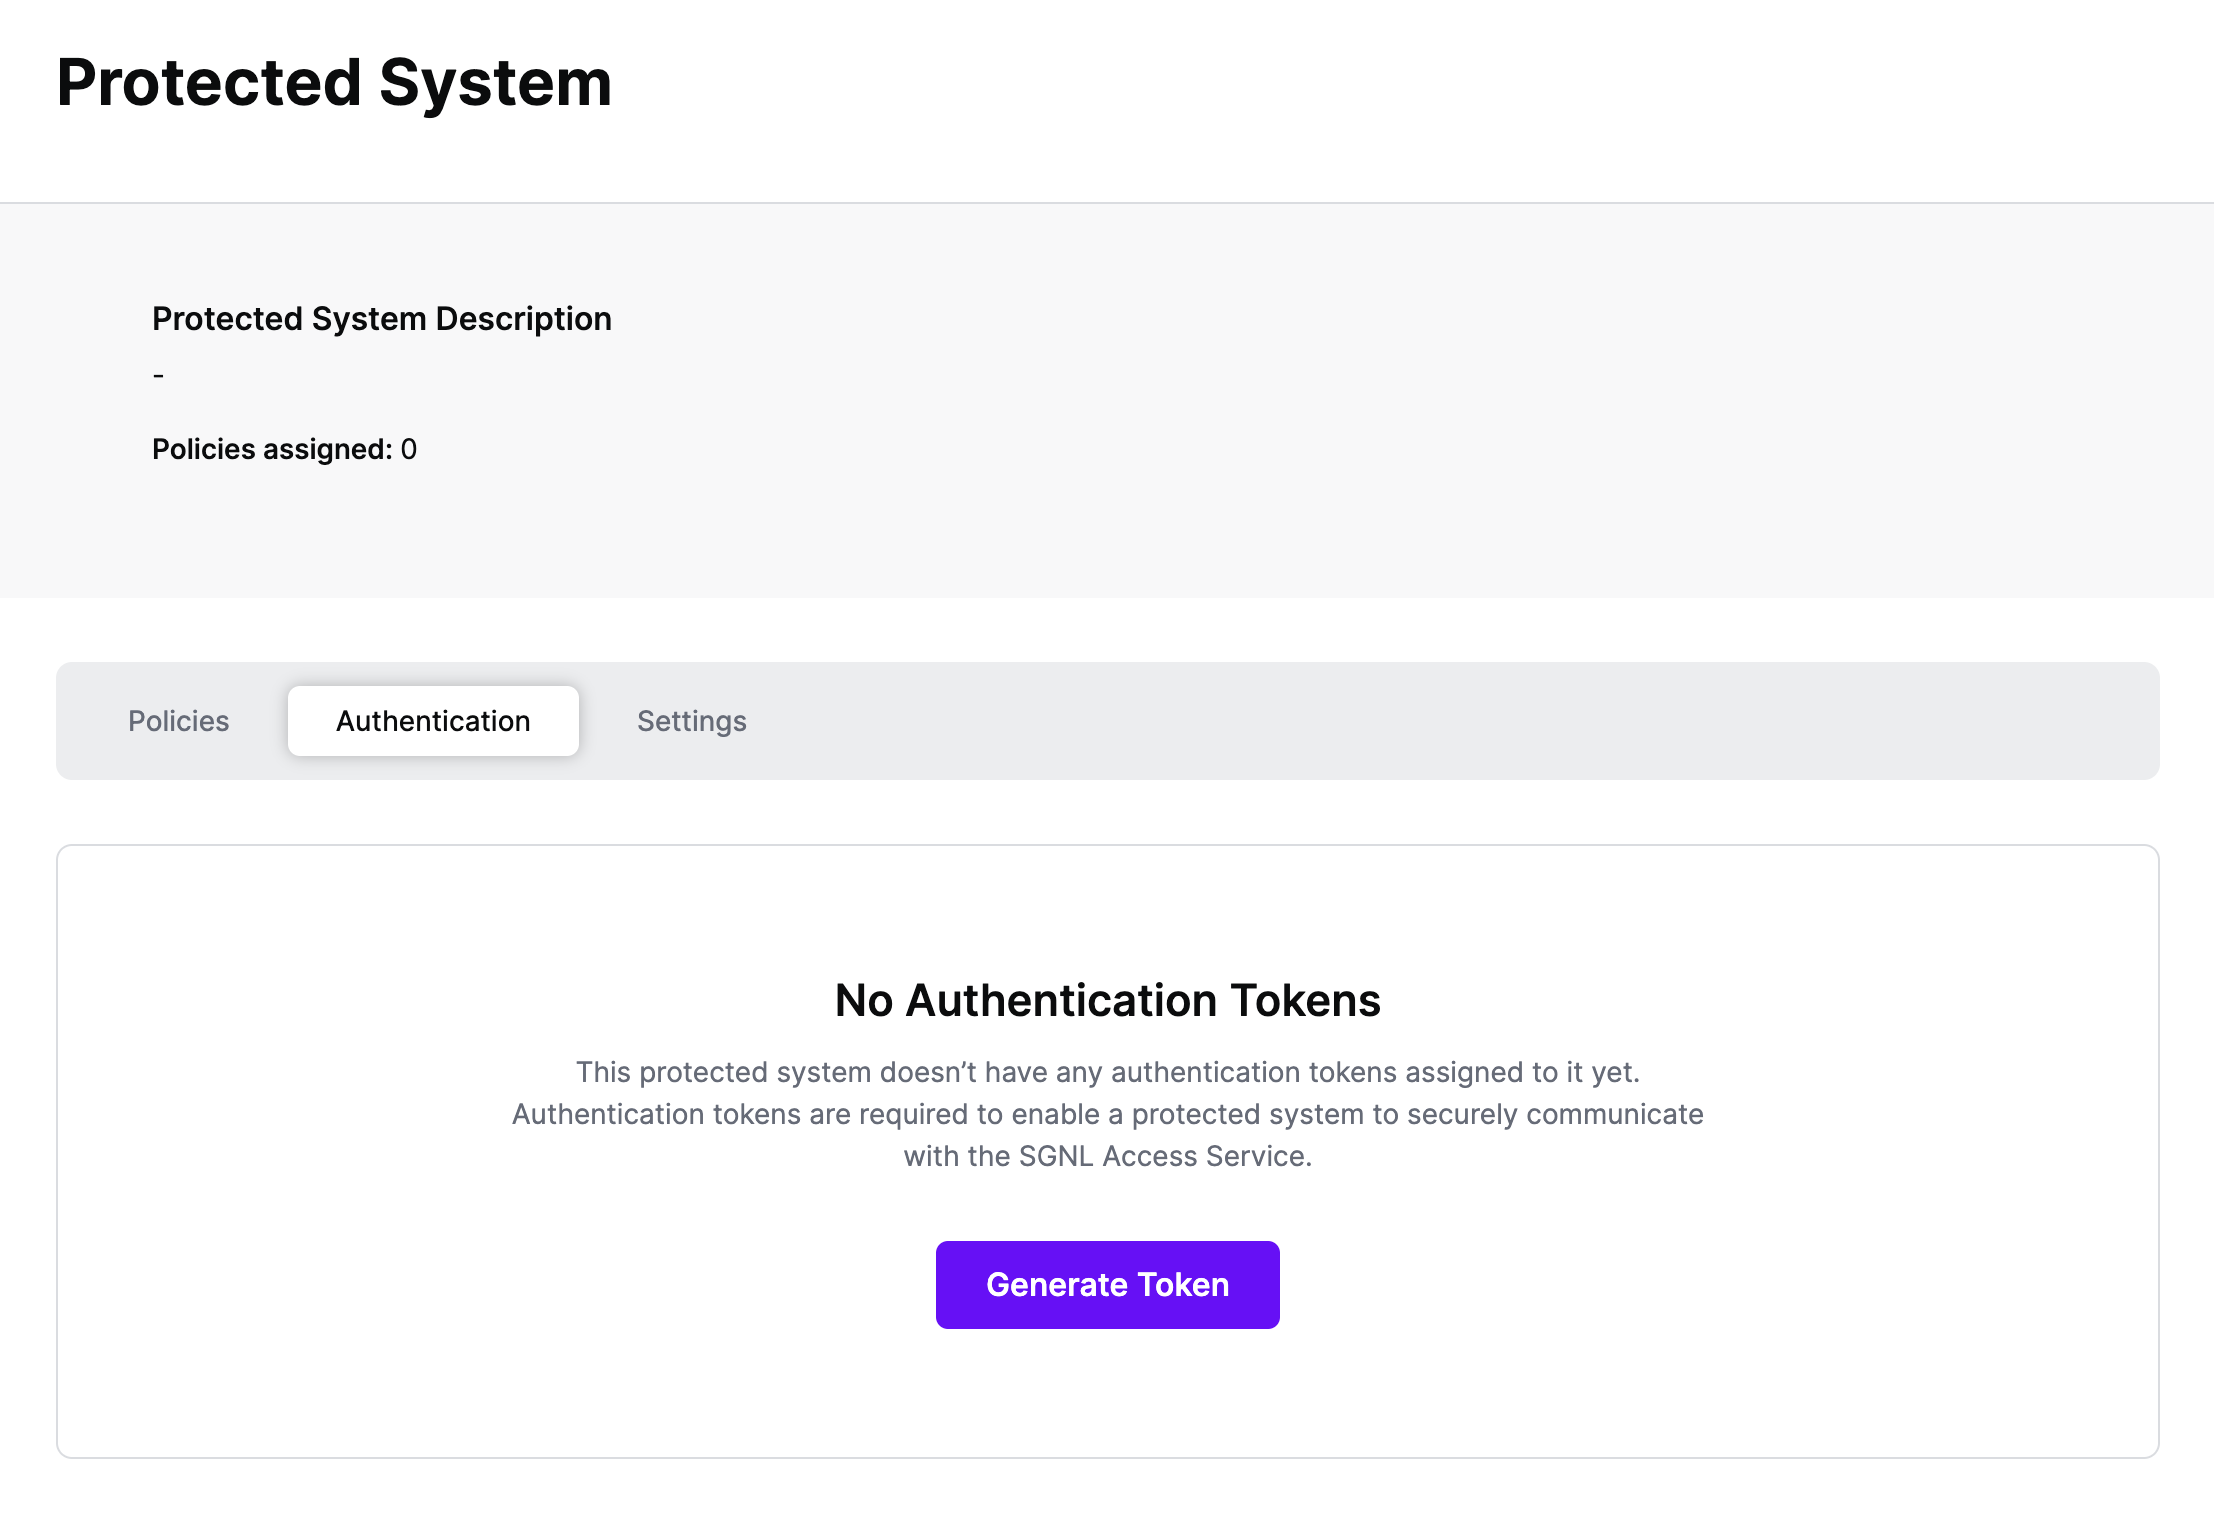
Authentication ensures that only authorized systems can make requests into SGNL, as well as verifying the identity of an integration in order to effectively evaluate Policies - to access Authentication settings, open your Envoy-enabled protected system and select the Authentication tab
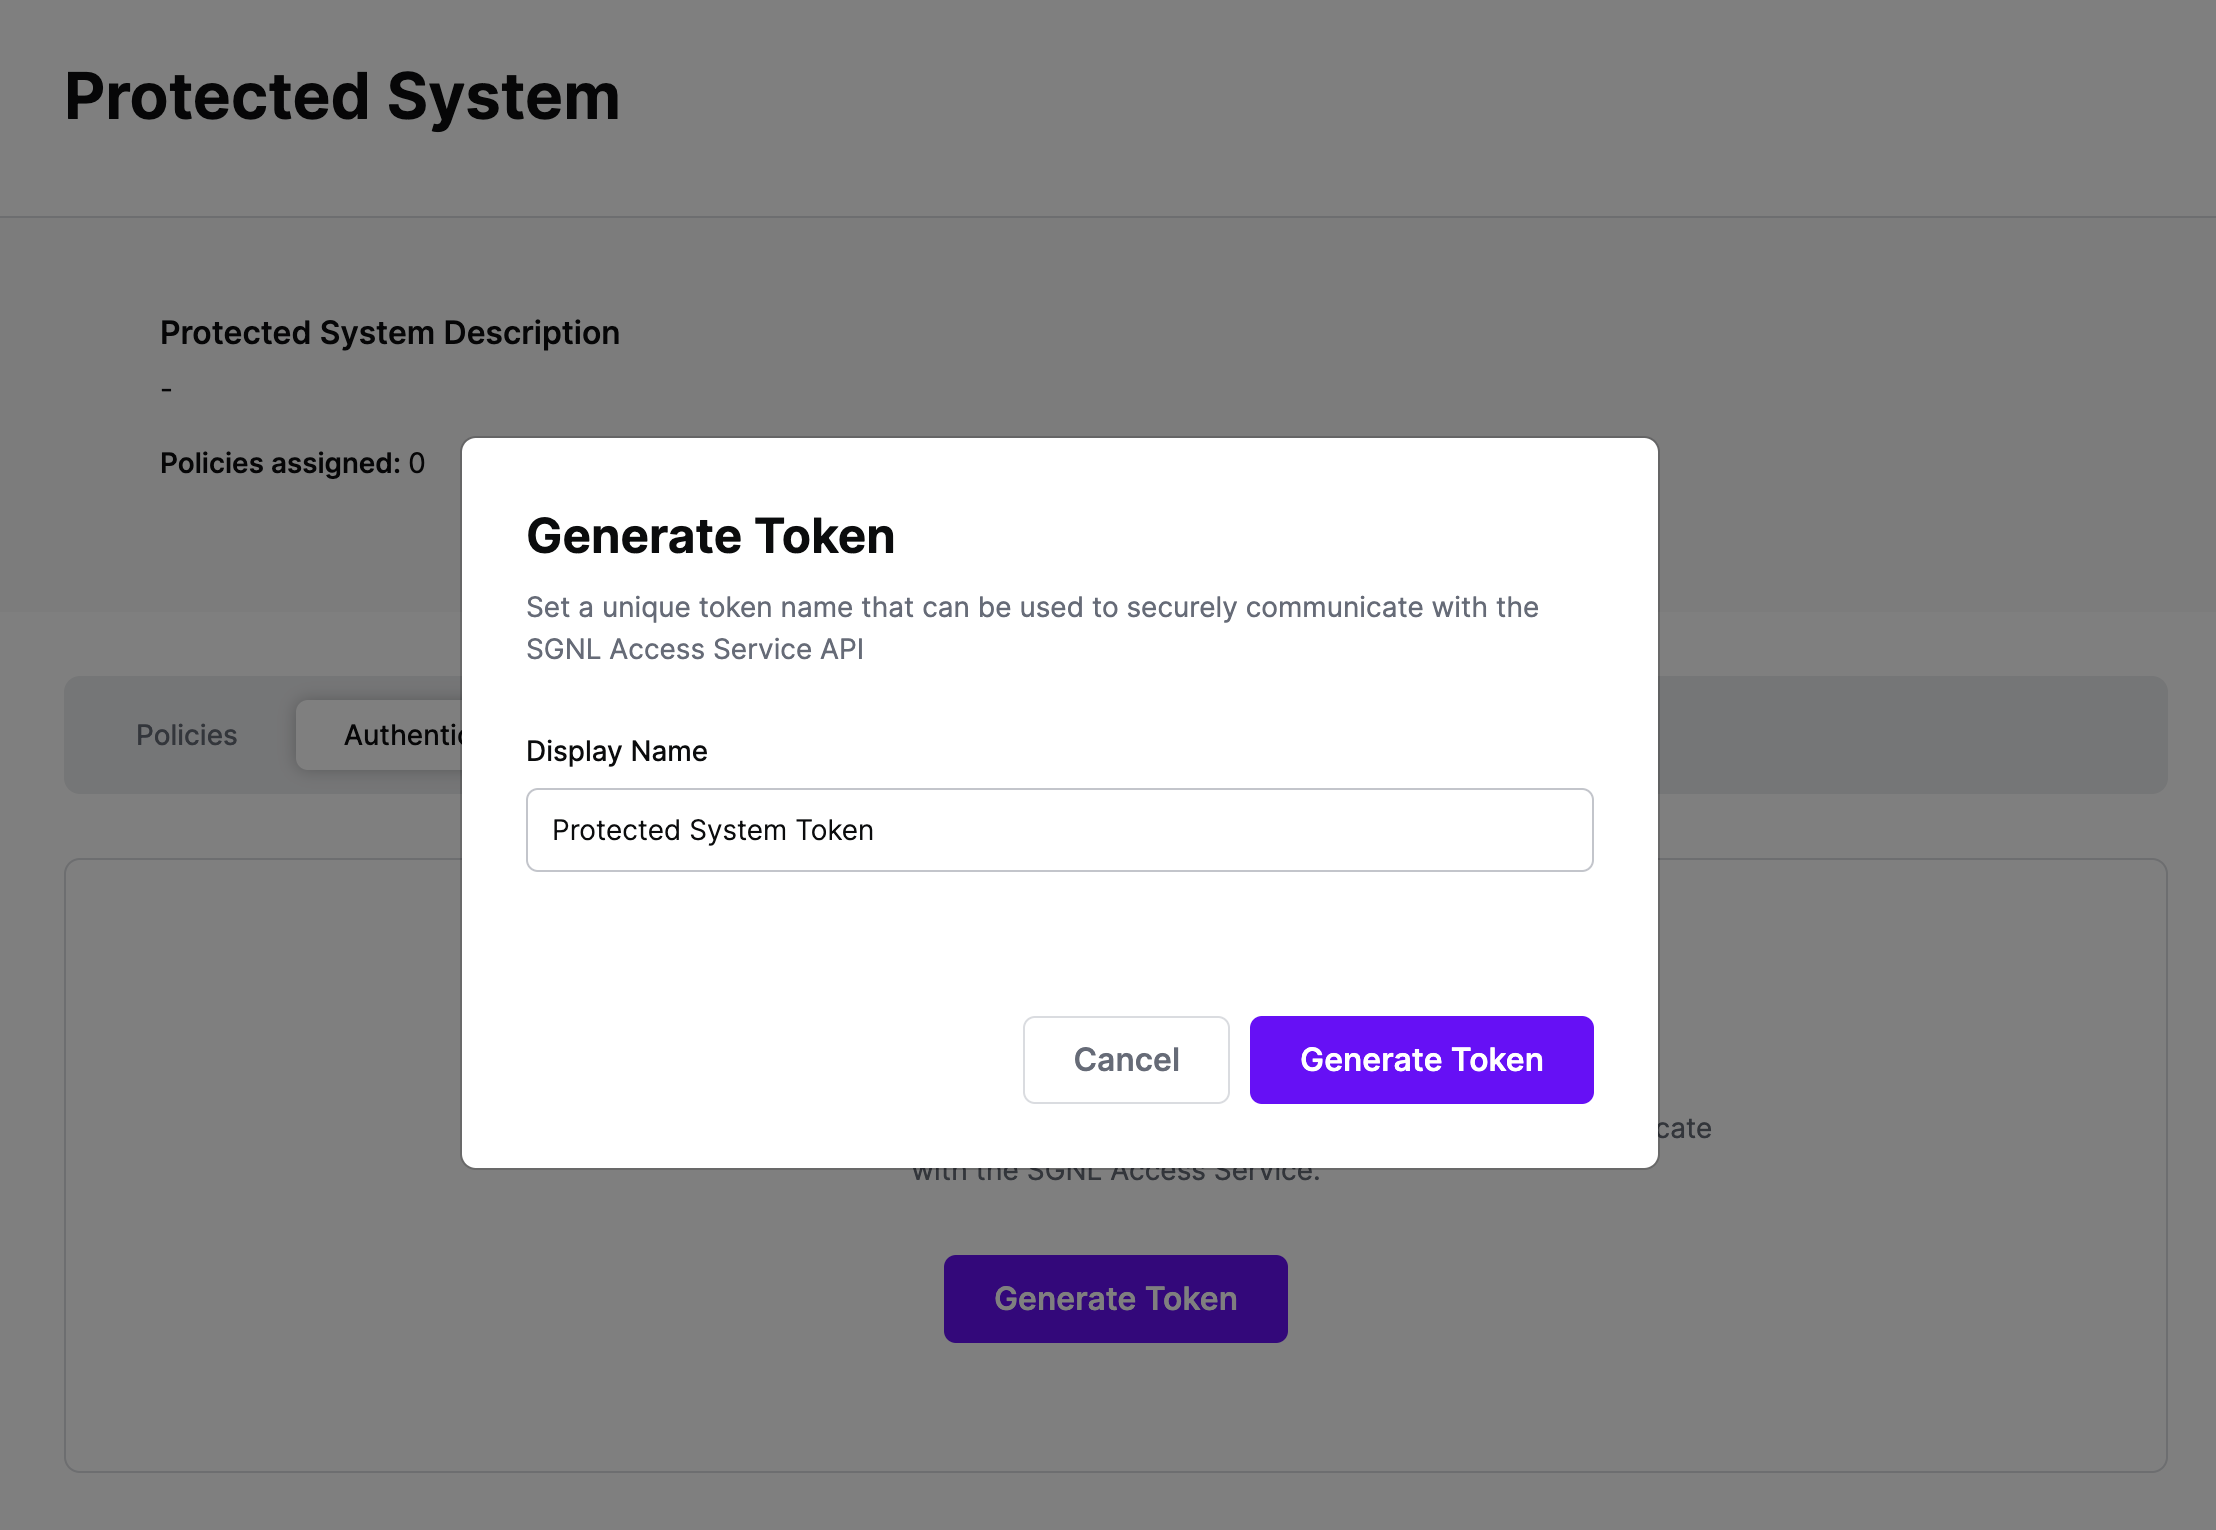
Click Generate Token
Give your token a descriptive name so that you know how it’s being used in the future and click to Generate Token
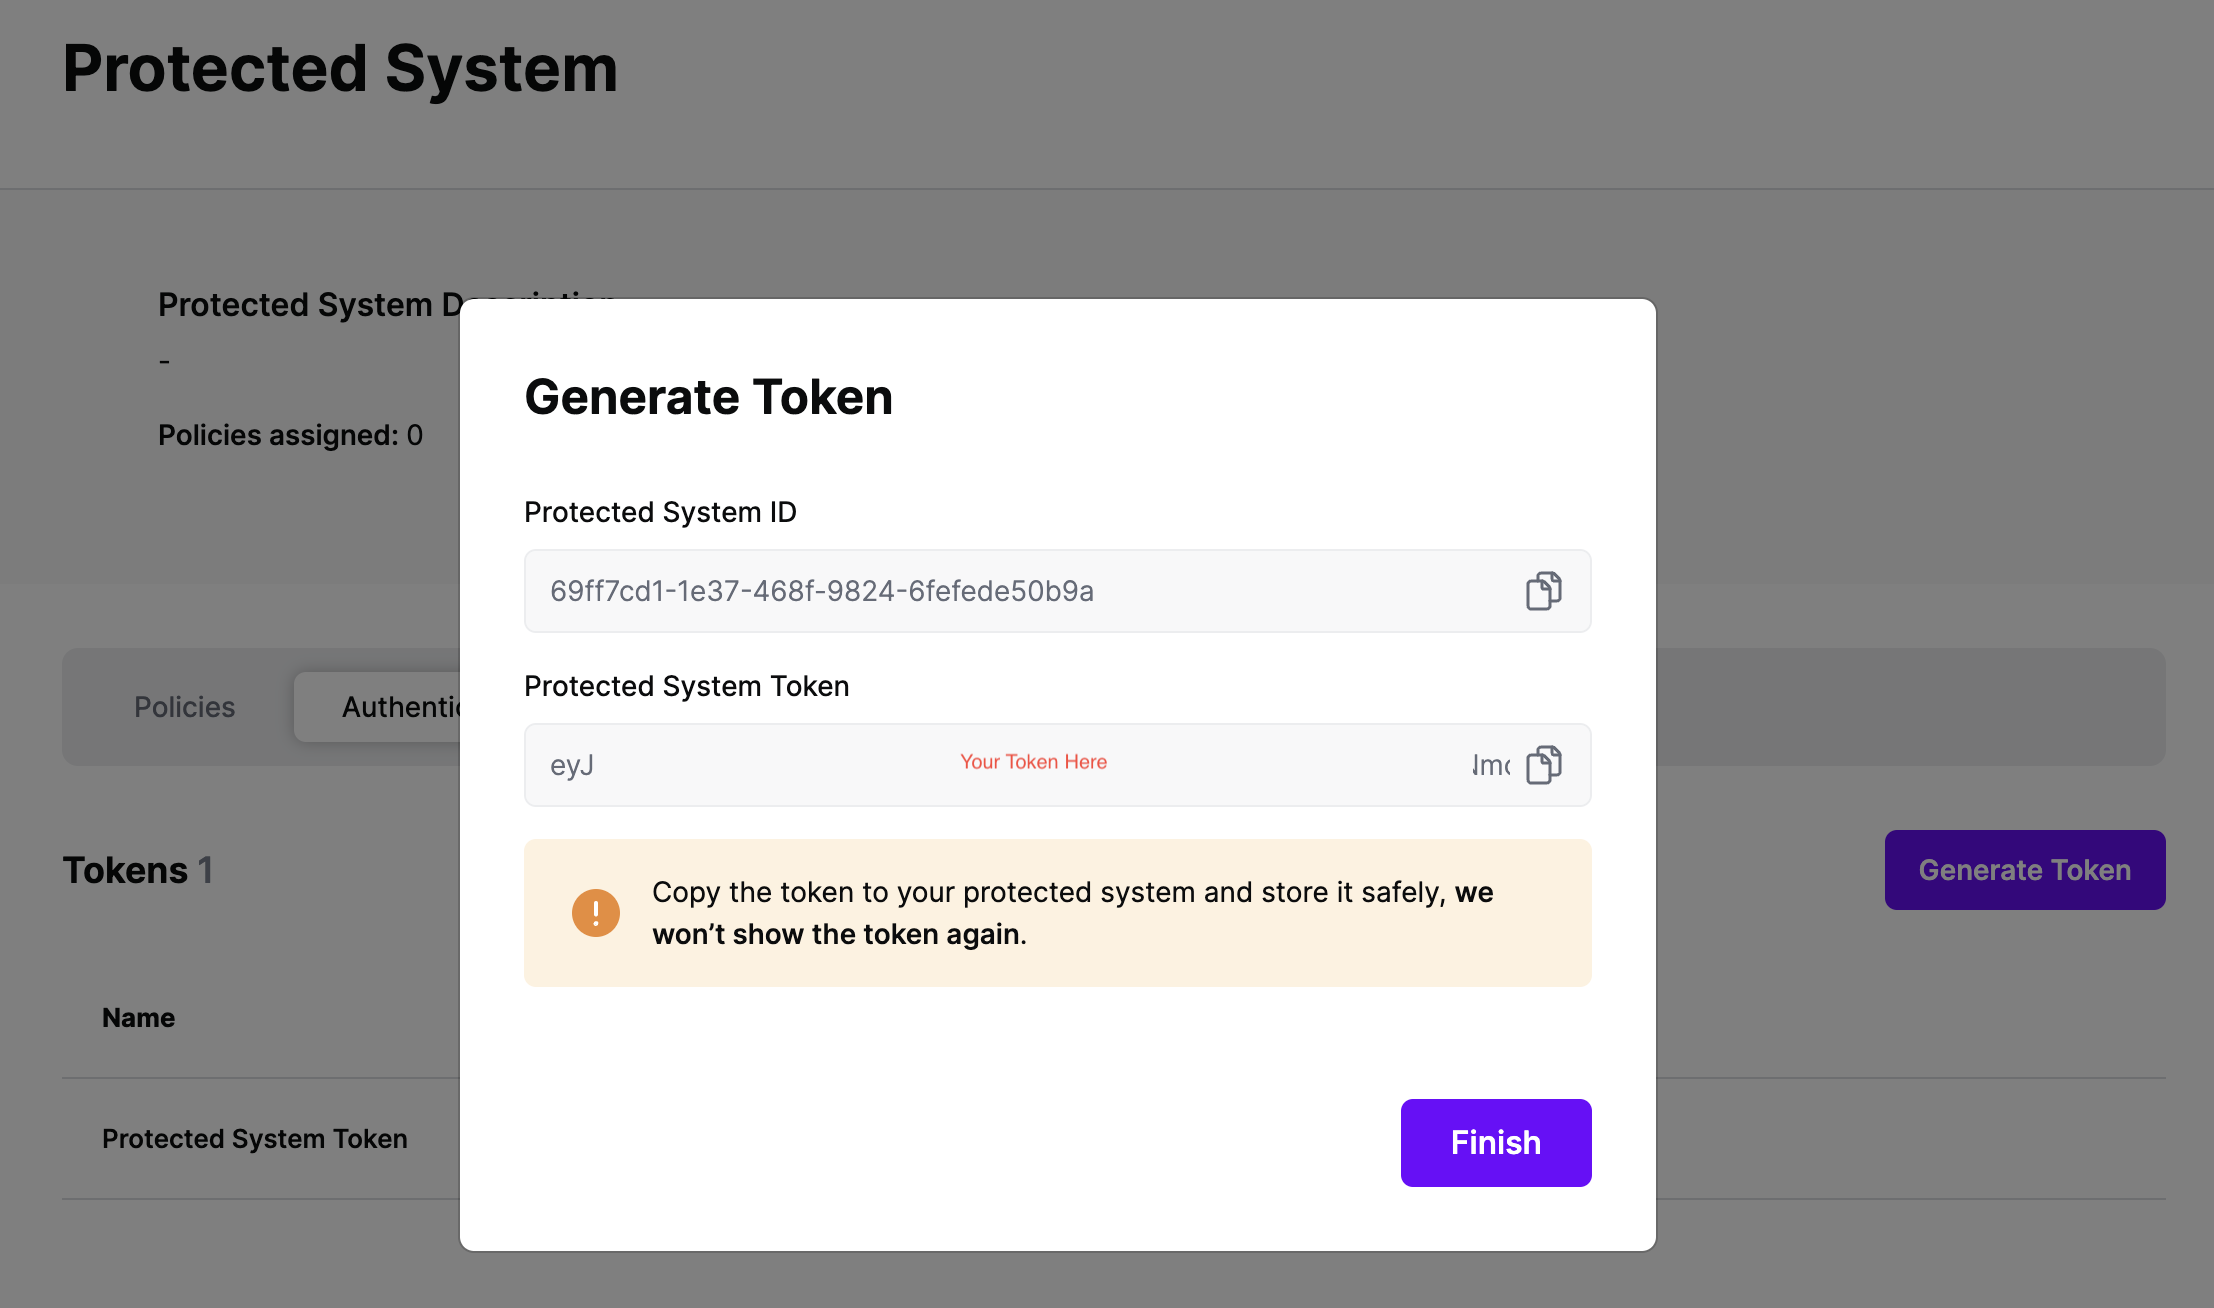
On the next screen, copy the token - this will be used by Envoy to make access requests to SGNL using the SGNL Access Service API
Note: The value of this token is not available again after this screen, so ensure you securely store it for steps later in this guide
Integrating Envoy Proxy with SGNL comprises an Envoy external authorization adapter, Envoy external authorization filter configuration, and the SGNL platform. The Envoy proxy is configured to send authorization requests to the Envoy external authorization adapter. The adapter sends context about the principal alongside the authorization request to SGNL for policy evaluation. The SGNL access service responds with allow and/or deny decisions based on the context and the authorization request.
Once the decision is made, the Envoy external authorization adapter then sends an allow or deny response to the Envoy proxy. If the request is denied, the caller is blocked from gaining access to the requested resource. Otherwise, the request proceeds as normal.
Envoy runs alongside Microservices Infrastructure and is responsible for externalizing network routing, observability, load balancing, and security. This solution implements the Envoy external authorization filter protos that are part of the Envoy filter chain.
In order to call the Envoy external authorization adapter, you need to tell Envoy where to send the gRPC request when performing authorization. Below is an example of an HTTP Filter configuration:
http_filters:
- name: envoy.filters.http.ext_authz
typed_config:
"@type": type.googleapis.com/envoy.extensions.filters.http.ext_authz.v3.ExtAuthz
transport_api_version: V3
grpc_service:
envoy_grpc:
cluster_name: ext-authz
The configuration above defines an external authorization filter. The “ext-authz” is the cluster name that defines the additional configuration for sending the authorization request to the Envoy external authorization adapter. Here is an example cluster configuration:
- name: ext-authz
type: static
http2_protocol_options: {}
load_assignment:
cluster_name: ext-authz
endpoints:
- lb_endpoints:
- endpoint:
address:
socket_address:
address: {{SGNL AuthZ Service}}
port_value: {{Port Number}}
common_lb_config:
healthy_panic_threshold:
value: 50.0
health_checks:
- timeout: 1s
interval: 5s
interval_jitter: 1s
no_traffic_interval: 5s
unhealthy_threshold: 1
healthy_threshold: 3
grpc_health_check:
service_name: "envoy.service.auth.v3.Authorization"
authority: "server.domain.com"
At this point, it’s likely that all decisions will either be Allow or Deny, based on the Default Decision you’ve selected for the Envoy Integration - if that’s the case, you’re ready to start assigning policies.
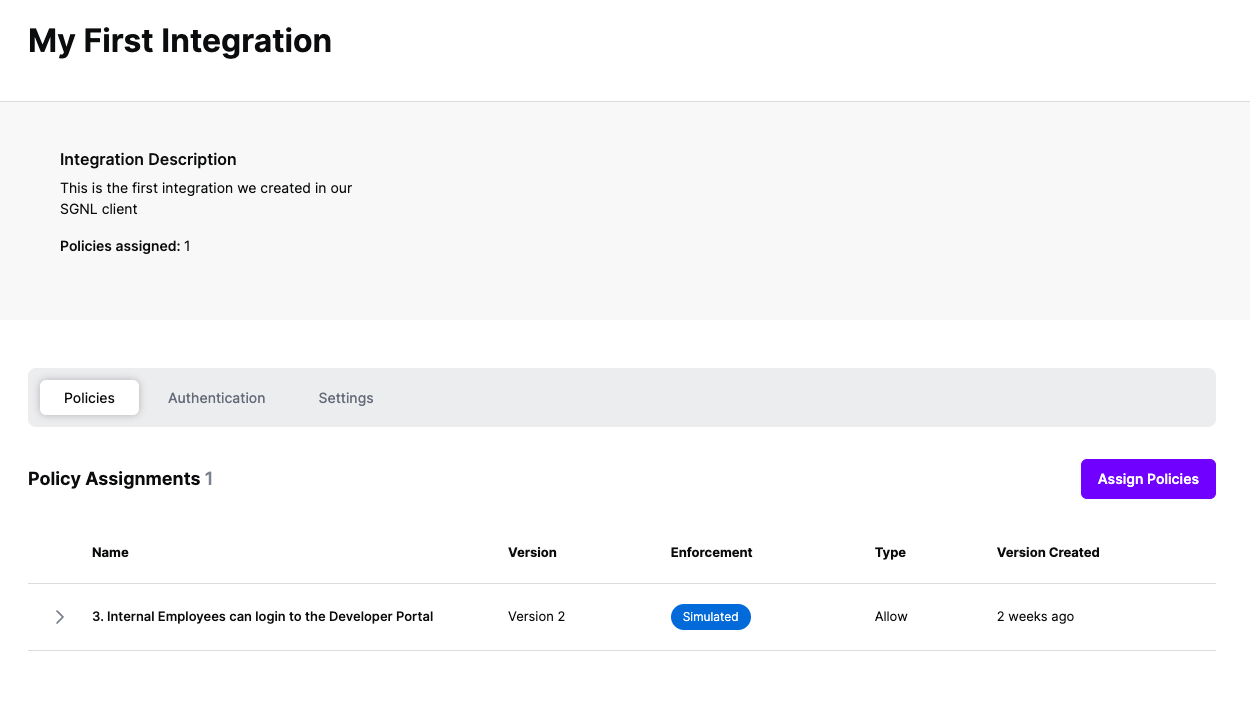
Once the Envoy integration is created, you can start assigning versions of Policies - to get started, select Policies from the tabs in your newly created integration
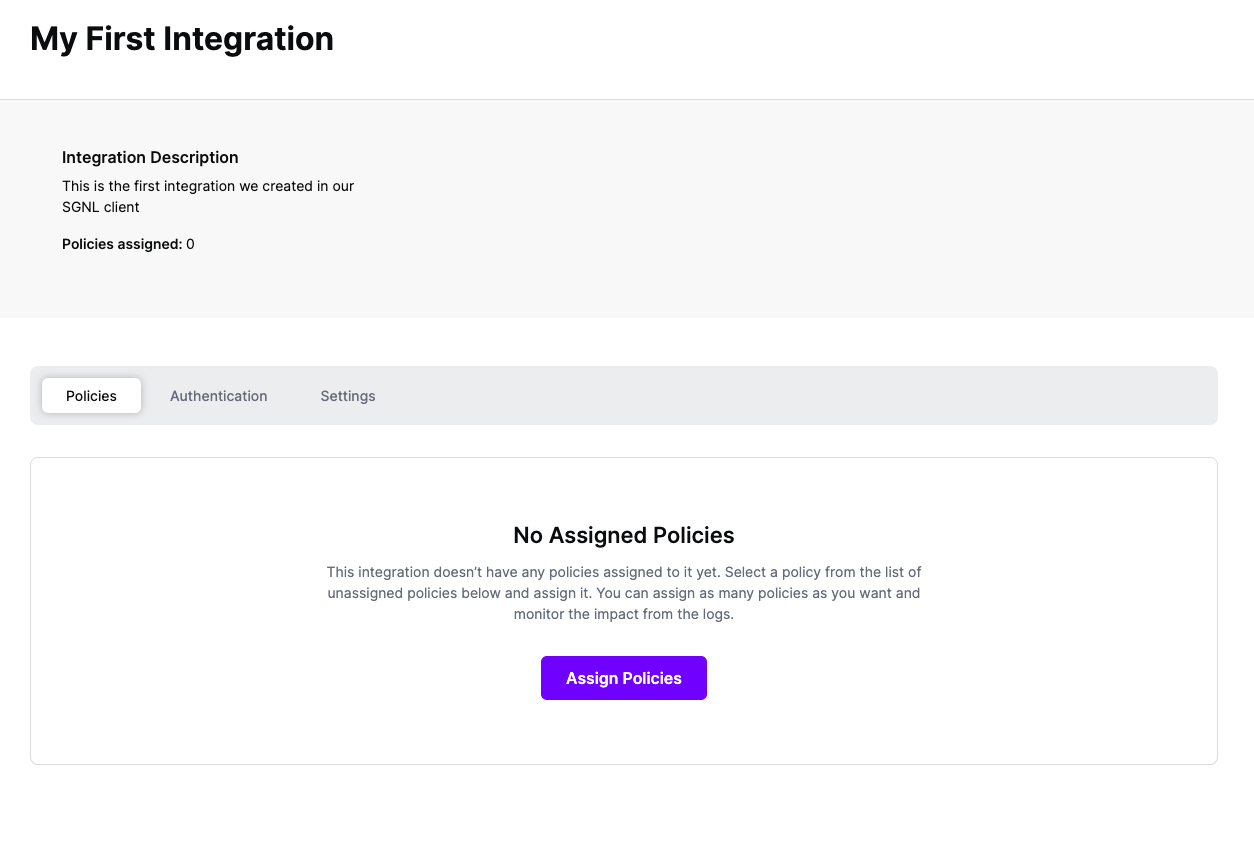
Select ‘Assign Policies’
Select:
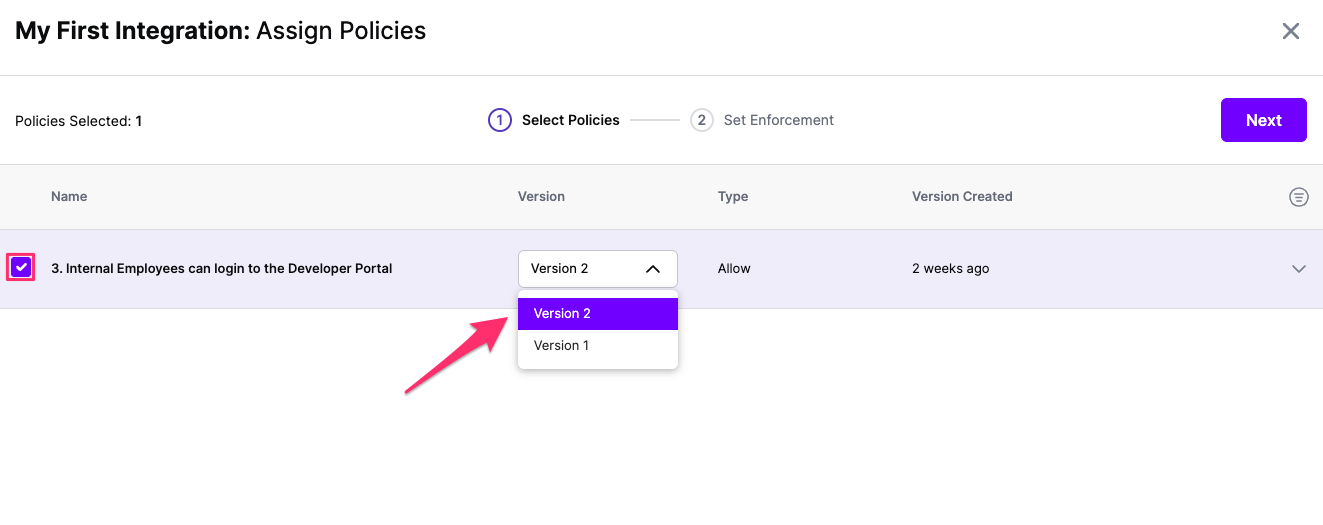
Click Next once you have the Policies and Versions configured as is appropriate
Select the Enforcement mode for the Policies you chose in the previous step
Simulated: Policy Versions that are being simulated will only log their access decision in the SGNL logs and will not impact the access decision that SGNL hands back to an integration. Simulated policies are useful for performing what-if analysis of new policy versions as well as debugging policy changes.
Note: It’s considered best practice to start with policies in Simulated mode, to verify that policies have been created an applied as expected
Enforced: Policy Versions that are being enforced will impact the access decisions that SGNL hands back to an integration. Enforced Policies will determine access for an integration
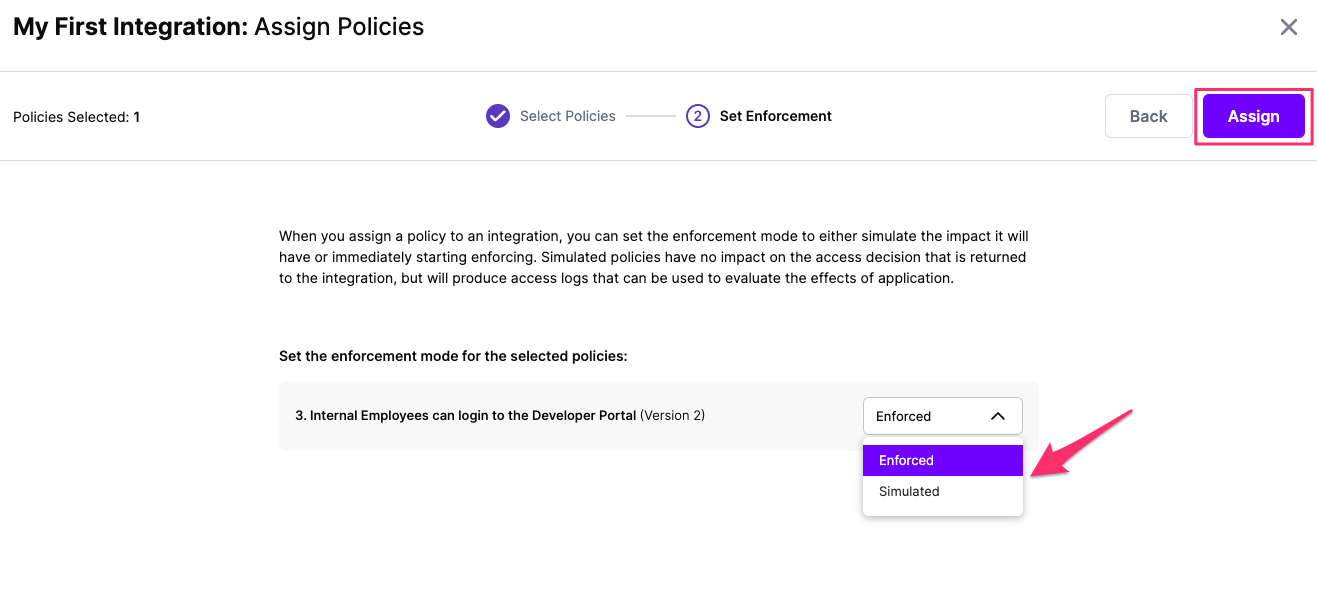
Select your desired Enforcement mode and select Assign
Versions of Policies will now be Assigned to your integration