Protected Systems are applications, services, or infrastructure that you want to protect with SGNL. In this guide, we’ll enhance access control for your Linux Servers by integrating them with SGNL’s Pluggable Authentication Module (PAM) for Linux.
With this integration, your Linux Servers need not know about the policies, systems of record, or any of the data in SGNL - it simply needs to pass to SGNL:
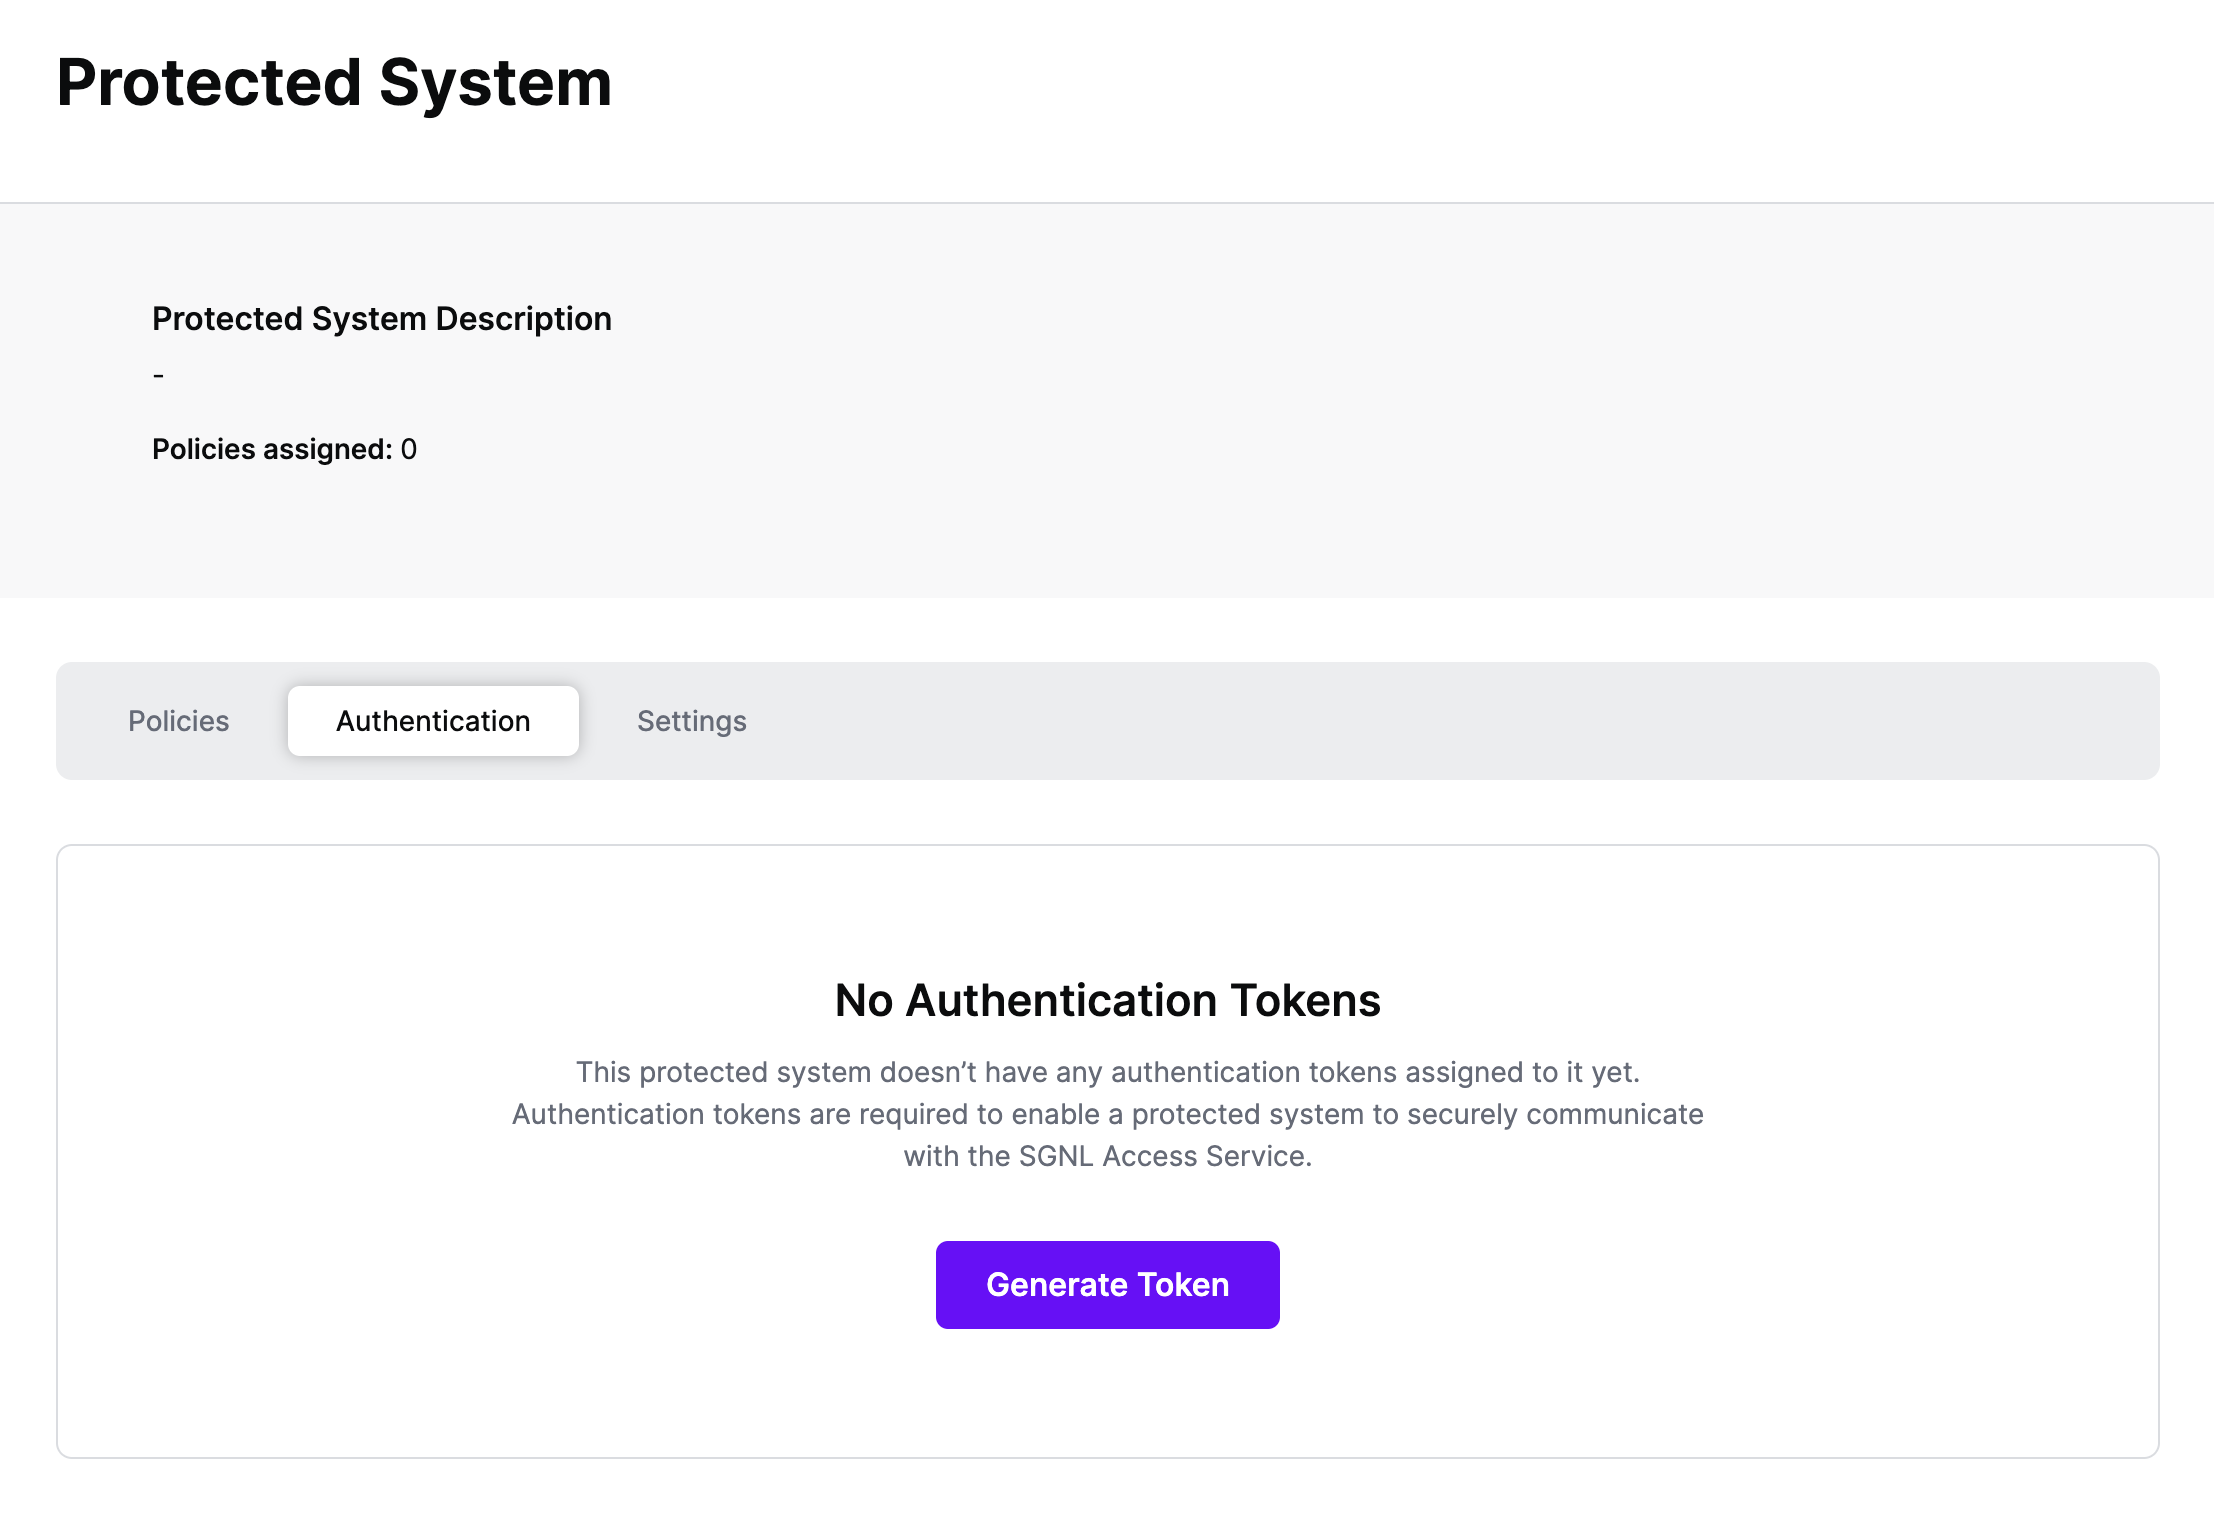
Authentication ensures that only authorized systems can make requests into SGNL, as well as verifying the identity of an integration in order to effectively evaluate Policies - to access Authentication settings, open your Linux protected system and select the Authentication tab
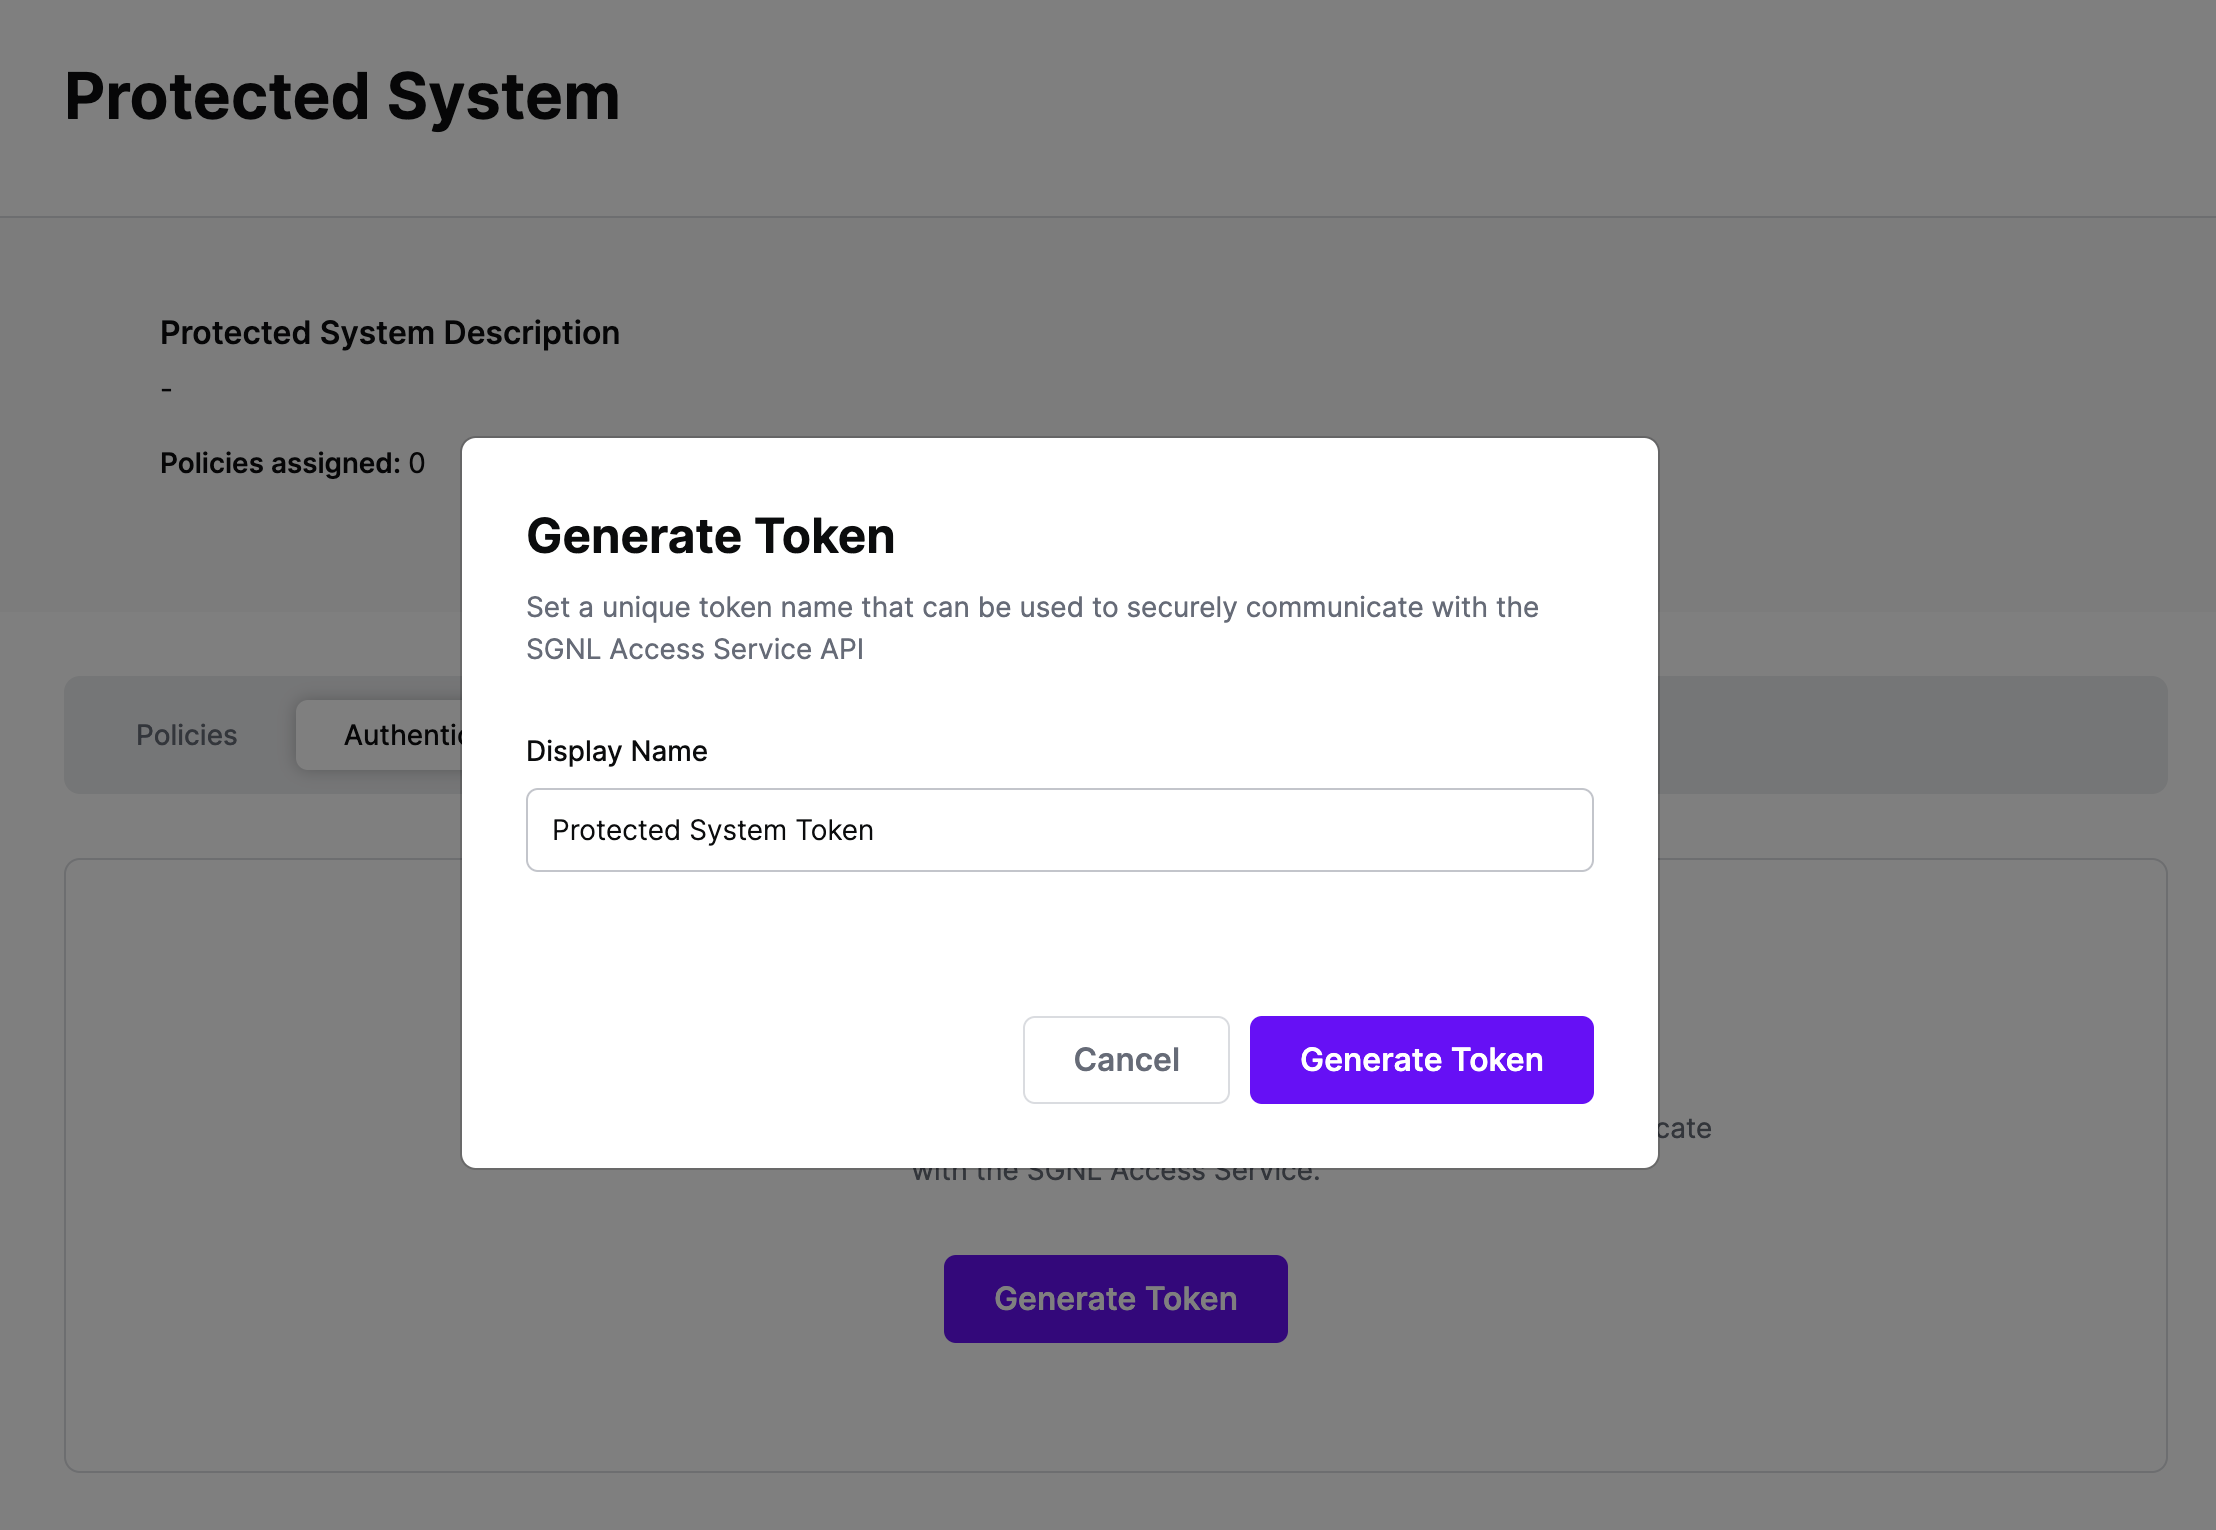
Click Generate Token
Give your token a descriptive name so that you know how it’s being used in the future and click to Generate Token
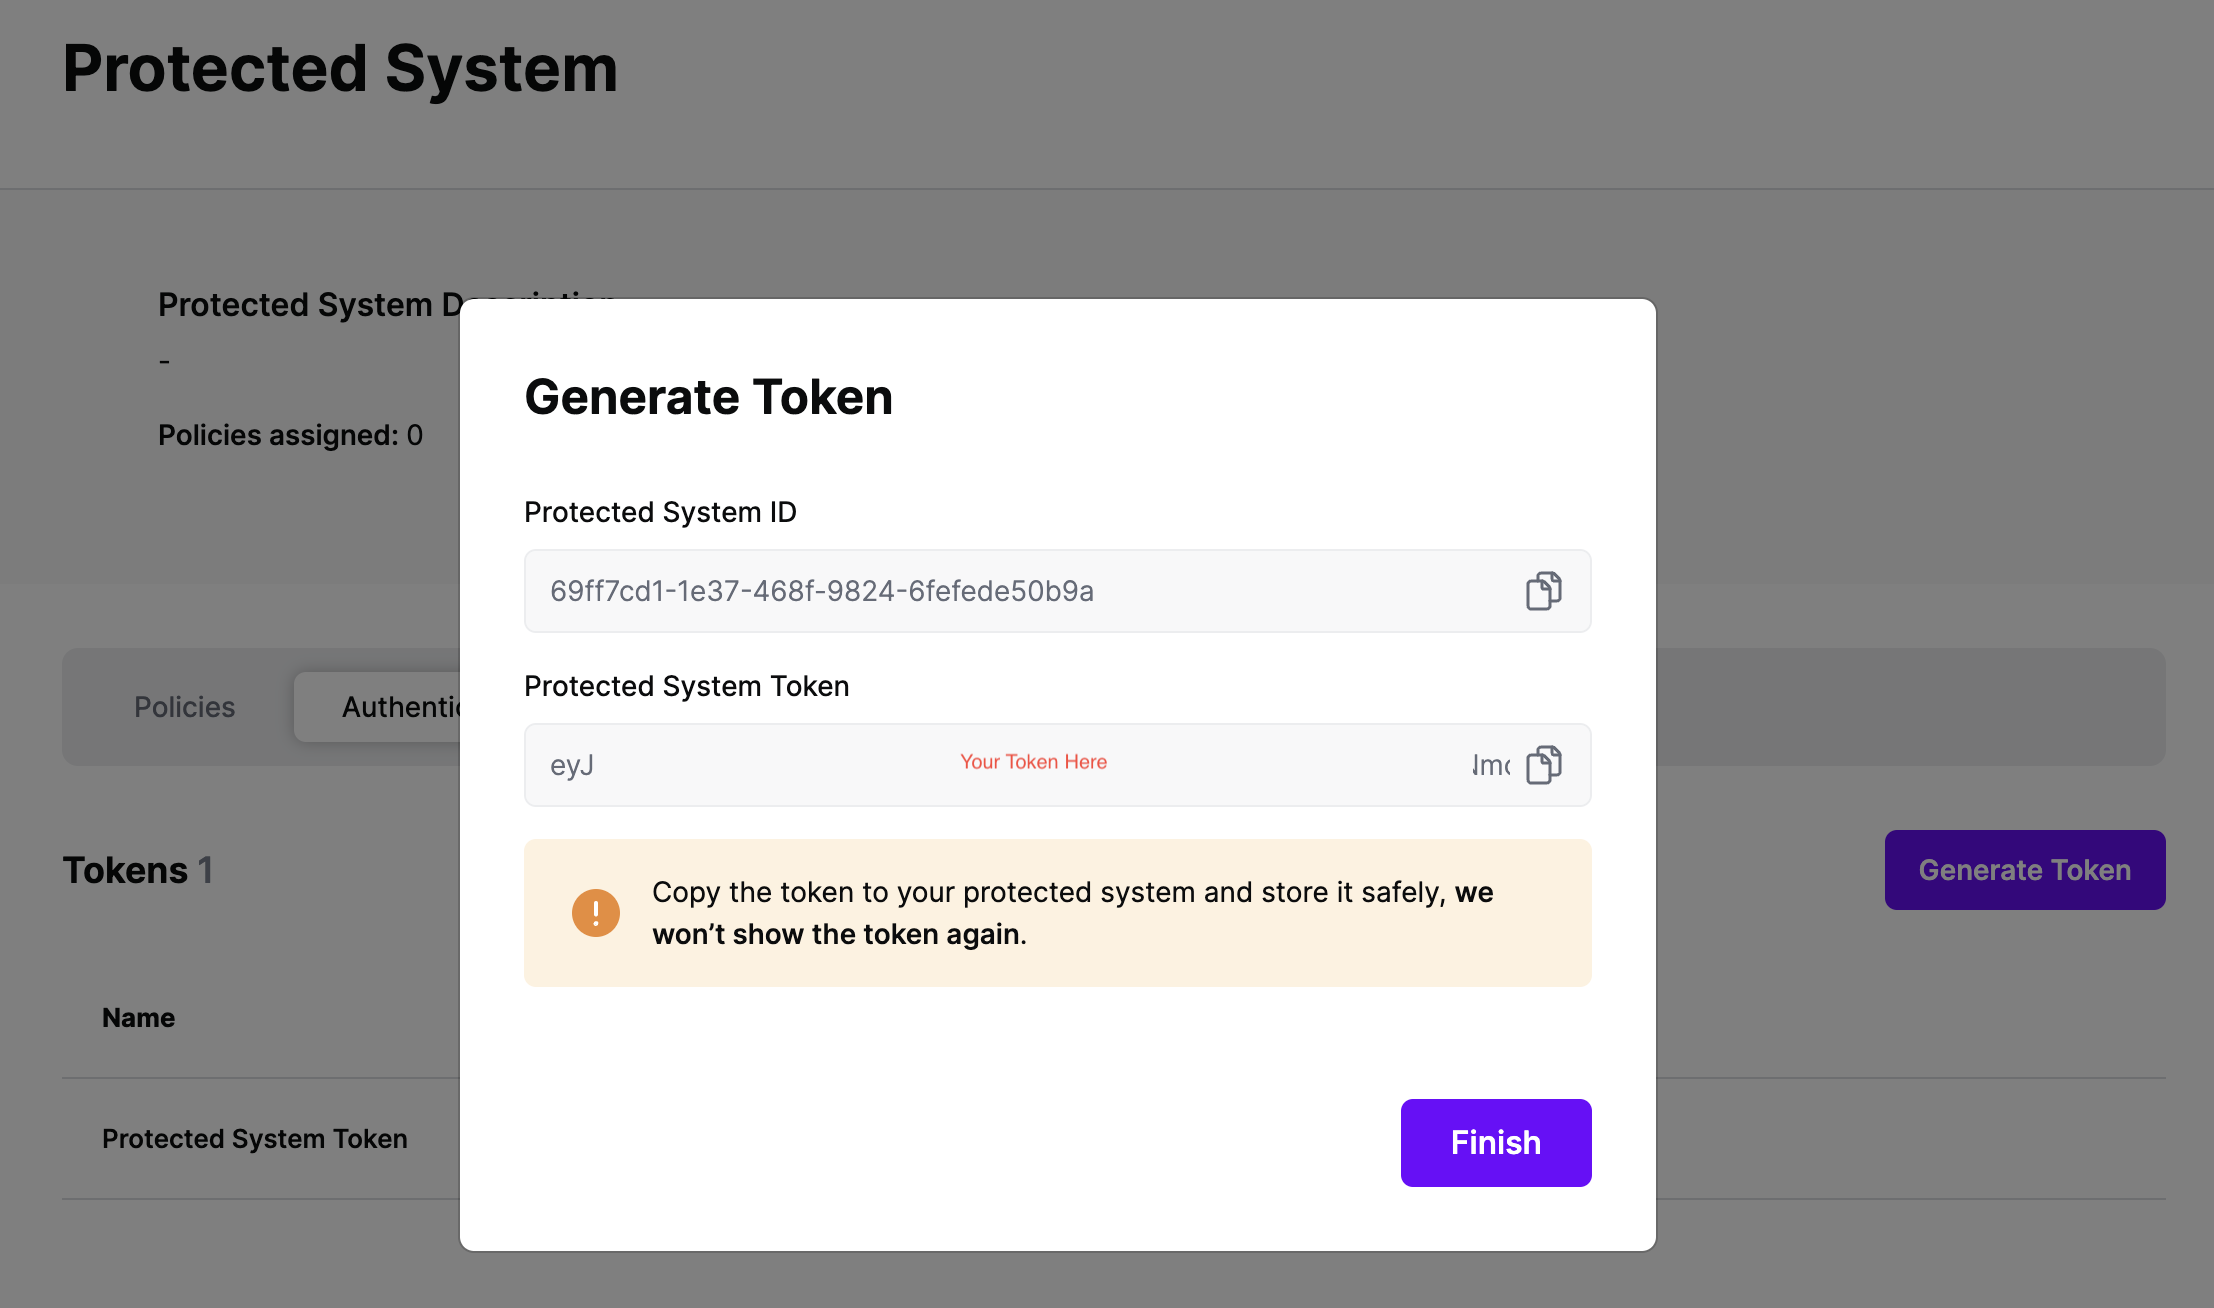
On the next screen, copy the token - this will be used by Linux to make access requests to SGNL using the SGNL Access Service API
Note: The value of this token is not available again after this screen, so ensure you securely store it for steps later in this guide
The SGNL PAM for Linux is available to all SGNL Customers - if you’re interested in deploying this solution in your Enterprise, please get in contact with your Account Manager.
Once you have the PAM, you’ll need to provide configuration for your SGNL Client. This will require updating the config JSON file with details about your SGNL deployment and Authentication Token, e.g.
{
	"url": "https://access.sgnlapis.cloud/access/v1/evaluations",
	"token":"Authorization:Bearer {insert integration token}"

}
In your C Linux Development environment, you’ll need to ensure you have the appropriate packages installed, these are OS dependent and detailed below:
sudo yum install gcc
sudo yum install pam-devel
sudo yum install json-c-devel
sudo yum install libcurl-devel
sudo apt update
sudo apt install gcc
sudo apt install libpam-dev
sudo apt install libcurl4-openssl-dev
sudo apt install libjson-c-dev
To install the PAM, simply run the build script:
./build_pam.sh
Finally, you can enable the PAM for a Linux service such as sudo. For sudo, modify the /etc/pam.d/sudo file and add the following line:
account required sgnl_pam.so
After you save your sudo PAM configuration, the operating system will now call the SGNL PAM and consequently the SGNL Access Service API to authorize the user based on SGNL policy. To disable the PAM, simply edit the sudo file and remove/comment the line that refers to the sgnl_pam.so module.
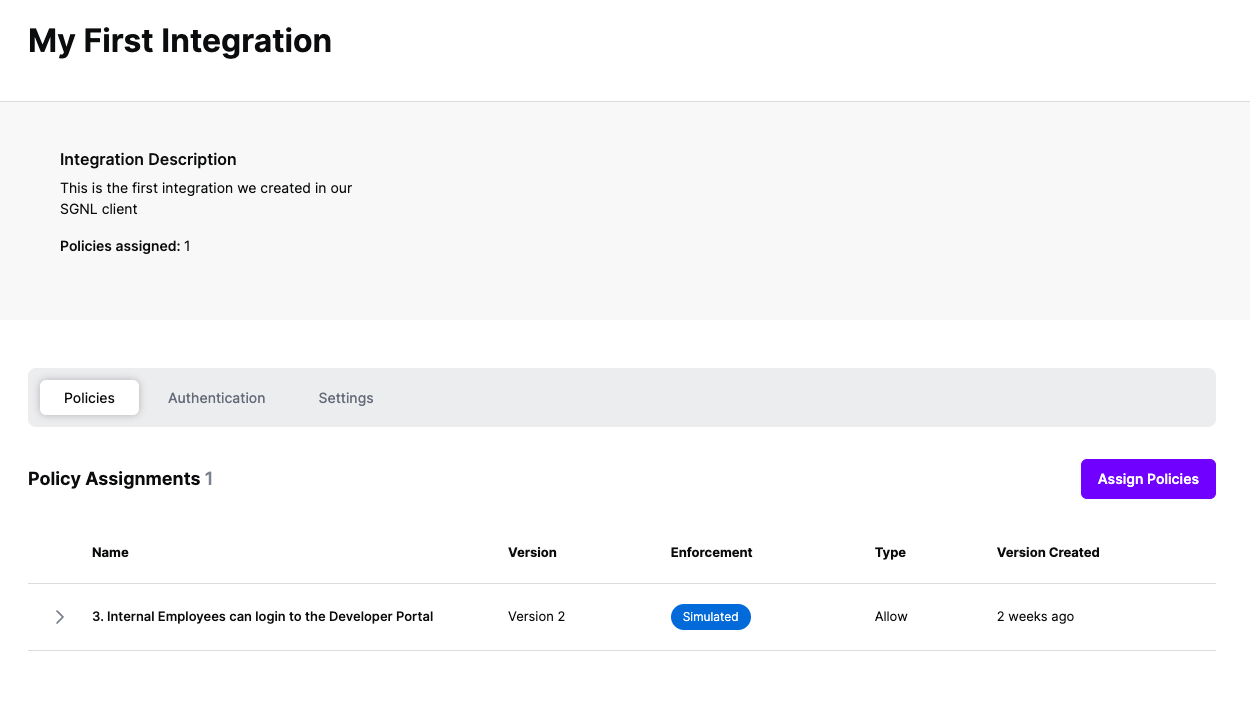
At this point, it’s likely that all decisions will either be Allow or Deny, based on the Default Decision you’ve selected for the Linux Integration - if that’s the case, you’re ready to start assigning policies to be applied to Linux
Once the Integration is created, you can start assigning versions of Policies to the integration - to get started, select Policies from the tabs in your newly created integration
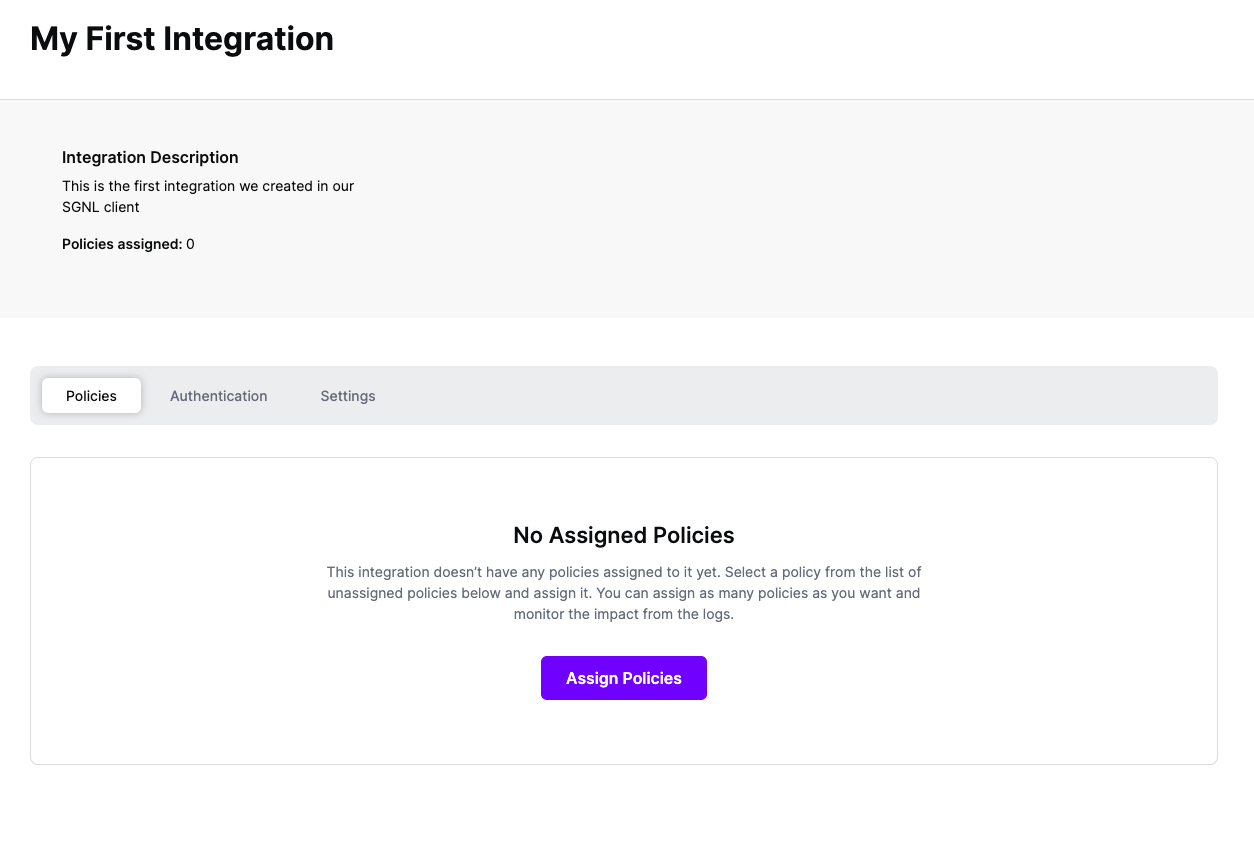
Select ‘Assign Policies’
Select:
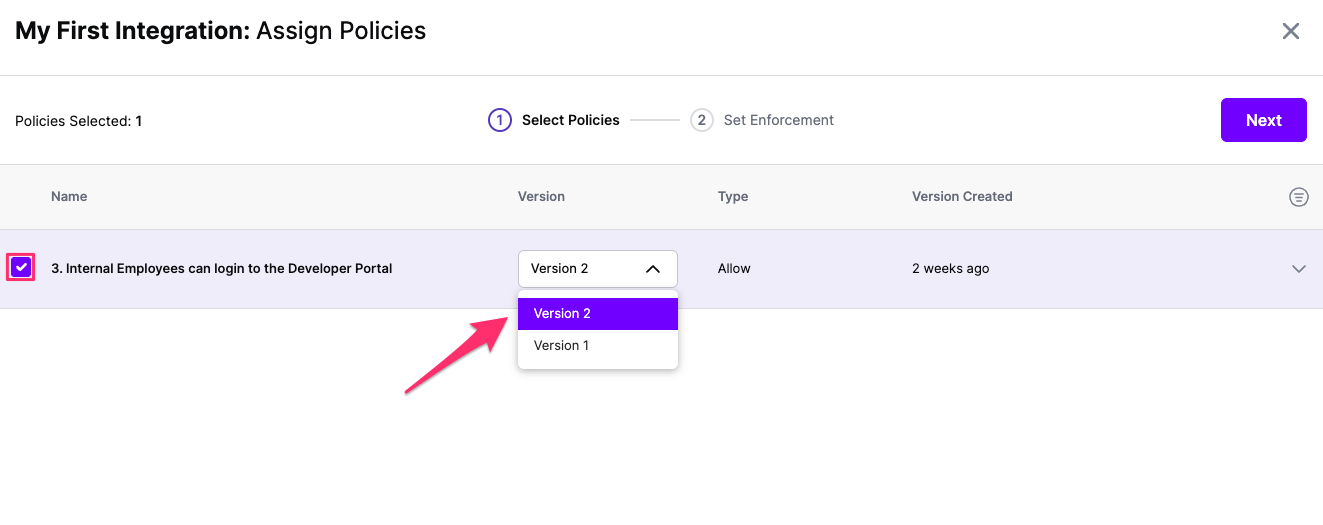
Click Next once you have the Policies and Versions configured as is appropriate
Select the Enforcement mode for the Policies you chose in the previous step
Simulated: Policy Versions that are being simulated will only log their access decision in the SGNL logs and will not impact the access decision that SGNL hands back to an integration. Simulated policies are useful for performing what-if analysis of new policy versions as well as debugging policy changes.
Note: It’s considered best practice to start with policies in Simulated mode, to verify that policies have been created an applied as expected
Enforced: Policy Versions that are being enforced will impact the access decisions that SGNL hands back to an integration. Enforced Policies will determine access for an integration
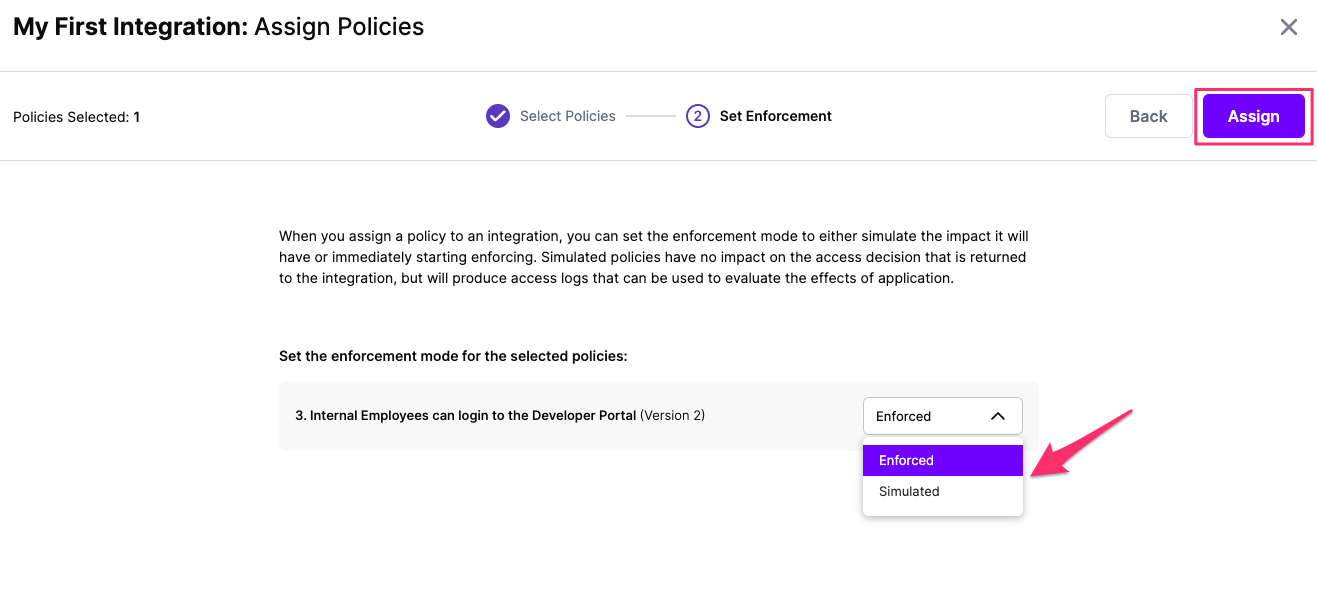
Select your desired Enforcement mode and select Assign
Versions of Policies will now be Assigned to your integration