Login to the Microsoft Azure Portal and launch the Entra ID Console
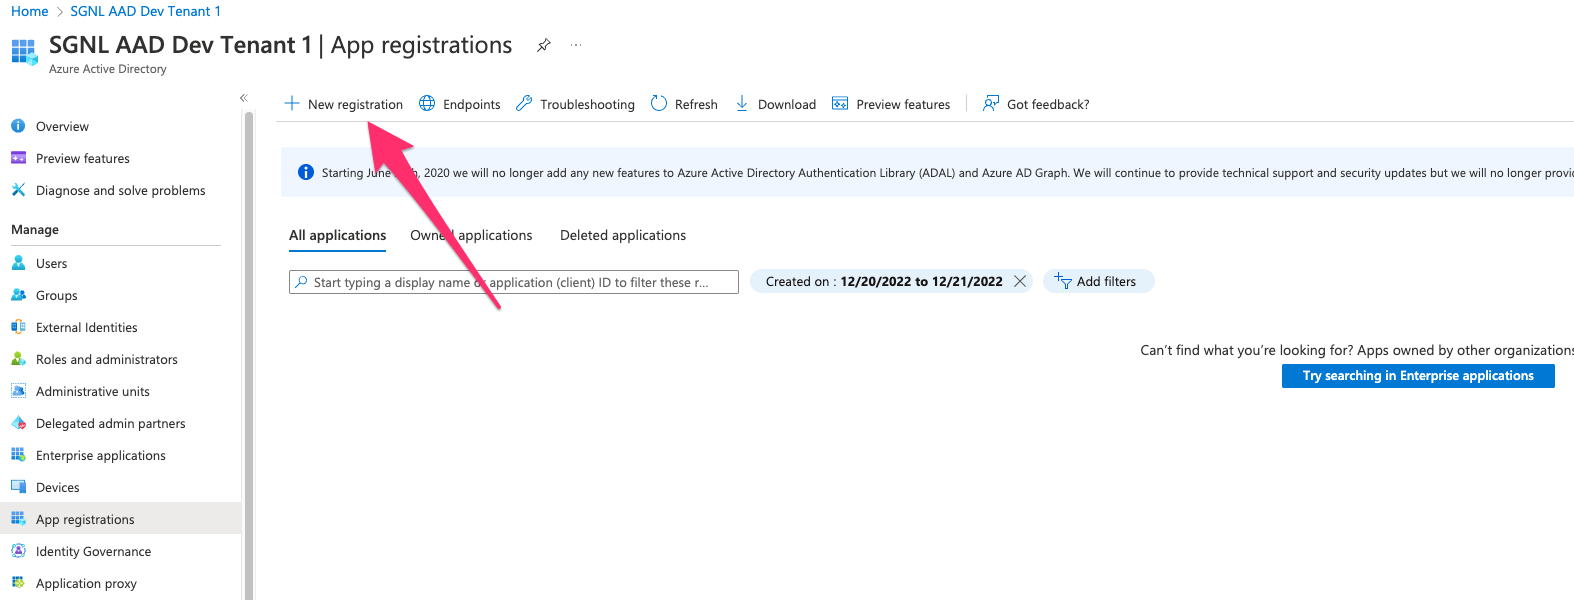
From the left navigation pane, select App Registrations
Create a New Registration
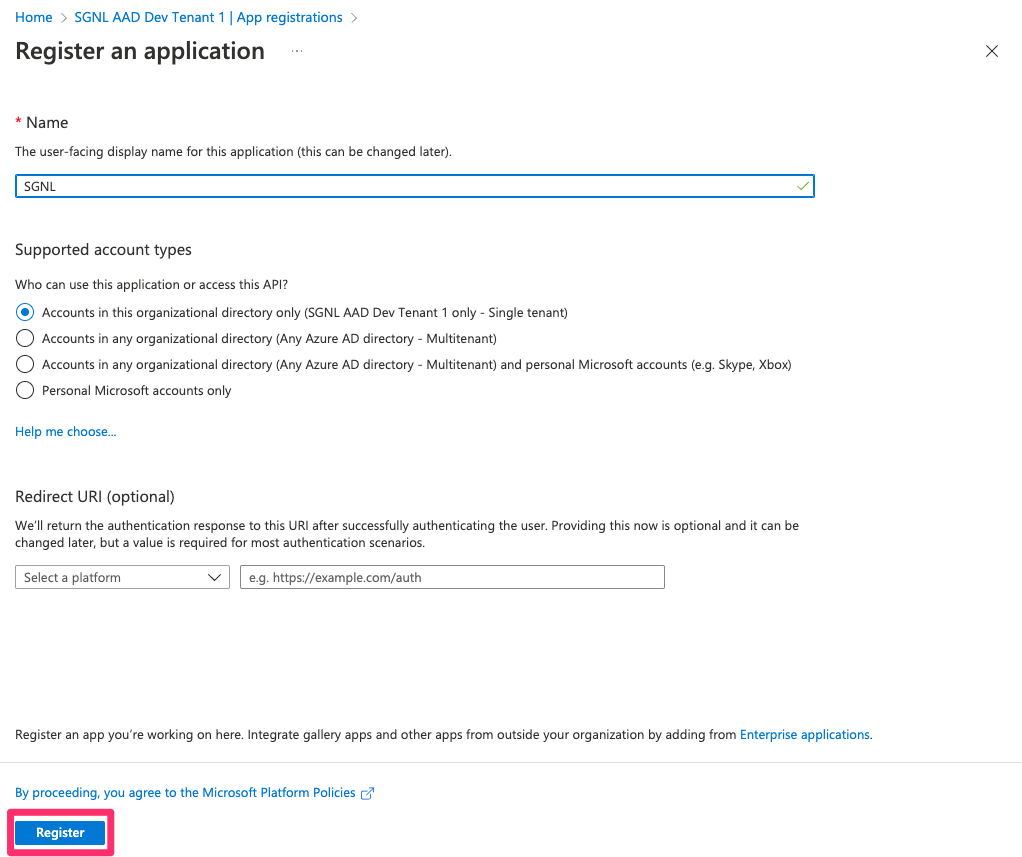
Specify a Name for the App and choose Register
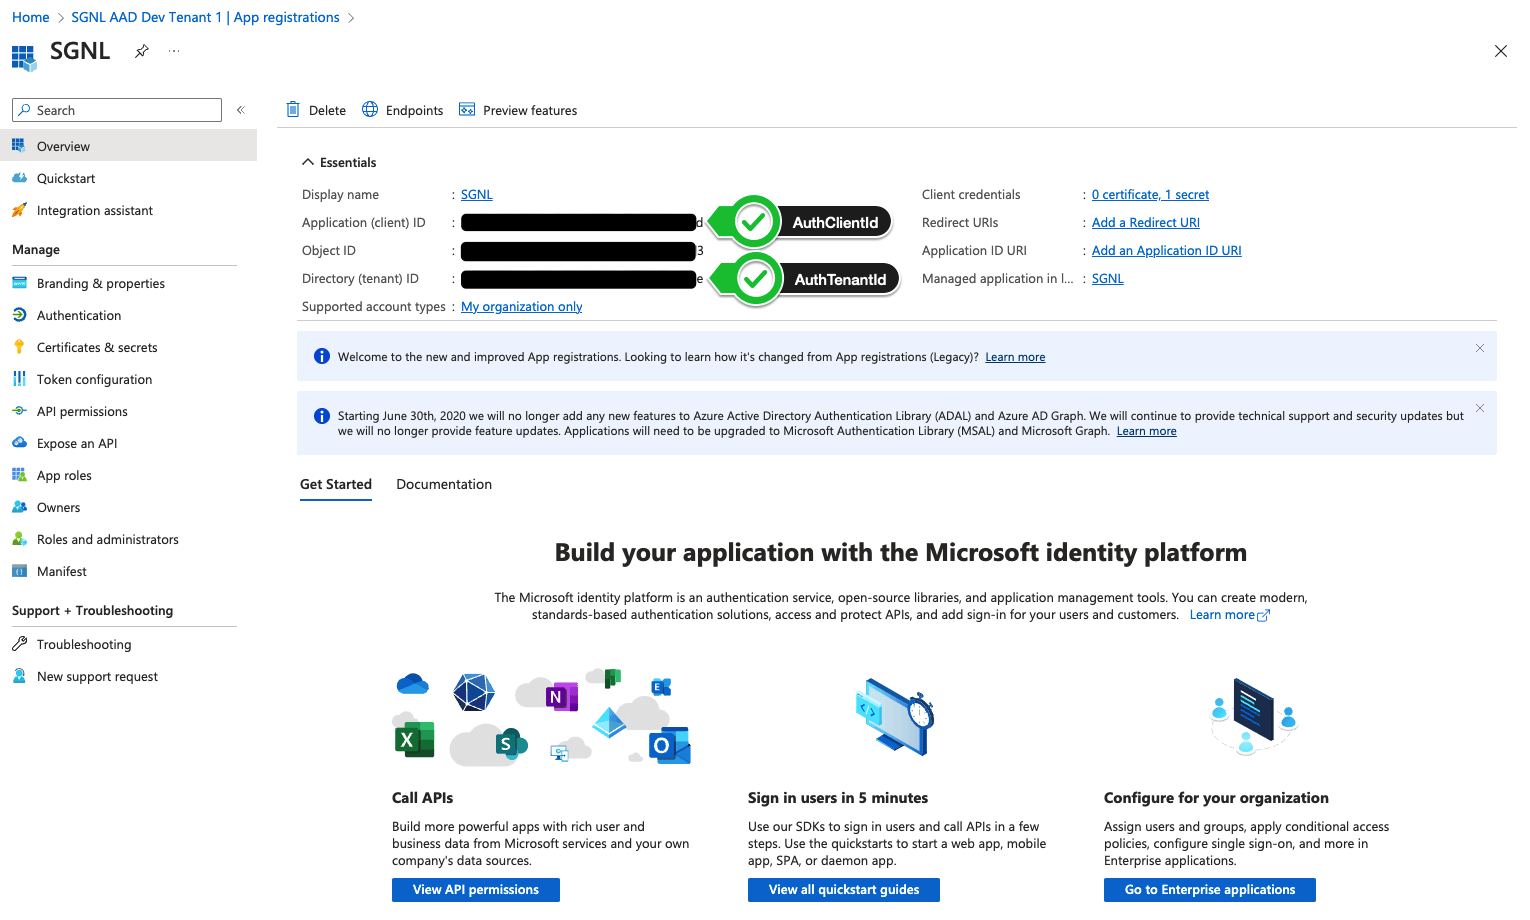
Within the App Registration, note the:
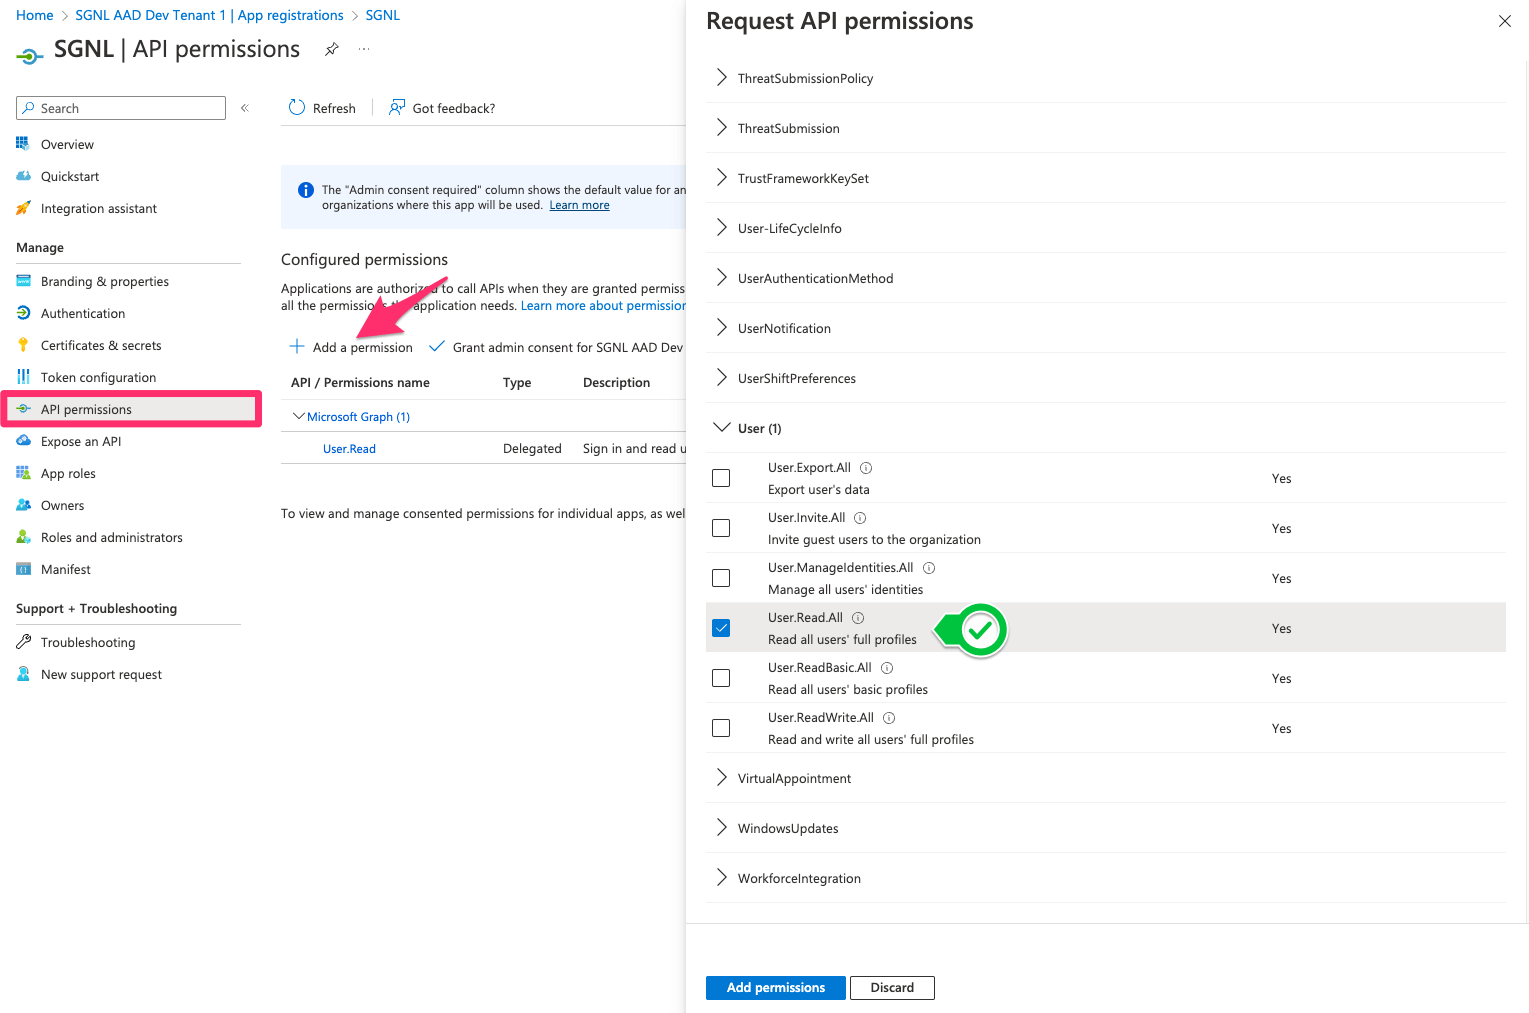
From the API permissions page in the left menu, choose to Add a permission
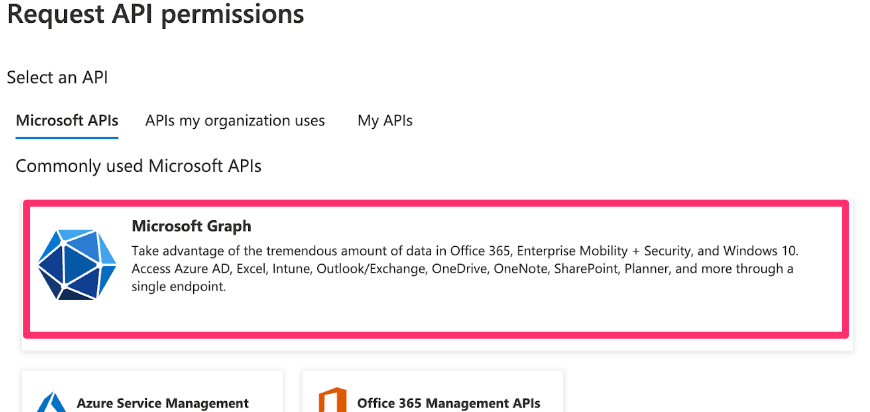
Select Microsoft Graph
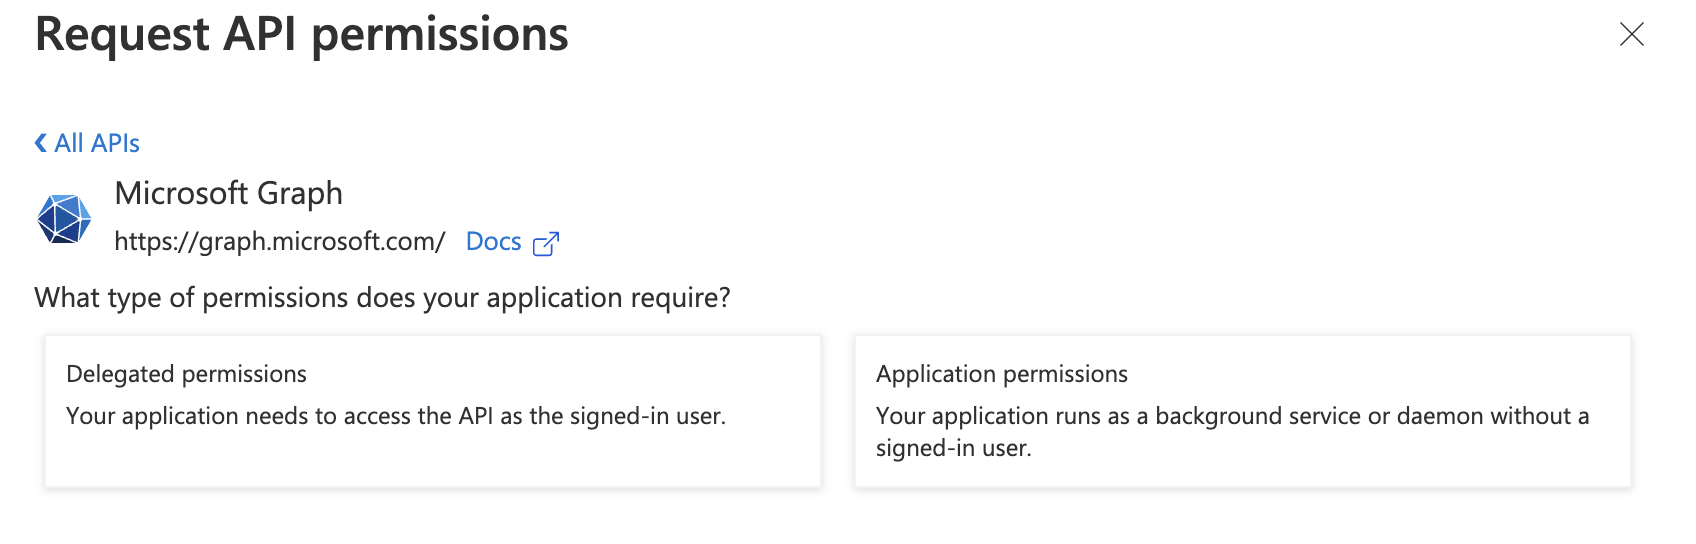
Select “Application Permissions”
Select the below and Add permissions:
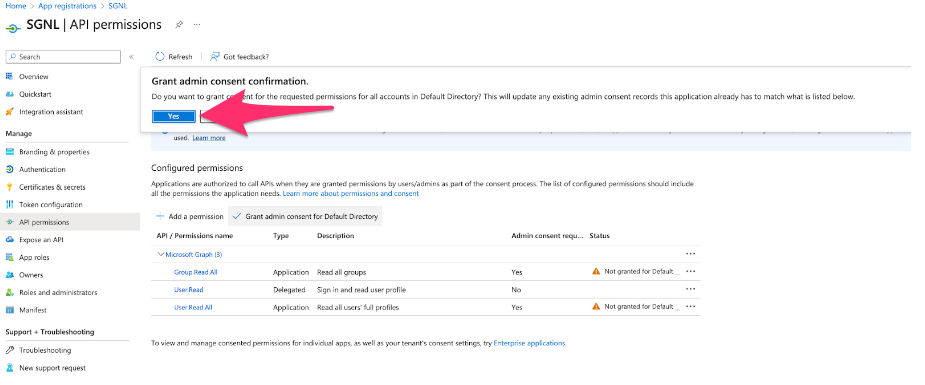
If asked to do so, grant “admin consent”
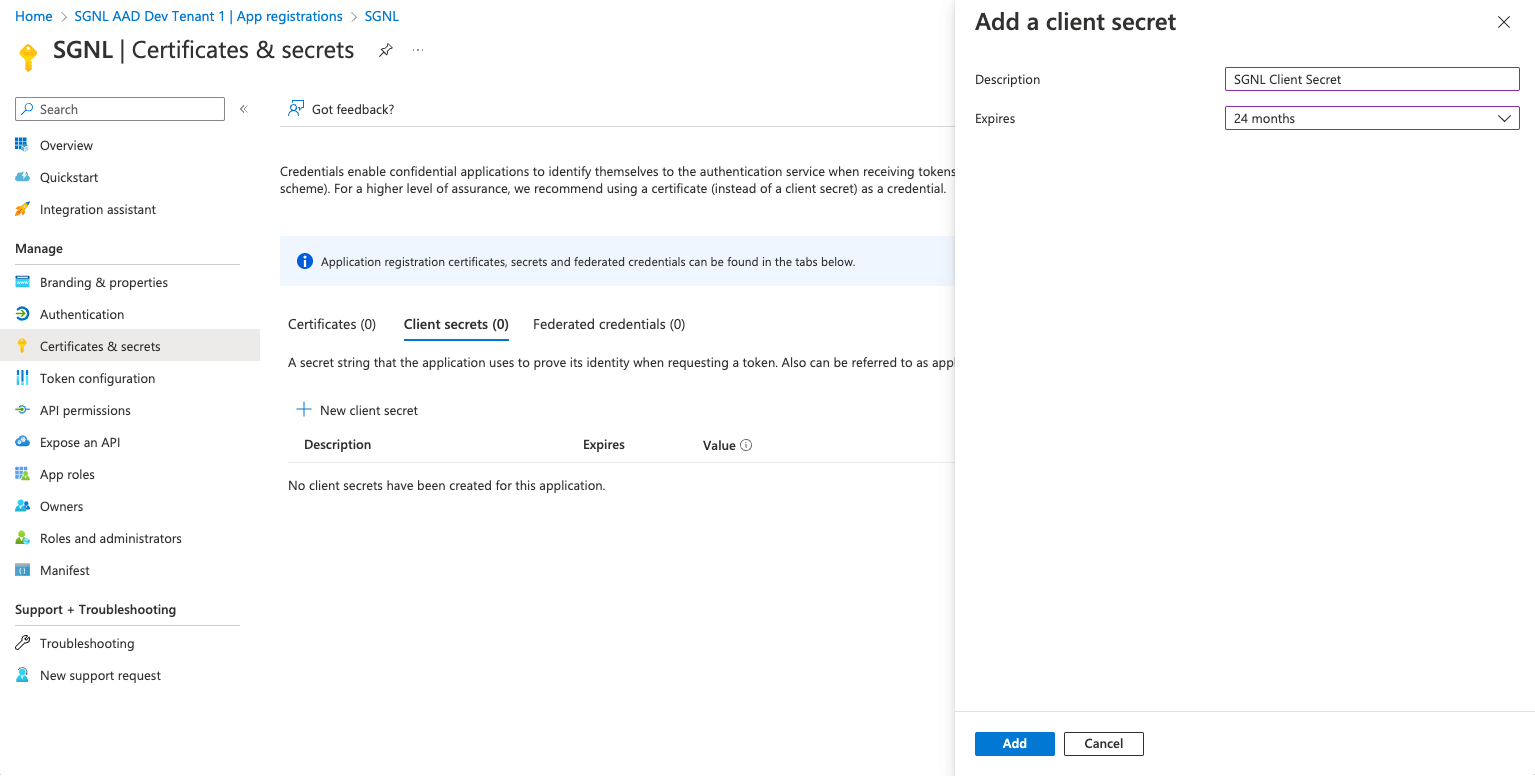
Select Certificates and Secrets from the left menu, select Client secrets, and + New Client Secret

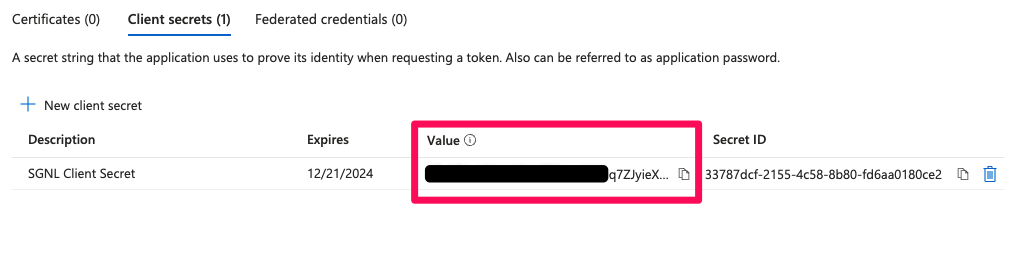
Give the secret a description and expiry (the length of time until a new secret will need to be generated for SGNL to communicate with Entra ID), and select Add
Copy the Value of the secret, this will be required for the SGNL Console (SGNL: AuthClientSecret)


In most cases, you will want to reduce the data coming from Entra ID to only the entities, attributes, and objects that you need to sucessfully evaluate your policies or take action within SGNL. Given that, it’s likely that you will want to make use of filters to reduce that data. Basic filters use Entra filtering syntax exactly as it is documented, without additional processing or intelligence in SGNL.
As with other SoRs, you can apply the native filtering syntax from the SoR, in this case Entra ID, to the Adapter Config for the System. Filters are configured per Entity and are passed directly to the System of Record at Synchronization time to be evaluated and have only the right data made available to SGNL.
Microsoft provides quality documentation and samples for their filtering syntax, but under the covers uses the odata specification which provides other useful examples.
To use Entra ID filters, simply add the appropriate filter (i.e. the text you would include after filter= on the Graph API) to the relevant entity in the Adapter config.
Sample Adapter Config
{
  "requestTimeoutSeconds": 10,
  "apiVersion": "v1.0",
  "applyFiltersToMembers": true,
  "filters": {
    "User": "department eq 'Product Management'",
    "Group": "id in ('1a902e2d-76ec-4341-b351-2ad18978ae2c','52e20194-dca1-489b-8ebc-c836d8ea871e')",
  }
}
Advanced Filters perform additional filtering by SGNL, beyond what can easily be achieved with Entra’s native capabilities. Advanced Filters add significant intelligence to SGNL’s adapters, enabling them to process complex queries based on properties like membership or association with a grouping of some sort.
Advanced Filters enable you to select a scope at the top-level, and filter the objects that are synchronized as a result.
Note The current iteration of Advanced Filters, enables SGNL Admins to specify one or more groups in order to synchronize the parent group and direct members of that group. You’re unable to use both filters and advancedFilters for the same set of Entra ID Entities. SGNL will produce a validation error if you attempt to configure advancedFilters for User, Group, or GroupMember objects that already have a filter configured.
For Entity Filters in Advanced Filters (scopeEntityFilter and memberEntityFilter), we still use the same set of Basic Filter syntax that is detailed in the Microsoft Documentation above.
Example 1 - Get all User Members of a single group
Say you want to synchronize only a single group (with an Entra ID identifier of 077834dc-7dd2-46c6-ab45-91188d4d409d), and whatever users might be a direct member of it with advanced filters:
{
  "requestTimeoutSeconds": 10,
  "apiVersion": "v1.0",
  "filters": {
    "GroupRequest": "status eq 'PendingApproval'"
  },
  "advancedFilters": {
    "getObjectsByScope": {
      "GroupMember": [
        {
          "scopeEntity": "Group",
          "scopeEntityFilter": "id in ('077834dc-7dd2-46c6-ab45-91188d4d409d')",
          "members": [
            {
              "memberEntity": "User"
            }
          ]
        }
      ]
    }
  }
}
In this example, we’re looking to get all the Members of this group by using the ‘GroupMember’ type of Advanced Filter. The entity to filter on is an ordinary Group object. We only want to bring in users here, which is our memberEntity but we should bring anyone is a member of the group with Id 077834dc-7dd2-46c6-ab45-91188d4d409d unfiltered.
It’s important to note here that Advanced Filters work right alongside the filters you’re already using, but for each type of entity, you should decide whether to use Basic or Advanced Filtering (e.g. You could filter GroupRequest objects with Basic Filters and Groups with Advanced Filters, but not Groups with both Basic and Advanced).
Example 2 - Get Members of Groups by Department and nested Groups
Let’s get a little more complex, say we want to get members of two groups, but we want only users specifically with the department ‘Engineering’ or ‘IT/IS’, and we also want to synchronize a regional group that might be a member of the top-level groups, based on its displayName:
{
  "requestTimeoutSeconds": 10,
  "apiVersion": "v1.0",
  "filters": {
    "GroupRequest": "status eq 'PendingApproval'"
  },
  "advancedFilters": {
    "getObjectsByScope": {
      "GroupMember": [
        {
          "scopeEntity": "Group",
          "scopeEntityFilter": "id in ('077834dc-7dd2-46c6-ab45-91188d4d409d', '63321711-8a80-4964-8d83-04e8db6762f3')",
          "members": [
            {
              "memberEntity": "User",
              "memberEntityFilter": "department eq 'IT/IS'"
            },
            {
              "memberEntity": "User",
              "memberEntityFilter": "department eq 'Engineering'"
            },
            {
              "memberEntity": "Group",
              "memberEntityFilter": "startswith(displayName, 'North America')"
            }
          ]
        }
      ]
    }
  }
}
From this filter, I’d expect at least two groups in SGNL, those represented by ‘077834dc-7dd2-46c6-ab45-91188d4d409d’ and ‘63321711-8a80-4964-8d83-04e8db6762f3’. If there was one or more groups with a Display Name that started with ‘North America’ those Groups would sync too. We’d also expect users to come into SGNL, where they had a matching department of Engineering or IT/IS.
We would not sync any of the members of the North America group(s) as a result of this filter.
Example 3 - Get Members of Nested Groups
Let’s take the example above one step further and decide that we also want to get the members of the nested group. We’ll be a little more specific this time and declare the exact nested group we want to sync.
{
  "requestTimeoutSeconds": 10,
  "apiVersion": "v1.0",
  "filters": {
    "GroupRequest": "status eq 'PendingApproval'"
  },
  "advancedFilters": {
    "getObjectsByScope": {
      "GroupMember": [
        {
          "scopeEntity": "Group",
          "scopeEntityFilter": "id in ('077834dc-7dd2-46c6-ab45-91188d4d409d', '63321711-8a80-4964-8d83-04e8db6762f3')",
          "members": [
            {
              "memberEntity": "User",
              "memberEntityFilter": "department eq 'IT/IS'"
            },
            {
              "memberEntity": "User",
              "memberEntityFilter": "department eq 'Engineering'"
            },
            {
              "memberEntity": "Group",
              "memberEntityFilter": "id in ('143834dc-7dd2-46c6-ca11-66688d4d744d')"
            }
          ]
        },
        {
          "scopeEntity": "Group",
          "scopeEntityFilter": "id in ('143834dc-7dd2-46c6-ca11-66688d4d744d')",
          "members": [
            {
              "memberEntity": "User"
            }
          ]
        }
      ]
    }
  }
}
In the above filter, we’d get the same data as we did in Example 2, but with the addition of group ‘143834dc-7dd2-46c6-ca11-66688d4d744d’. We’d also get all User members of that group (without filters).
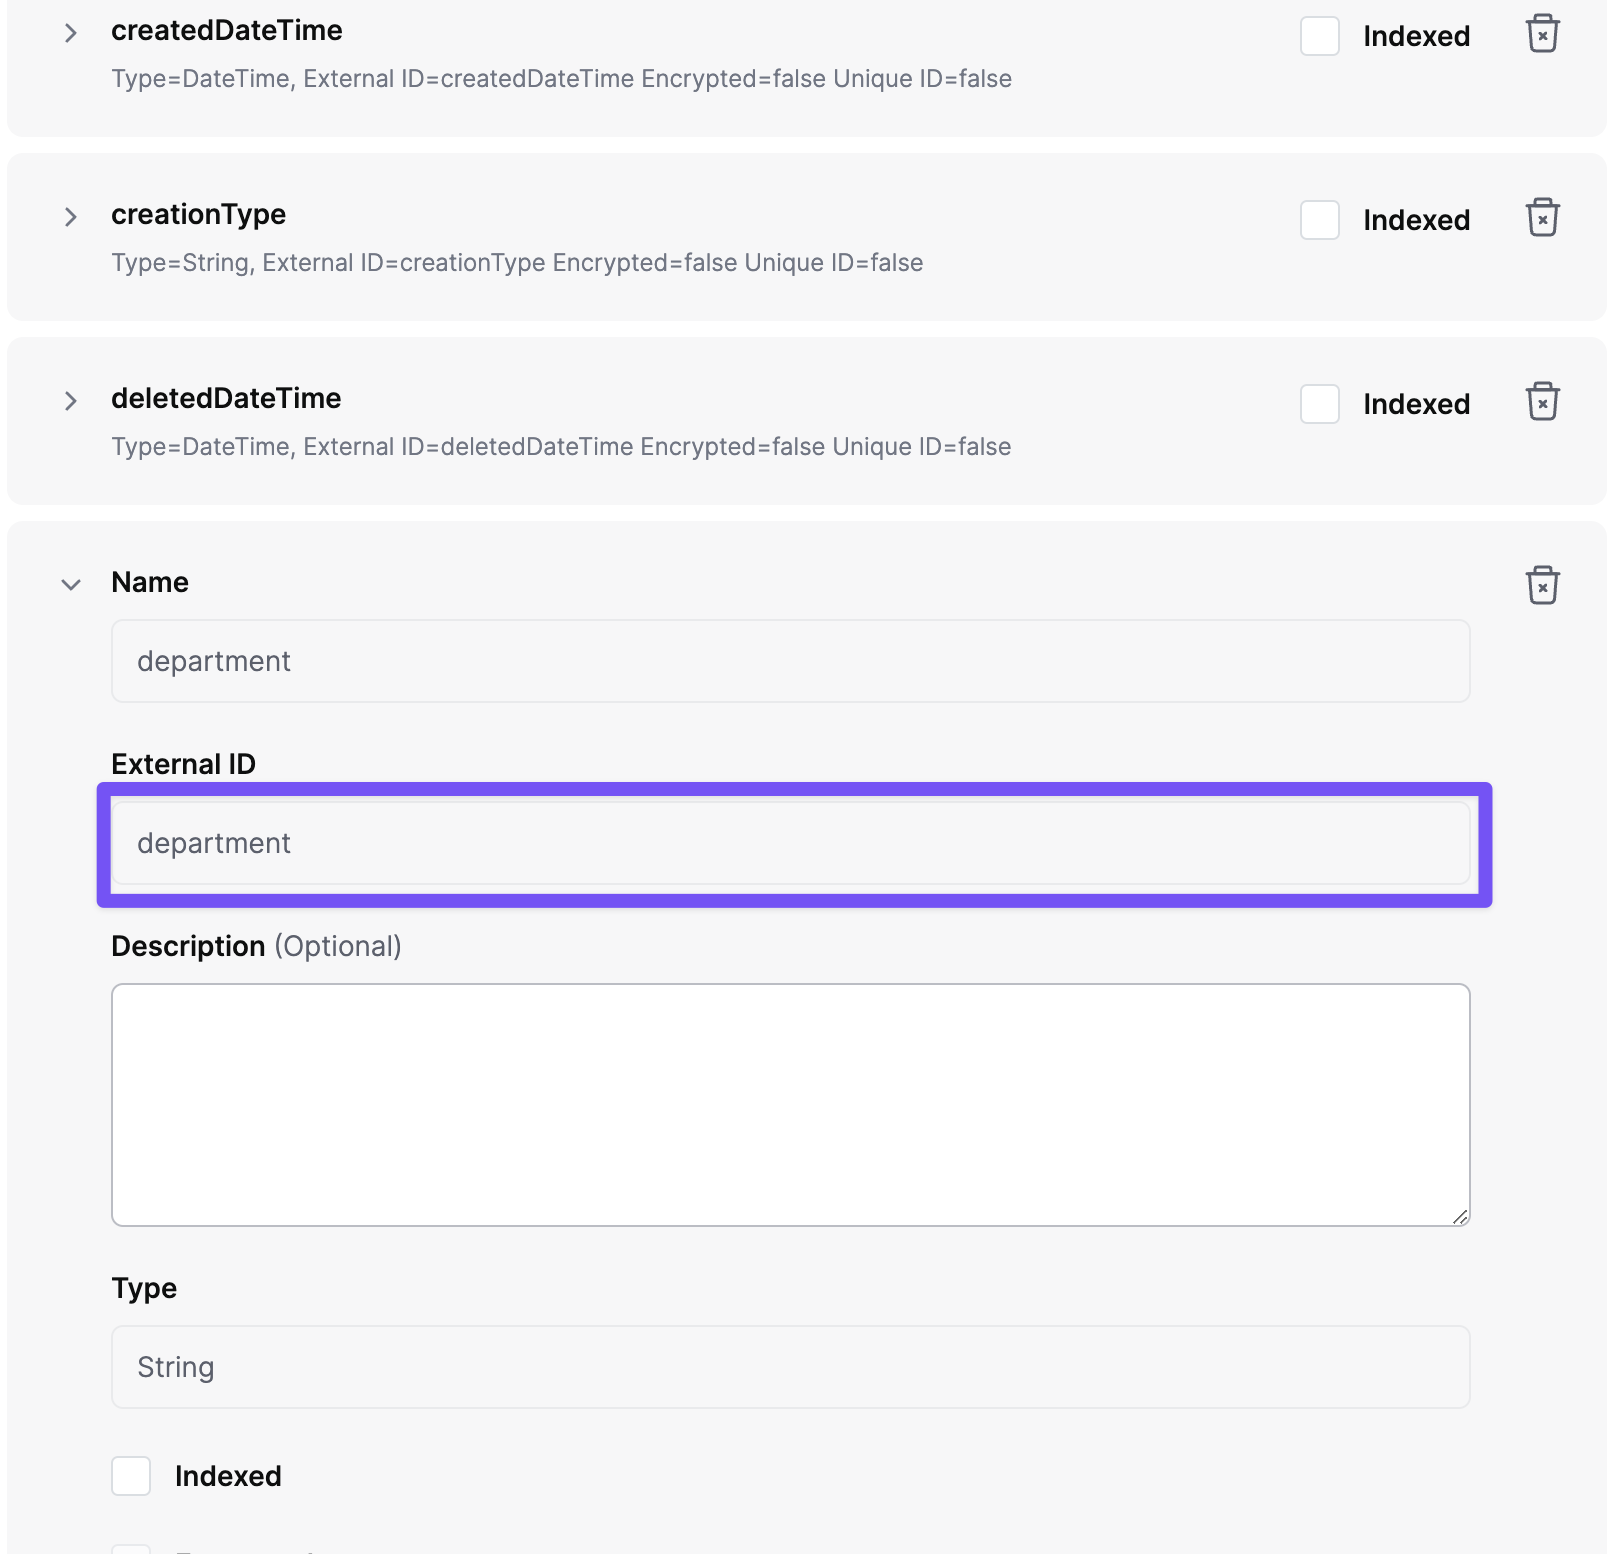
10"v1.0"Group entity to GroupMember entities, default trueExternalId of each of the Entities in SGNL, available from the SoR -> Entities -> Entity Page (e.g. User), and the externalId of each of the attributes that you want to filter