Login to the Curity Admin Web Service and browse to the Token Service Profile
Select Clients from the left navigation pane and create a New Client
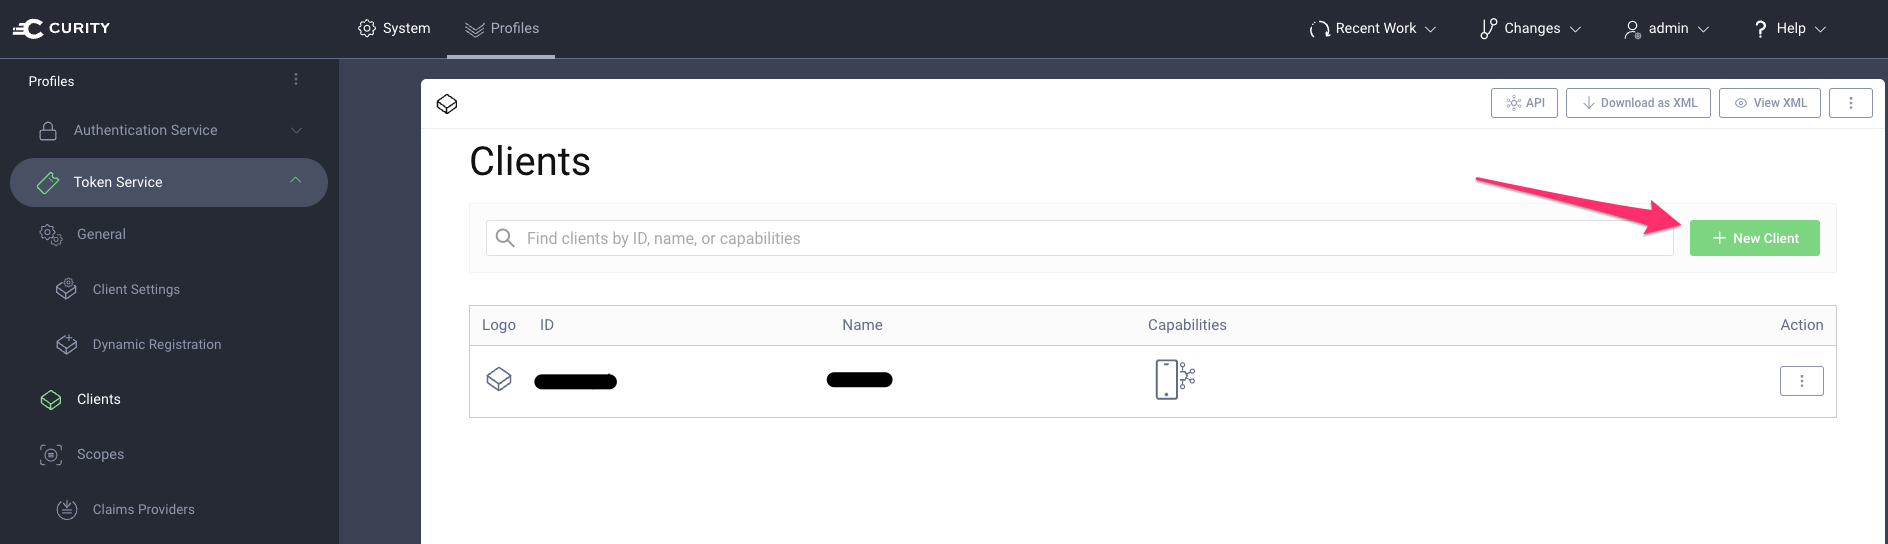
Enter a new Client ID and select Ok
- Note: securely store this value, you’ll need it for configuring SGNL
Add a ‘Capability’ to your new Client to support Client Credentials
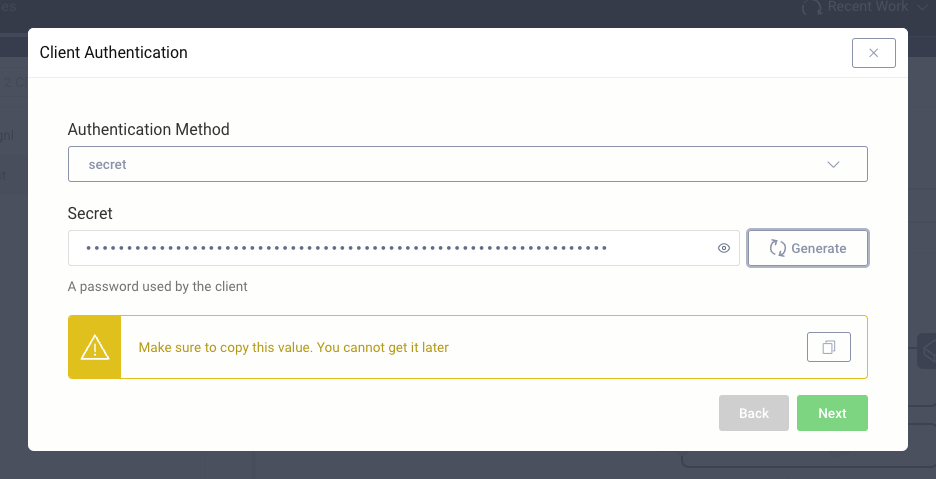
Select the ‘secret’ authentication method and generate a secure Client Secret
- Note: securely store this value, you’ll need it for configuring SGNL
Within ‘Scope and Claims’ select the read scope, or some other predefined scope that can read all necessary user attributes from your Curity instance
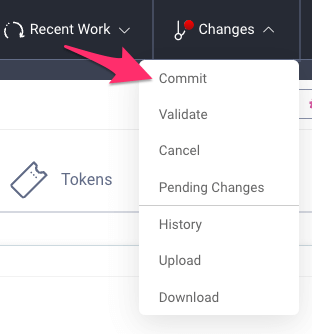
Apply your Changes by selecting ‘Commit’
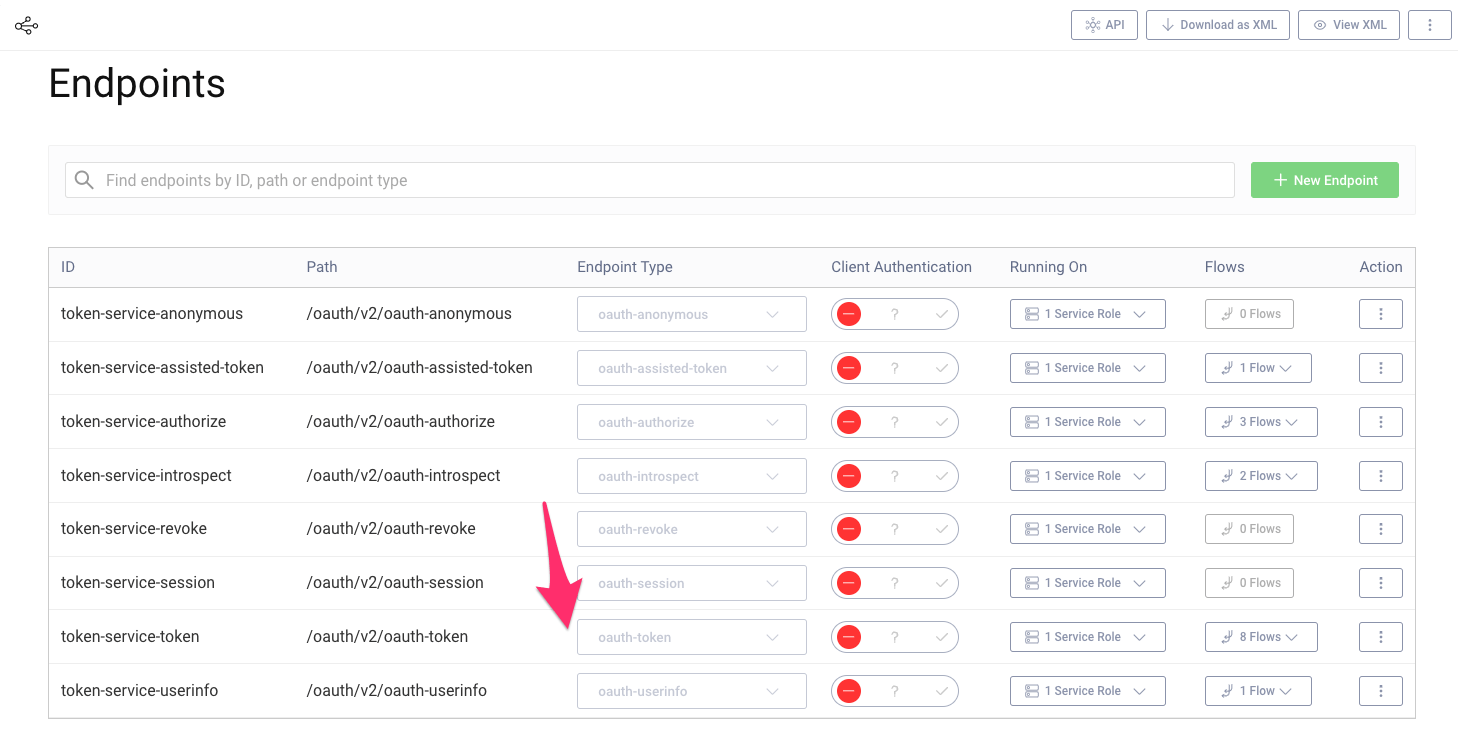
From the left navigation menu, select Endpoints from within Token Service and take note of the oauth-token endpoint path (in the default case /oauth/v2/oauth-token)
- Note: take note of this path, you’ll need it for configuring SGNL
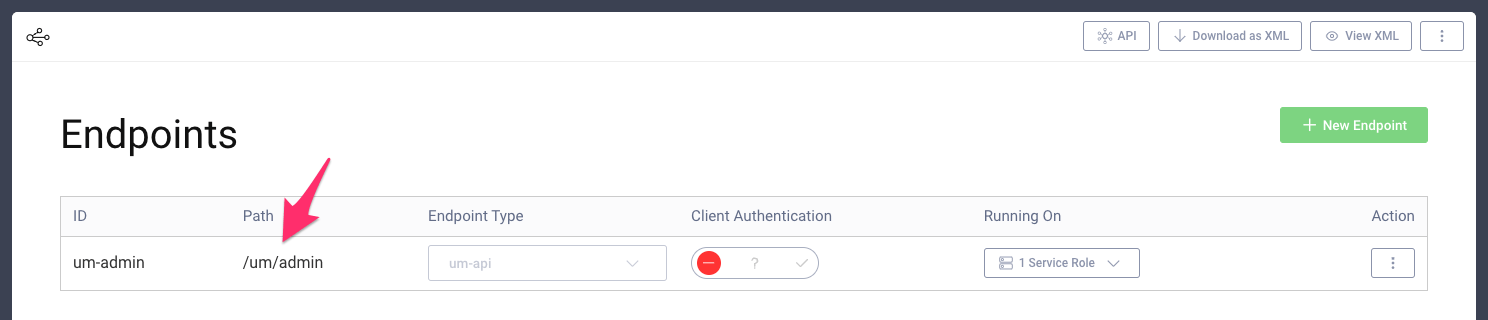
From the left navigation menu, select Endpoints from within User Management and take note of the um-api endpoint path (in the below case /um/admin)
- Note: take note of this path, you’ll need it for configuring SGNL
Finally, from the Curity Admin Web Service, browse to System settings and note the Base URL for the Curity Service
- Note: You’ll need this for completing configuration in SGNL

Login to the SGNL Console
From the left menu, select Identity Data Fabric
Add a New System of Record and select Curity
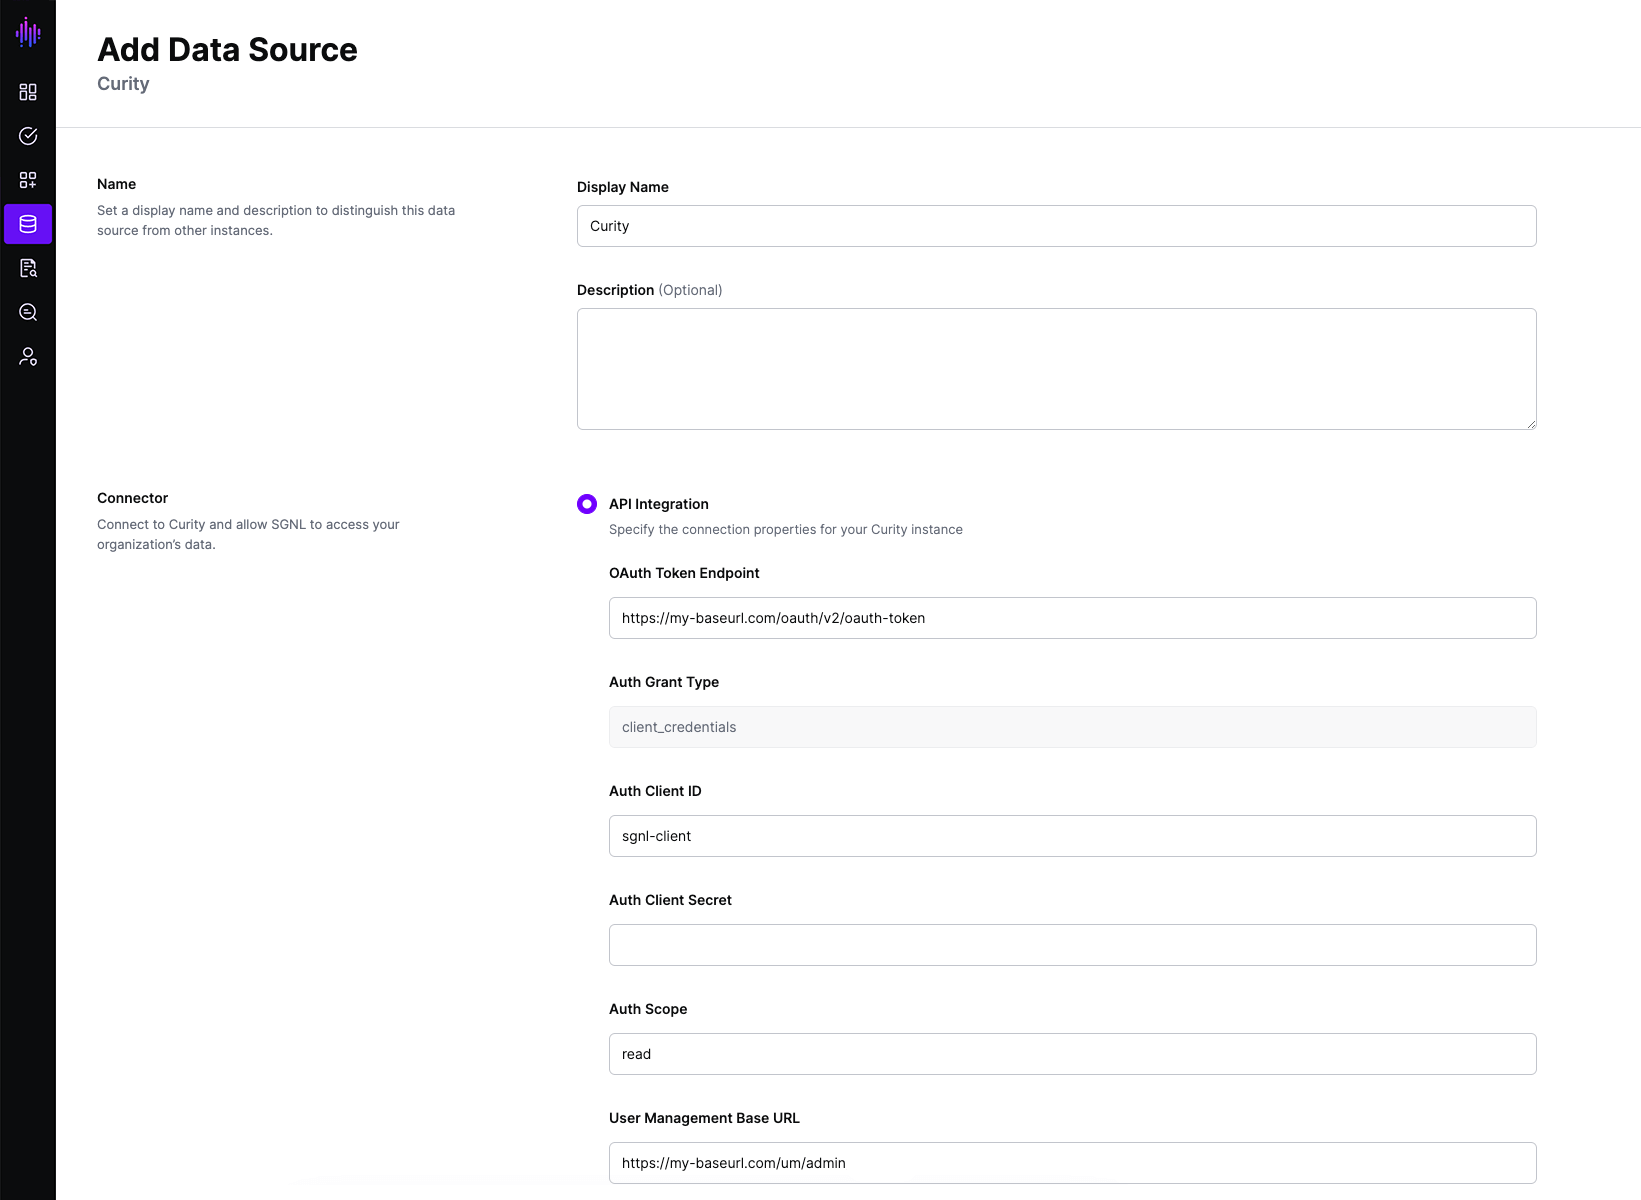
Enter the following data into SGNL:
- OAuth Token Endpoint: Using the Base URL you copied above, and the oAuth token endpoint, construct the OAuth Token Endpoint, this should look something like:
- Auth Client ID: This is the Client ID you created in Curity above
- Auth Client Secret: The Client Secret you created when you configured the above Client ID
- Auth Scope: The scope you assigned to the SGNL Client, by default, ‘read’
- User Management Base URL: Using the Base URL you copied above and the User Management endpoint, construct the user management endpoint by concatenating the two, this should look something like
Once configured, click Continue to save your System of Record and move on to configuring Entities
From the Entities tab, click on ‘Edit Attributes’ to select the entities and attributes you will need synchronized into SGNL to be used in your specified SGNL policies
- Refer to Curity’s documentation for the SCIM API reference for Curity entities: User
- E.g. If you want to create a policy that Curity Users of Role: Admin and with active: true are allowed to access certain assets, you will need to select the following attributes from the Curity User entity: Role, active in addition to principal identifiers such as emails__value or id
(If applicable) If you will be synchronizing entities and attributes from 2+ different Systems of Record into SGNL to define policies, click on Add join rule to specify the attribute(s) that will join the entities you’ve configured to synchronize from Curity to other entities in the SGNL Graph
- You only have to specify a join rule from one System of Record. For instance, if you specify a join rule between Curity Users and Azure Active Directory Users, you only need to configure the relationship from either the Curity or Azure Active Directory System of Record
- E.g. If User Employee IDs are found in Curity and your HRIS system and are consistent, you can choose the Employee ID Attribute in this Curity Instance and the Employee ID Attribute in your HRIS System of Record to join these entities together
- Join rules should only be used for entities that represent the same object across 2+ different Systems of Record. For instance, if a User in Curity represents the same User as one in Azure Active Directory, it is a good candidate for a join rule
- However, a User in Azure Active Directory and a Group in ServiceNow represent different objects and are therefore not good candidates for join rules, and instead should have custom relationships created via the Relationships API. Additionally, if a User in Azure Active Directory is not the same User as one in ServiceNow, it is not a good candidate for a join rule
Save the Configuration
Once ingestion is complete and Curity data is in the SGNL graph, you can use Data Lens to explore the SGNL graph.