Login to the SGNL Console
From the left menu, select Identity Data Fabric
Click “Add System of Record” or “Add”.
The SGNL SoR Catalog will show up on the screen
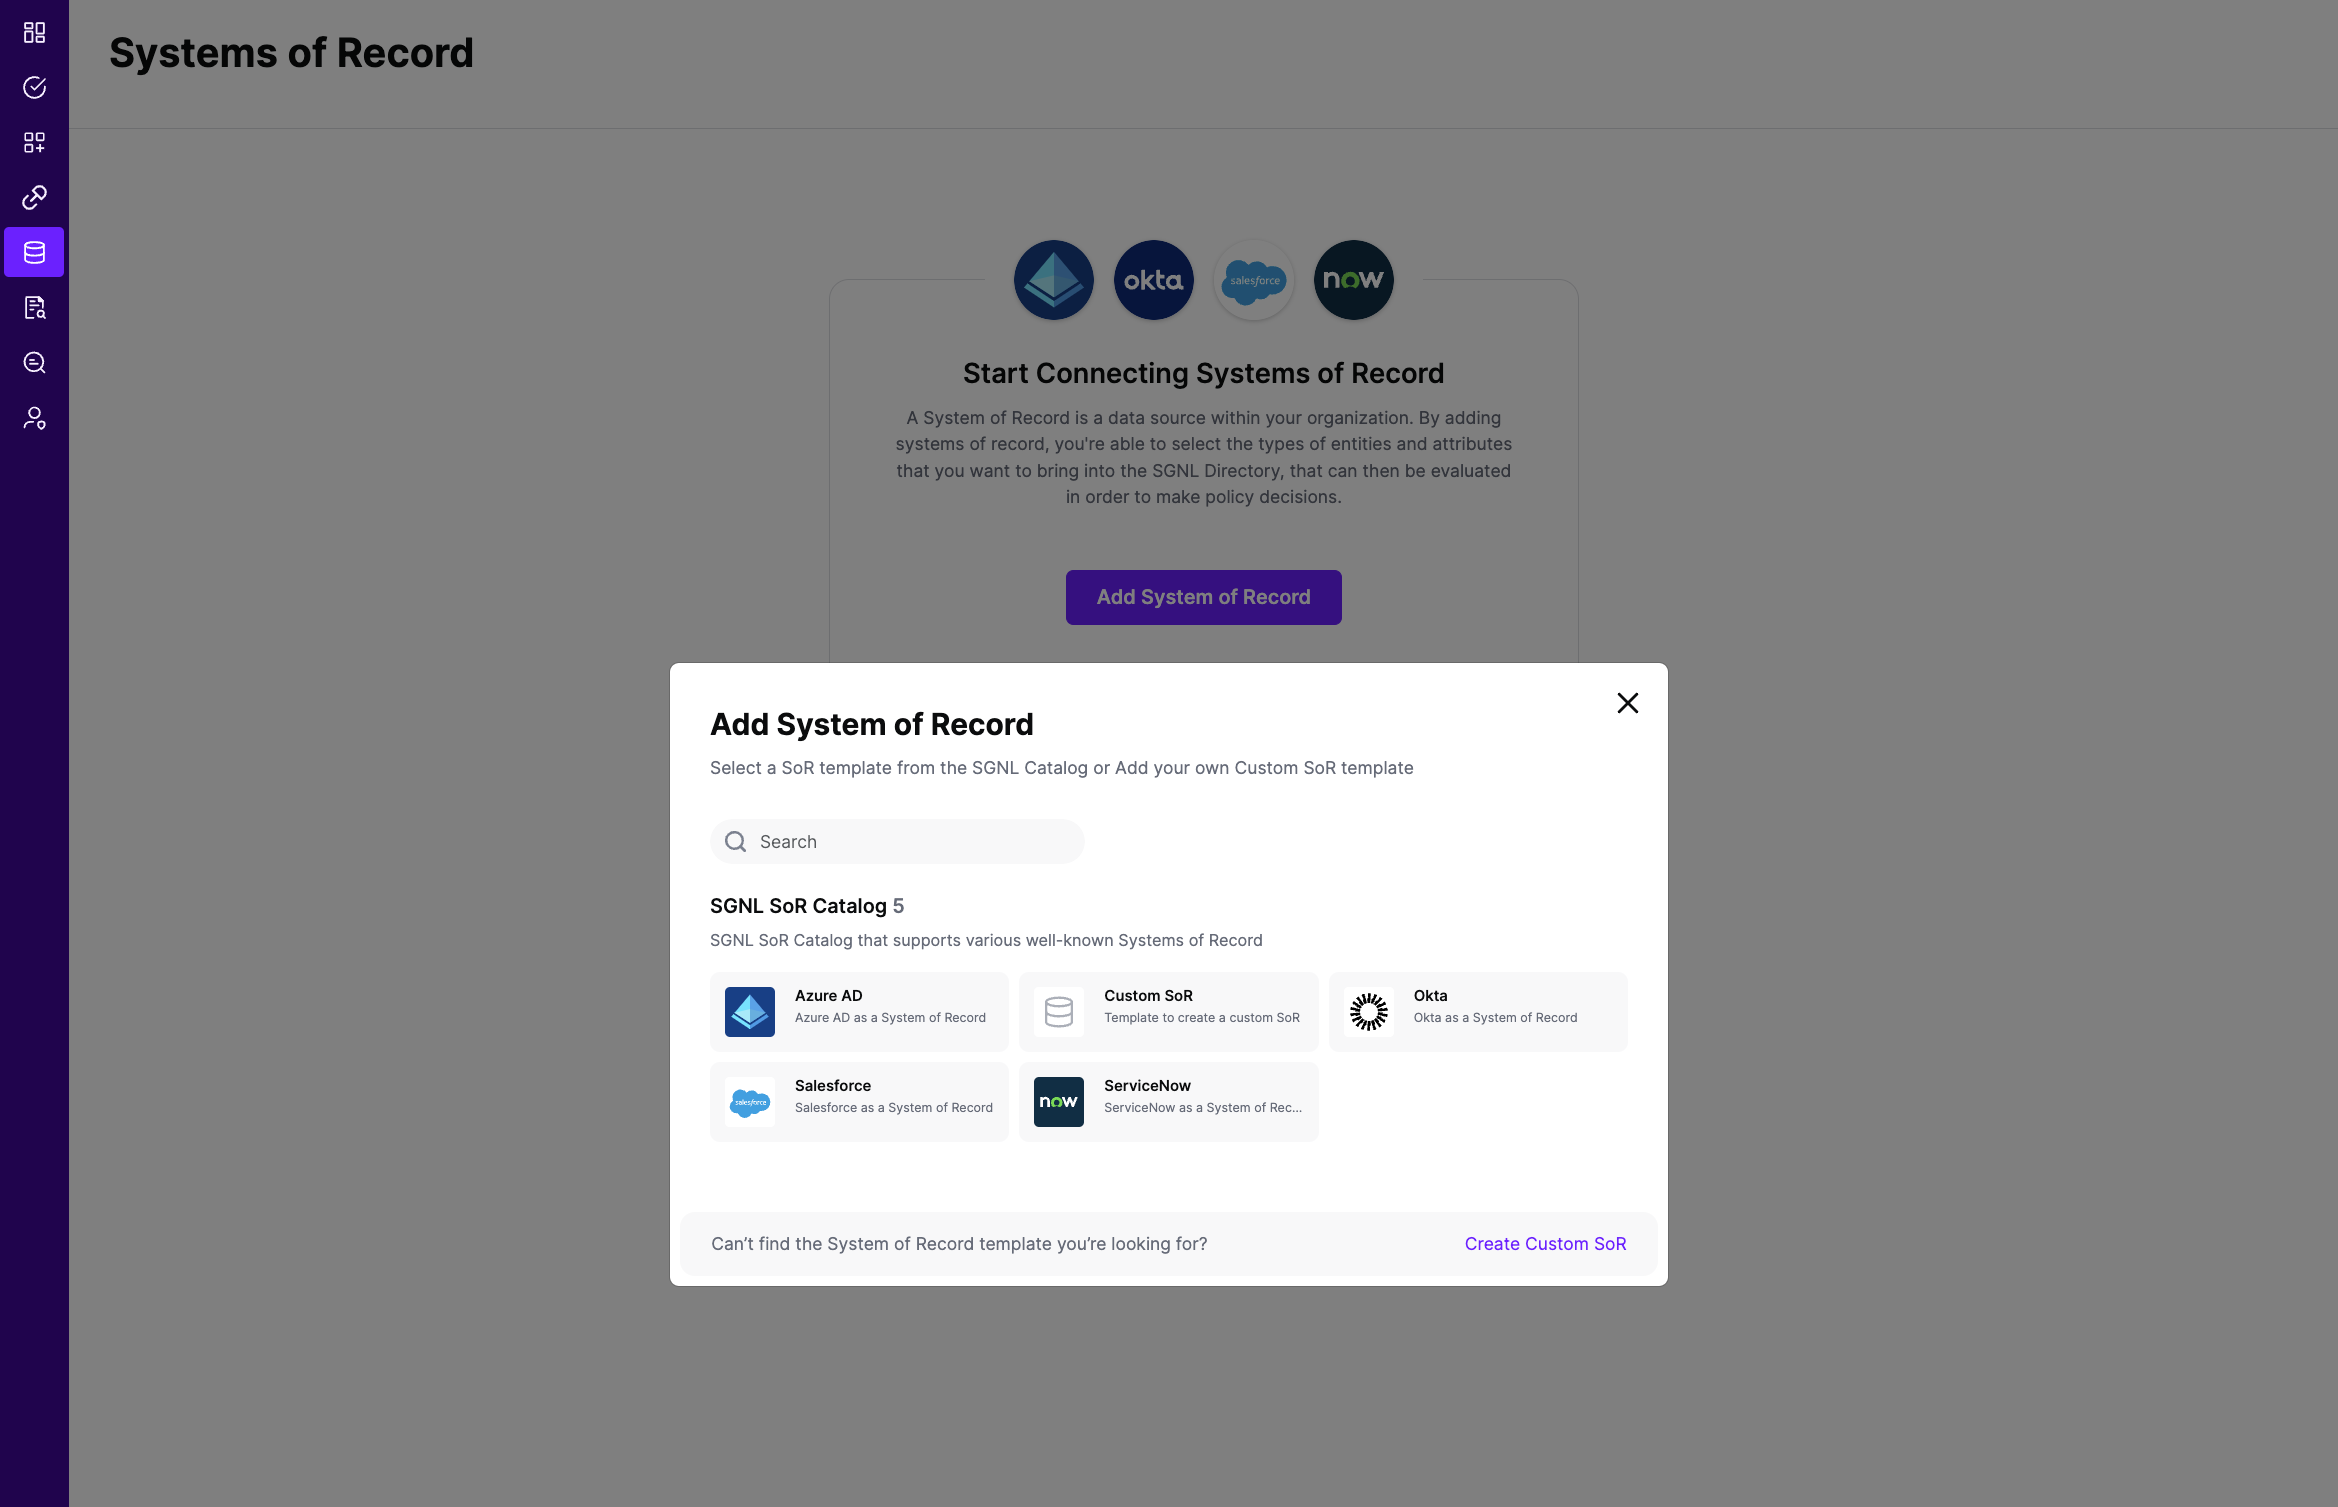
Click on “Okta” which will open up the New System of Record screen with some configuration options pre-populated from the Okta SoR template.

Choose the correct adapter that matches the Okta System of Record Type.
Select the Authentication Method - SGNL recommends using OAuth2 Authentication using an Okta API Service Integration
Replace all fields that have the {{Input Required:}} placeholder with relevant information. The following fields are required: Okta Domain: Enter the domain you use to login to Okta. Generally, this takes the form of https://acmecorp.okta.com
If you are using OAuth2 authentication for the API Service Integration
If you are using OpenID Connect with Authorization Code Flow
If you are using an API key, choose Bearer as the Authentication Method, and enter:
Click “Continue” to save your Okta System of Record. You will be taken to the Okta System of Record page.
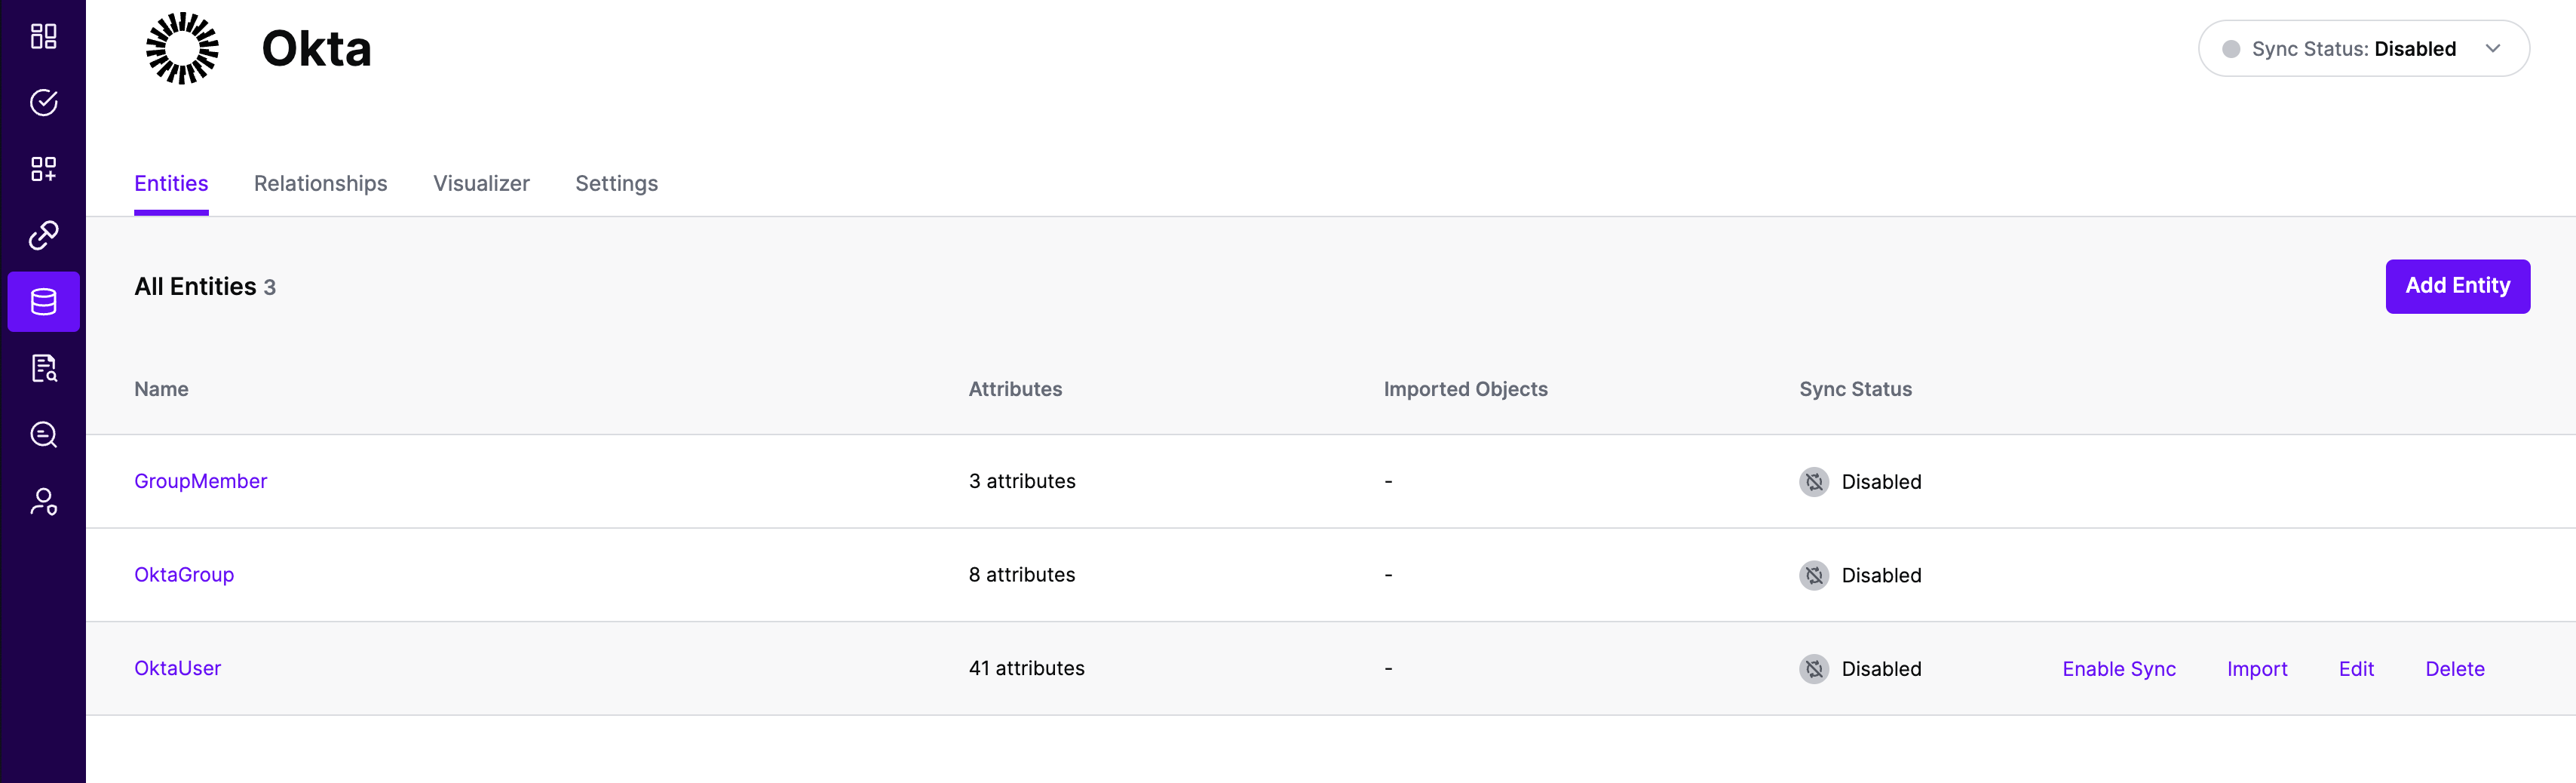
All entities and relationships are created as defined in the Okta template. If applicable, you can edit an entity and modify any properties of the entity or the associated attributes. Hover over the entity on the screen above to see the Edit button as shown above.
You can check the relationships created through the Relationships tab. However, relationships cannot be modified. You will need to delete an existing one, and create a new relationship.
(If applicable) You can also create relationships joining entities and attributes in Okta to entities and attributes in other Systems of Record configured in SGNL. For example, if User Employee Numbers in your ServiceNow instance are consistent with the User Employee Numbers in your HRIS system, you can create a relationship between the Employee Number attribute in the Okta instance and the Employee Number attribute in your HRIS System of Record. For more information on relationships, please refer to our Relationships page.
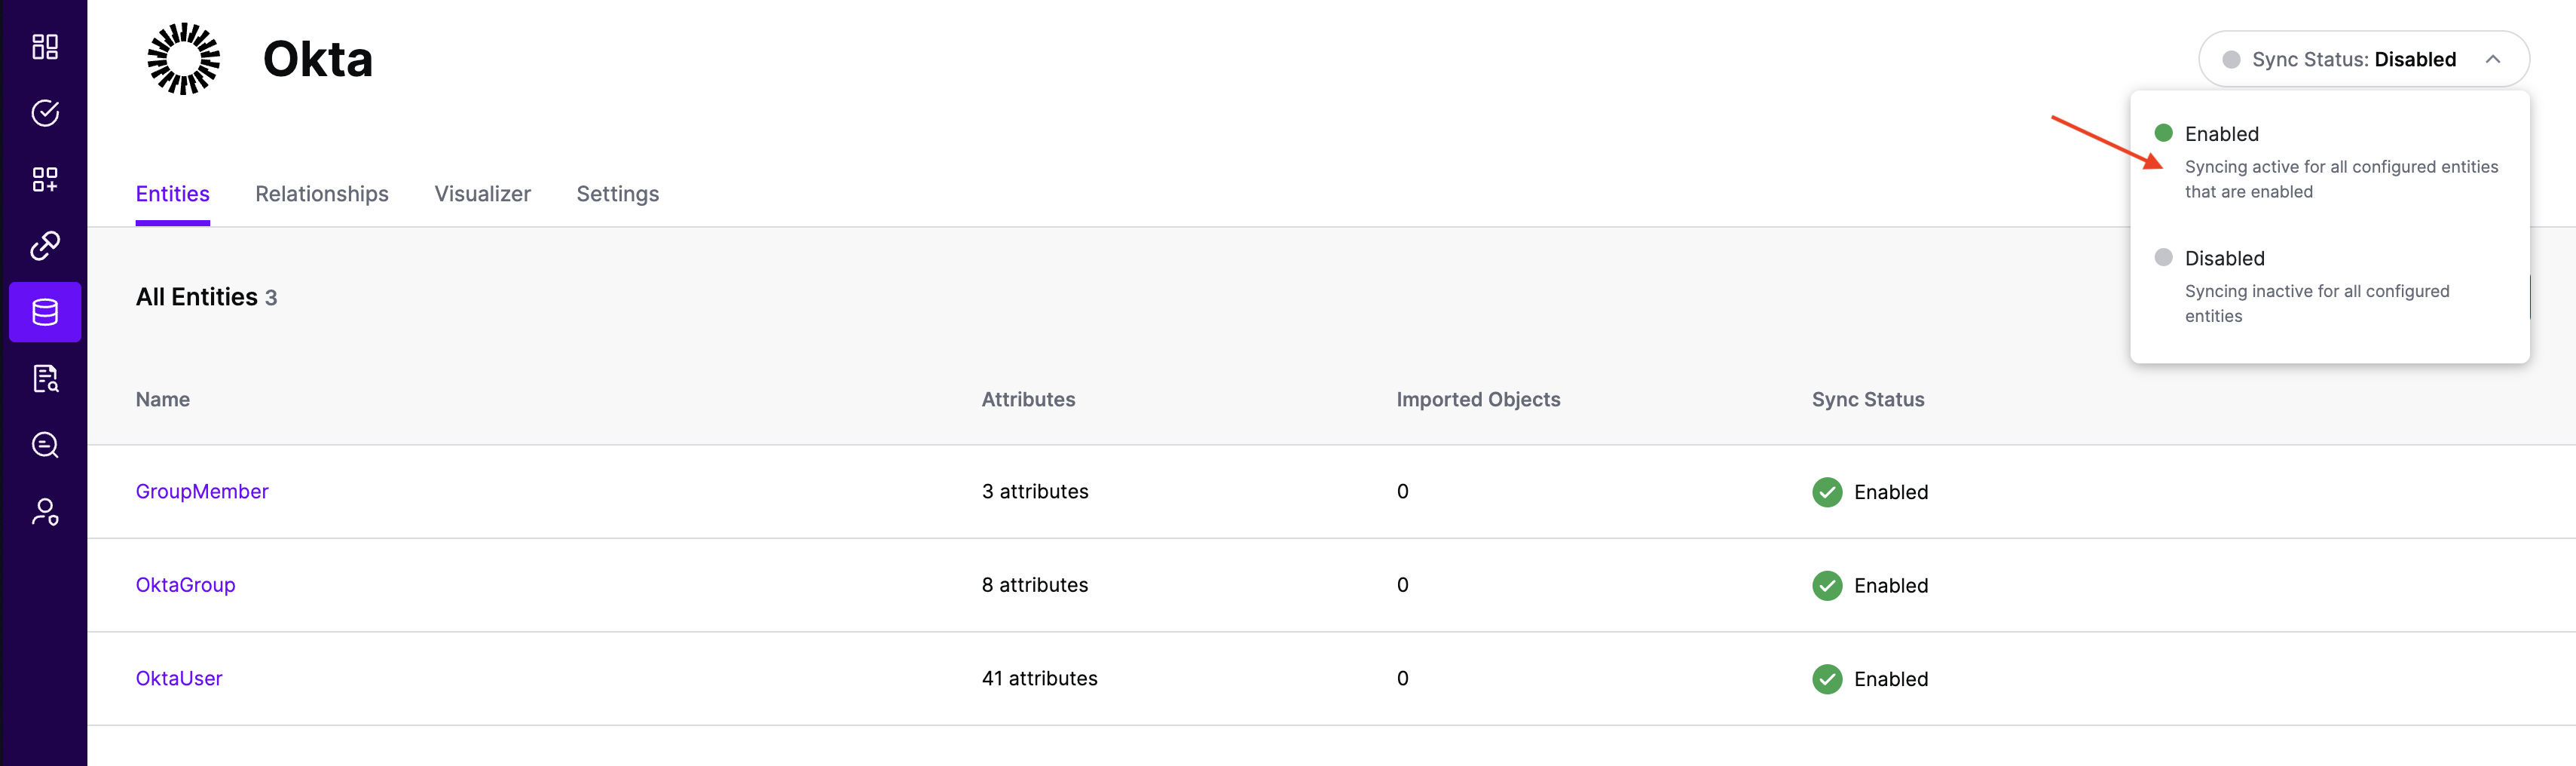
Note that synchronization is disabled by default when a new System of Record is created. You can choose to enable synchronization on Entities individually. Hover over the entity to see the Enable Sync button, and click on it.
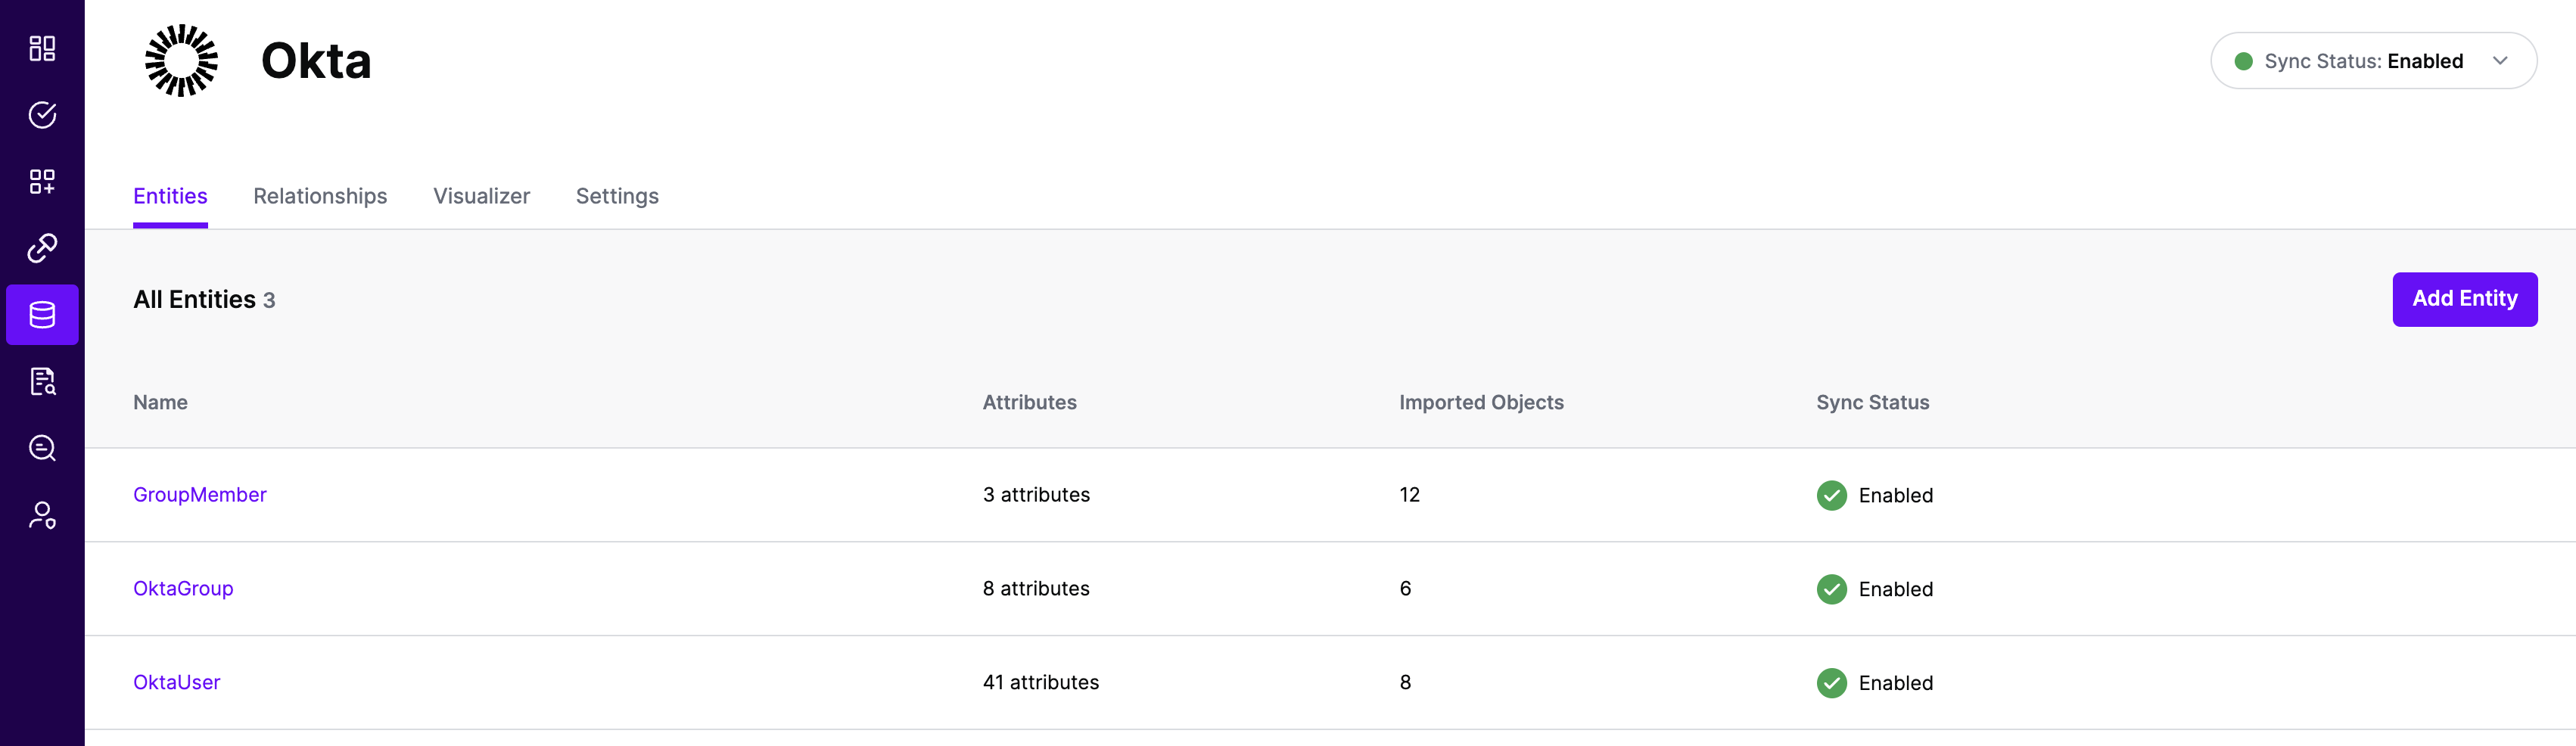
Repeat for all Entities you want to synchronize to SGNL. Finally, Enable synchronization for the System of Record.
In most cases, you will want to reduce the data coming from Okta to only the entities, attributes, and objects that you need to successfully evaluate your policies or take action within SGNL. You can apply filtering using either Okta’s filter or search parameters to reduce that data. Basic filters use Okta filtering syntax exactly as documented, without additional processing or intelligence in SGNL.
Filters are configured per Entity and are passed directly to Okta at synchronization time to be evaluated and have only the right data made available to SGNL.
Okta provides two different query parameters for filtering data:
Filter Parameter (filter)
status, lastUpdated, id, profile.login, profile.email, profile.firstName, and profile.lastNameeq) operator (except lastUpdated which supports inequality operators)Search Parameter (search) - Recommended
eq, ge, lt, gt, and, or)Important: You cannot use both filter and search parameters simultaneously for the same entity. SGNL will return a validation error if both are configured.
To use Okta filters, add the appropriate filter expression to the relevant entity in the Adapter config.
Sample Adapter Config with Filters
{
  "requestTimeoutSeconds": 10,
  "filters": {
    "User": "status eq \"ACTIVE\"",
    "Group": "id in (\"1a902e2d-76ec-4341-b351-2ad18978ae2c\",\"52e20194-dca1-489b-8ebc-c836d8ea871e\")"
  }
}
To use Okta search parameters, add the appropriate search expression to the relevant entity in the Adapter config. Search expressions must be at least 7 characters long (minimum valid search is “id eq x”).
Sample Adapter Config with Search Parameters
{
  "requestTimeoutSeconds": 10,
  "search": {
    "User": "profile.department eq \"Engineering\" and status eq \"ACTIVE\"",
    "Group": "profile.name sw \"Admin\" or profile.description co \"Management\""
  }
}
User Search Examples:
profile.department eq \"Engineering\"profile.firstName eq \"John\"status eq \"ACTIVE\" and (profile.department eq \"Engineering\" or profile.department eq \"Marketing\")profile.mobilePhone prcreated gt \"2023-01-01T00:00:00.000Z\"Group Search Examples:
profile.name sw \"Admin\"profile.description co \"Project\"type eq \"OKTA_GROUP\"When configuring search expressions in SGNL, you need to escape double quotes using backslashes. SGNL will automatically convert \" to " when sending the request to Okta.
Example:
"profile.department eq \"Engineering\""profile.department eq "Engineering"Comparison Operators:
eq - Equal togt - Greater thange - Greater than or equal tolt - Less thanle - Less than or equal topr - Present (attribute has a non-null value)sw - Starts withco - Contains (requires at least 3 characters)Logical Operators:
and - Logical ANDor - Logical OR() - Grouping with parenthesesNote: Okta does not support the ne (not equal) operator. Use lt ... or ... gt to achieve the same result.
requestTimeoutSeconds - How long to wait for a request to Okta to complete before failing and retrying, default 10filters - Basic filter expressions using Okta’s filter parameter syntaxsearch - Search expressions using Okta’s search parameter syntax (recommended)Important: For each entity, use either filters or search, but not both. SGNL will validate this configuration and return an error if both are specified for the same entity.