Creating and Configuring a Sailpoint IdentityNow System of Record
Prerequisites
- Sailpoint Account with permissions to create API Keys in Sailpoint and assign Scopes
- SGNL User Account with at least Protected System Admin and Log Reader (or Global Reader) privileges to your SGNL Client
Configuring Sailpoint IdentityNow
Using OAuth2 with Client Credentials Flow
Note This flow is suitable for those objects in Sailpoint that do not require admin or user context, Accounts and Entitlements (and the relationship between them) are suitable for synchronizing with this flow. If you require objects that have an API requirement for admin or user context, see below for instructions on using a Personal Access Token (PAT).
- Login to your Sailpoint instance as a user with Admin role
- Through the Admin panel, go to
Global->Security Settings->API Management as shown below:
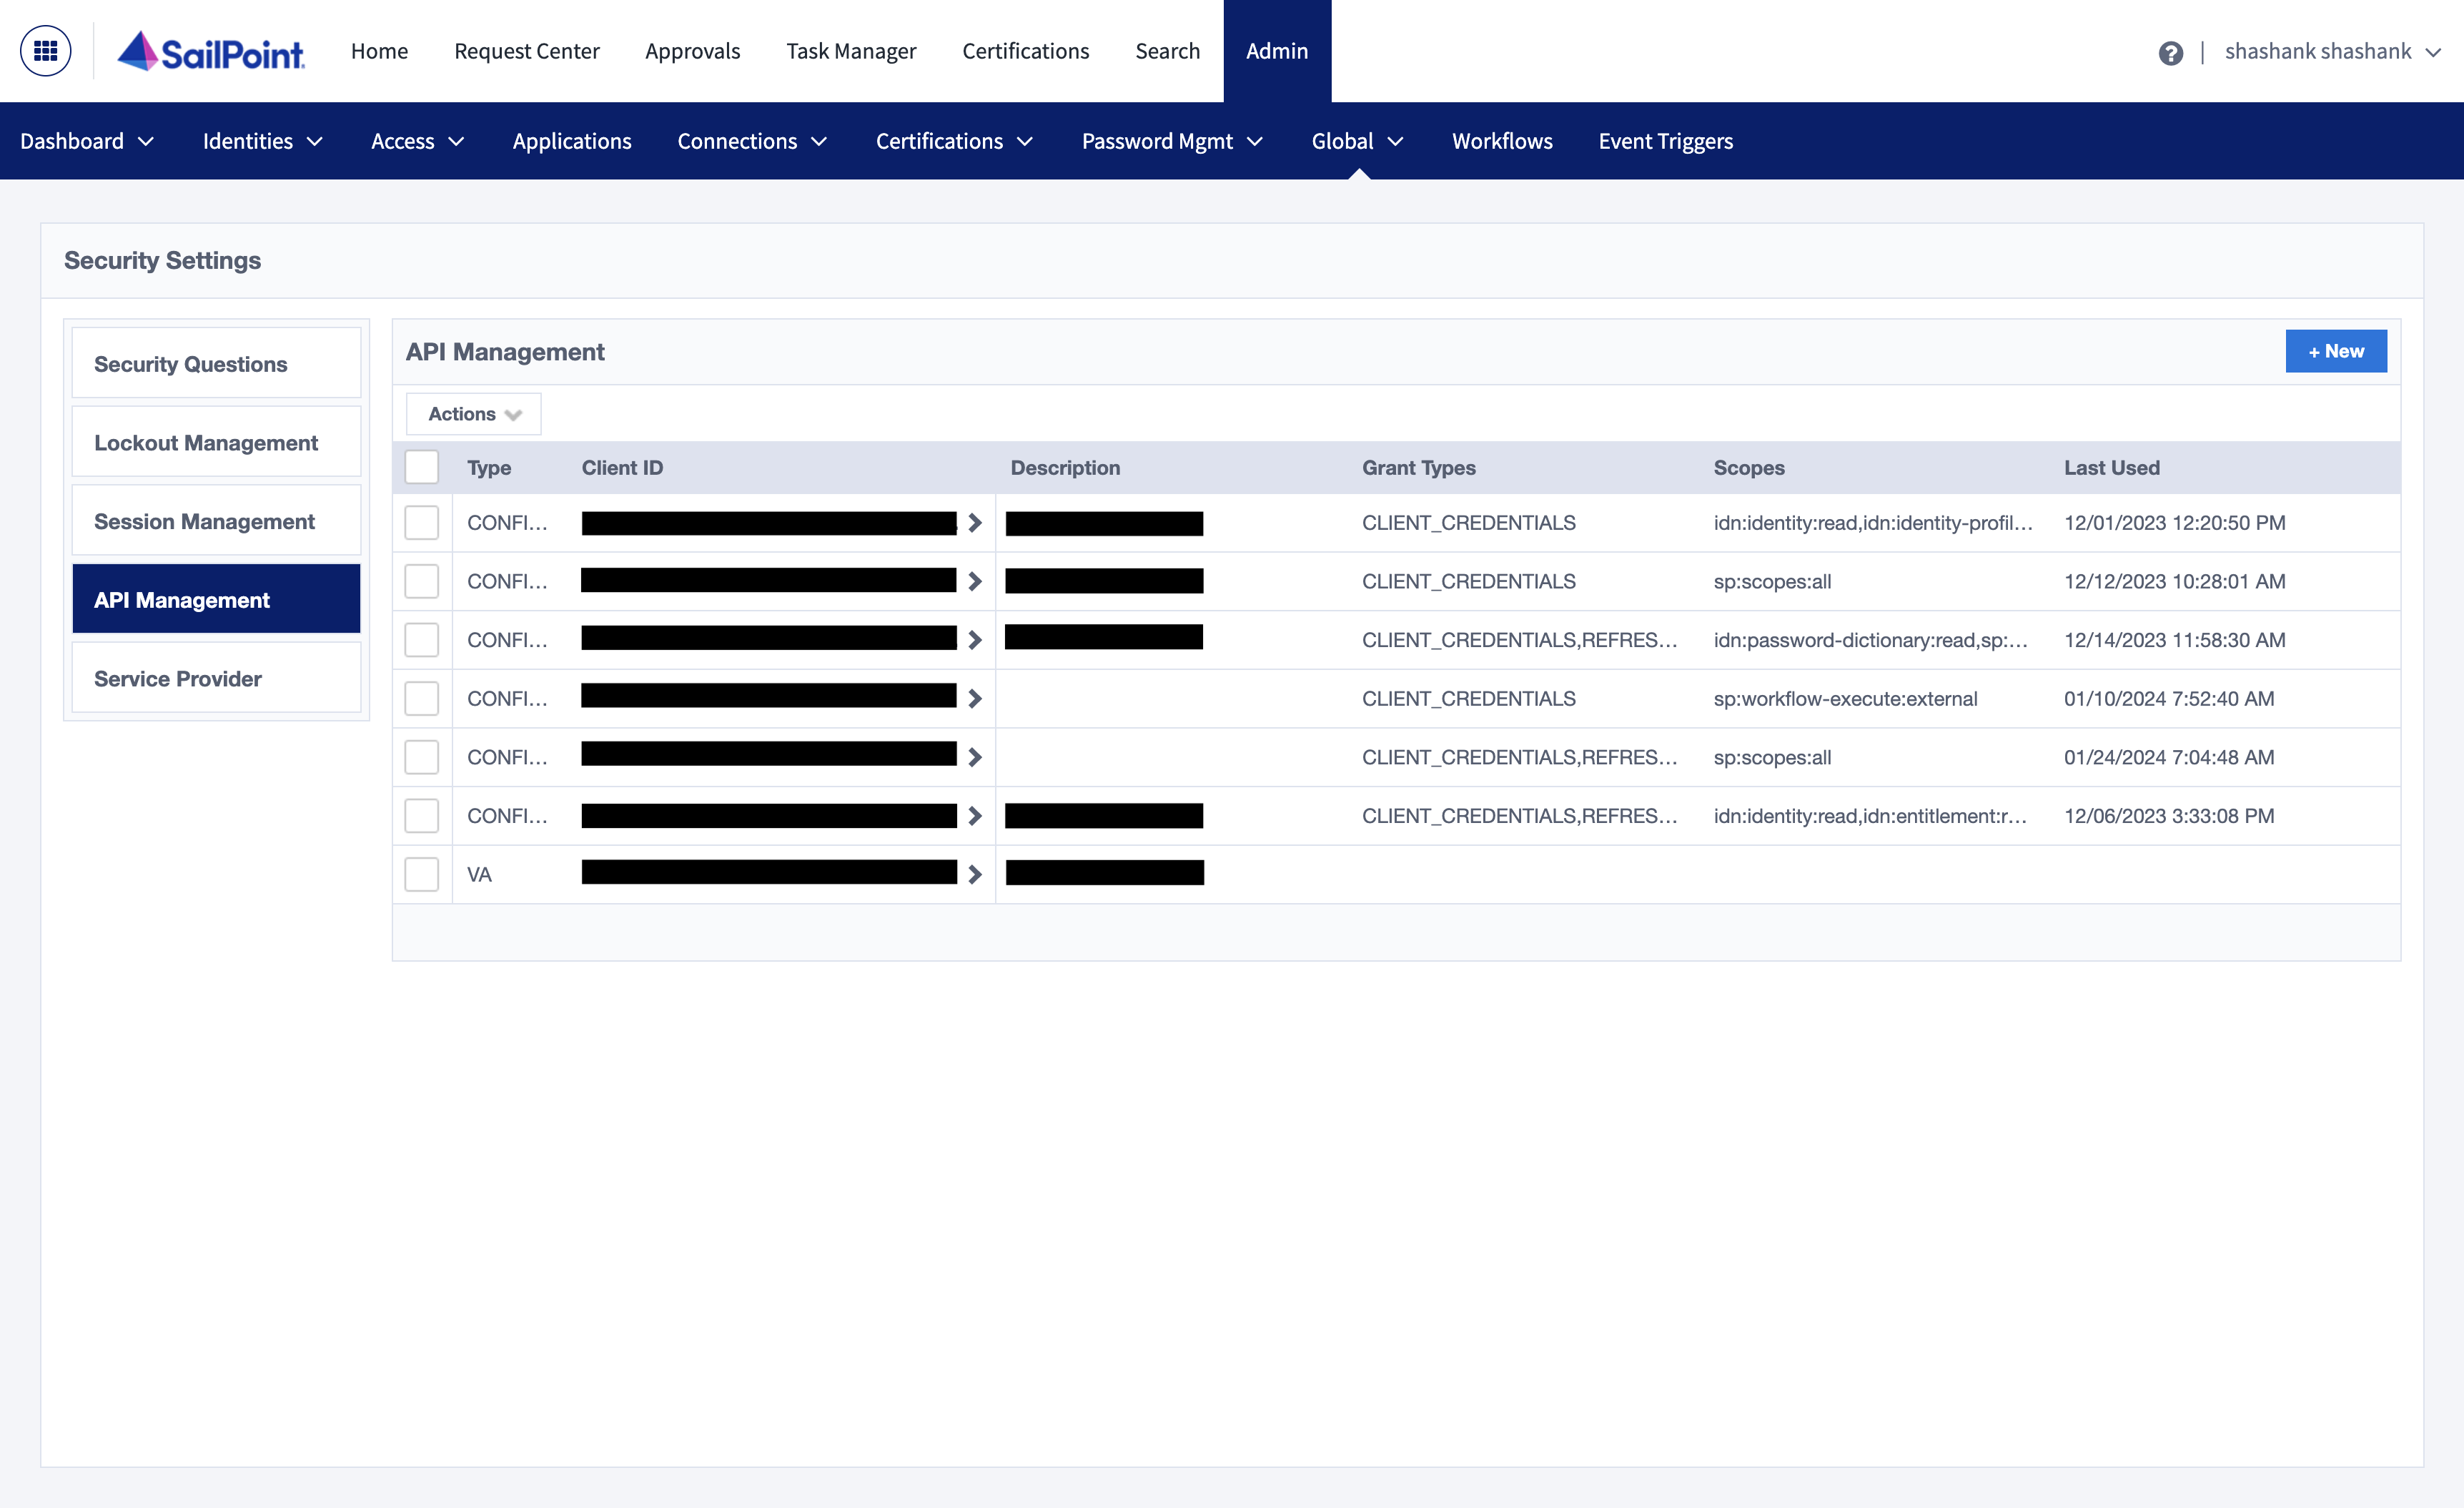
- Click on
+New, which opens up the New API Client modal
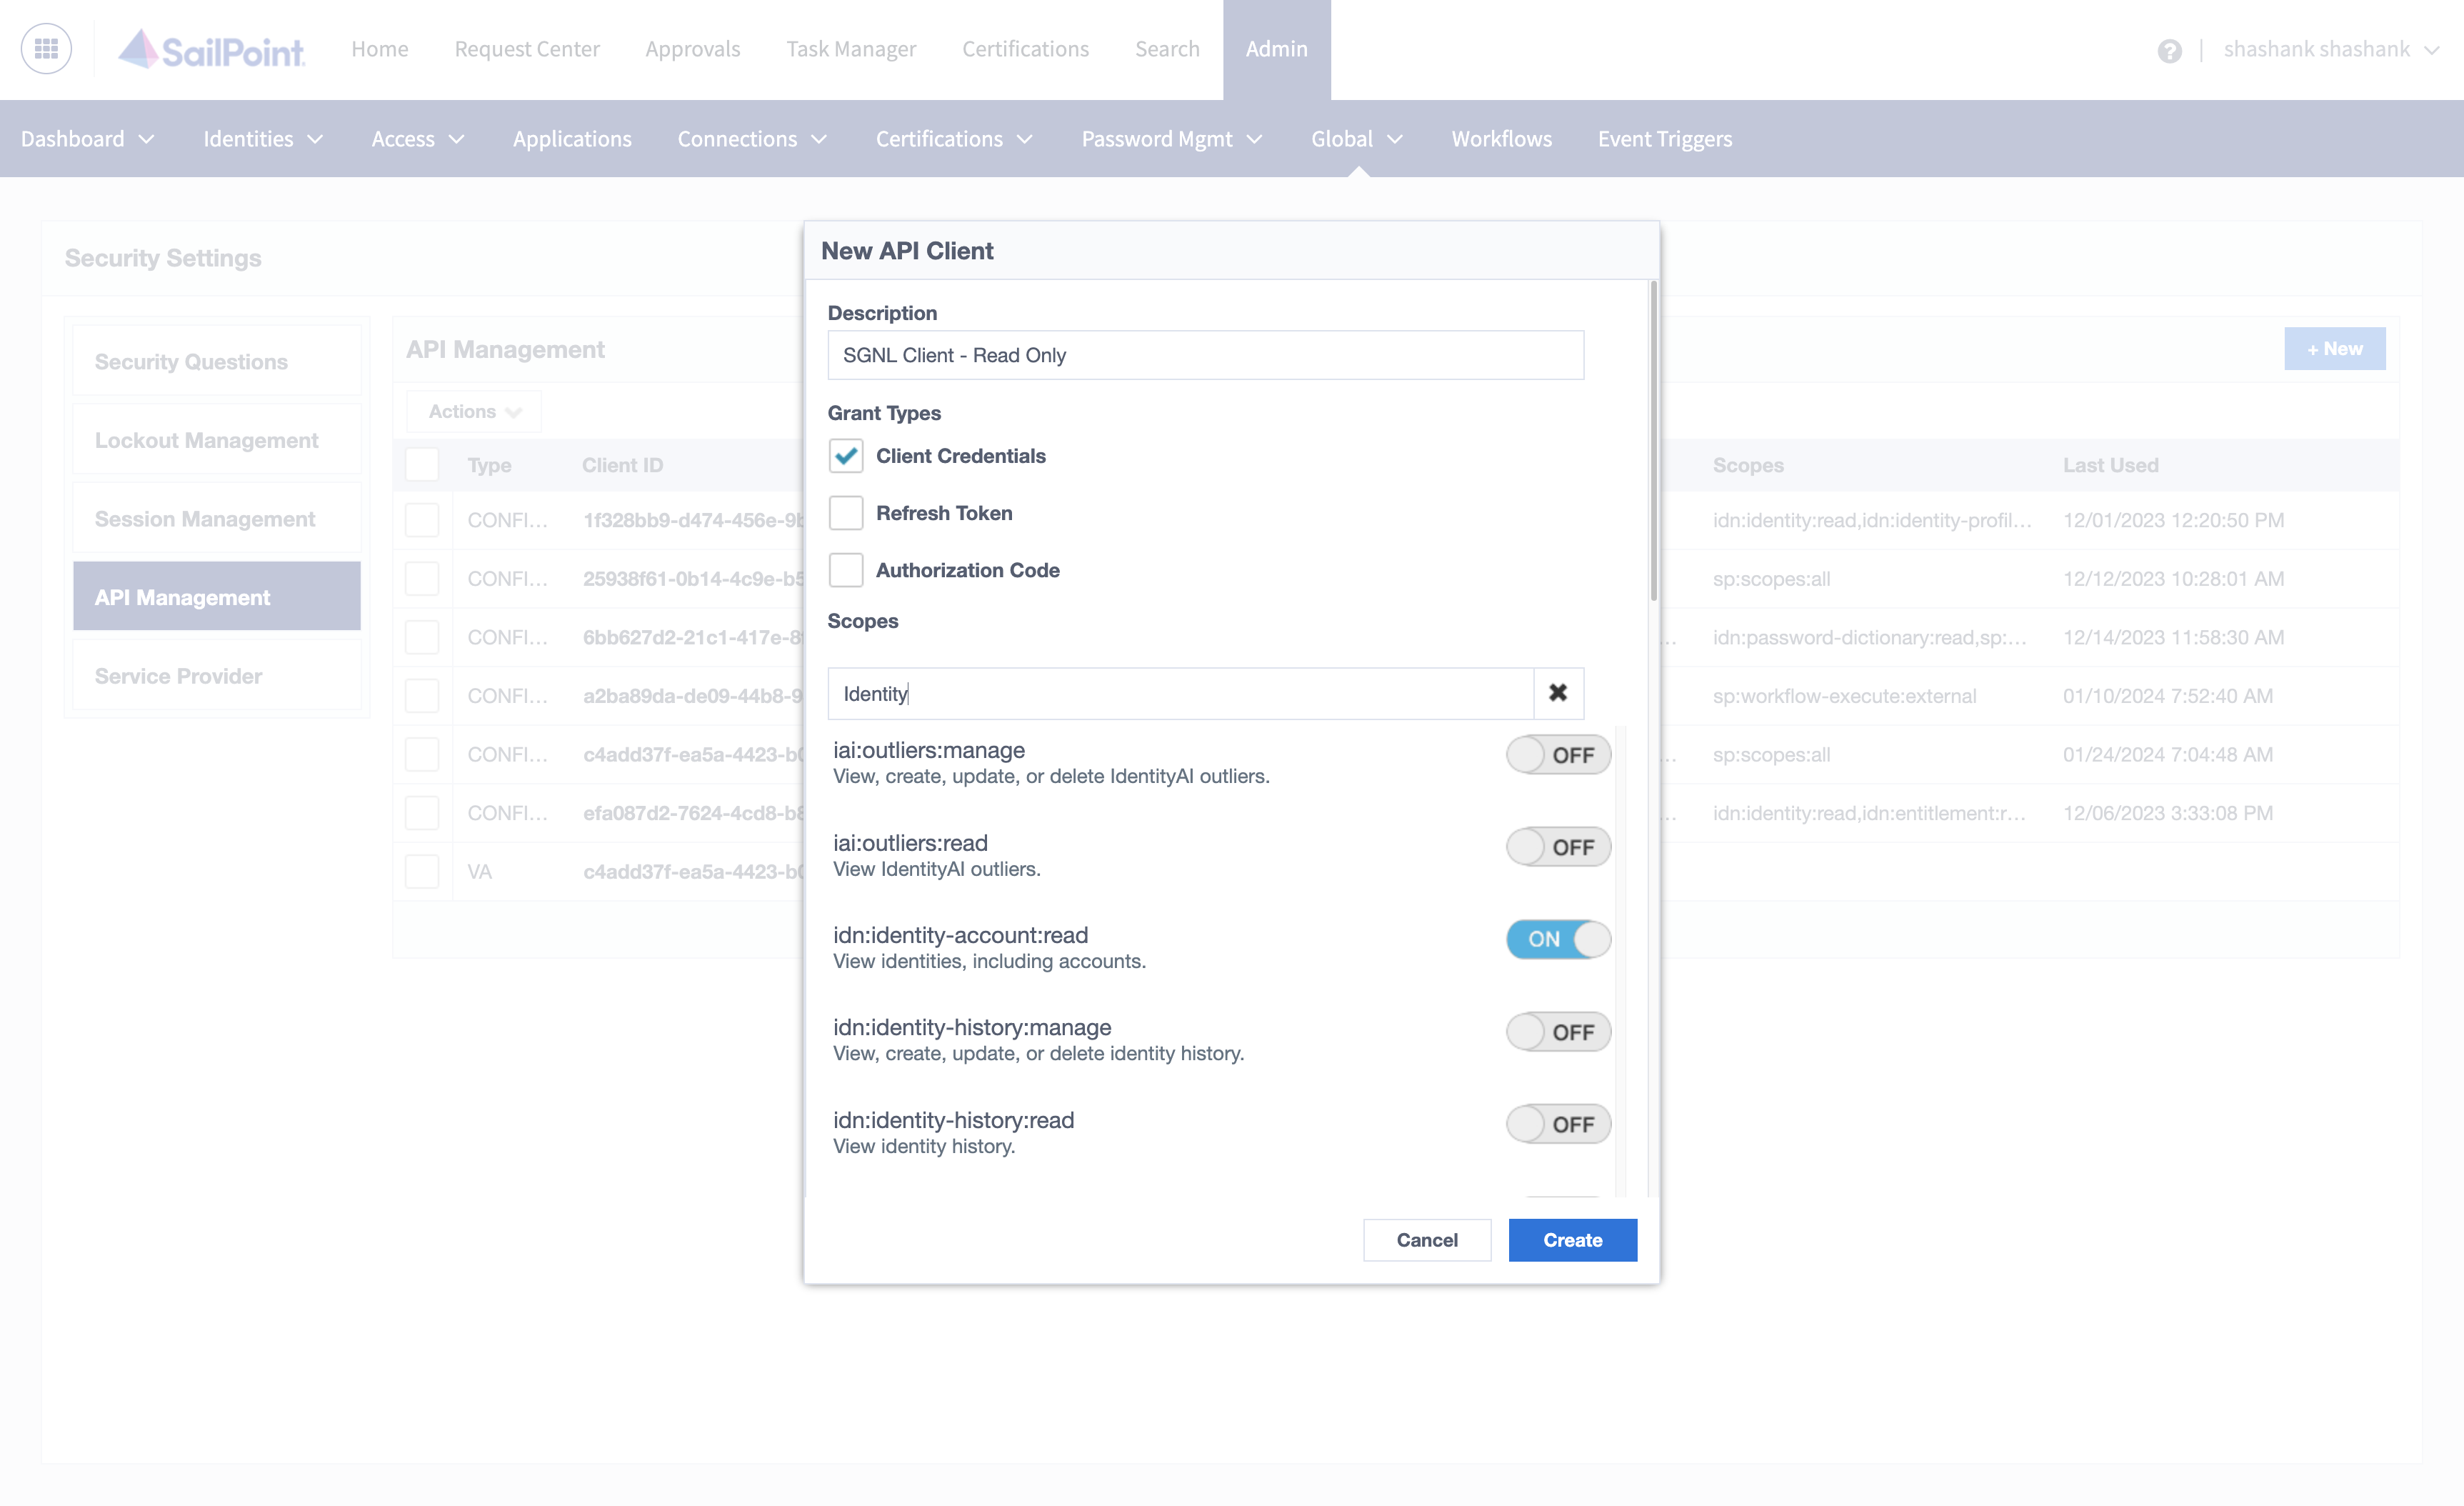
Add Description, select Client Credentials and search and enable the following Scopes and click on Save:
idn:identity-account:read, idn:entitlement:read, idn:accounts:read
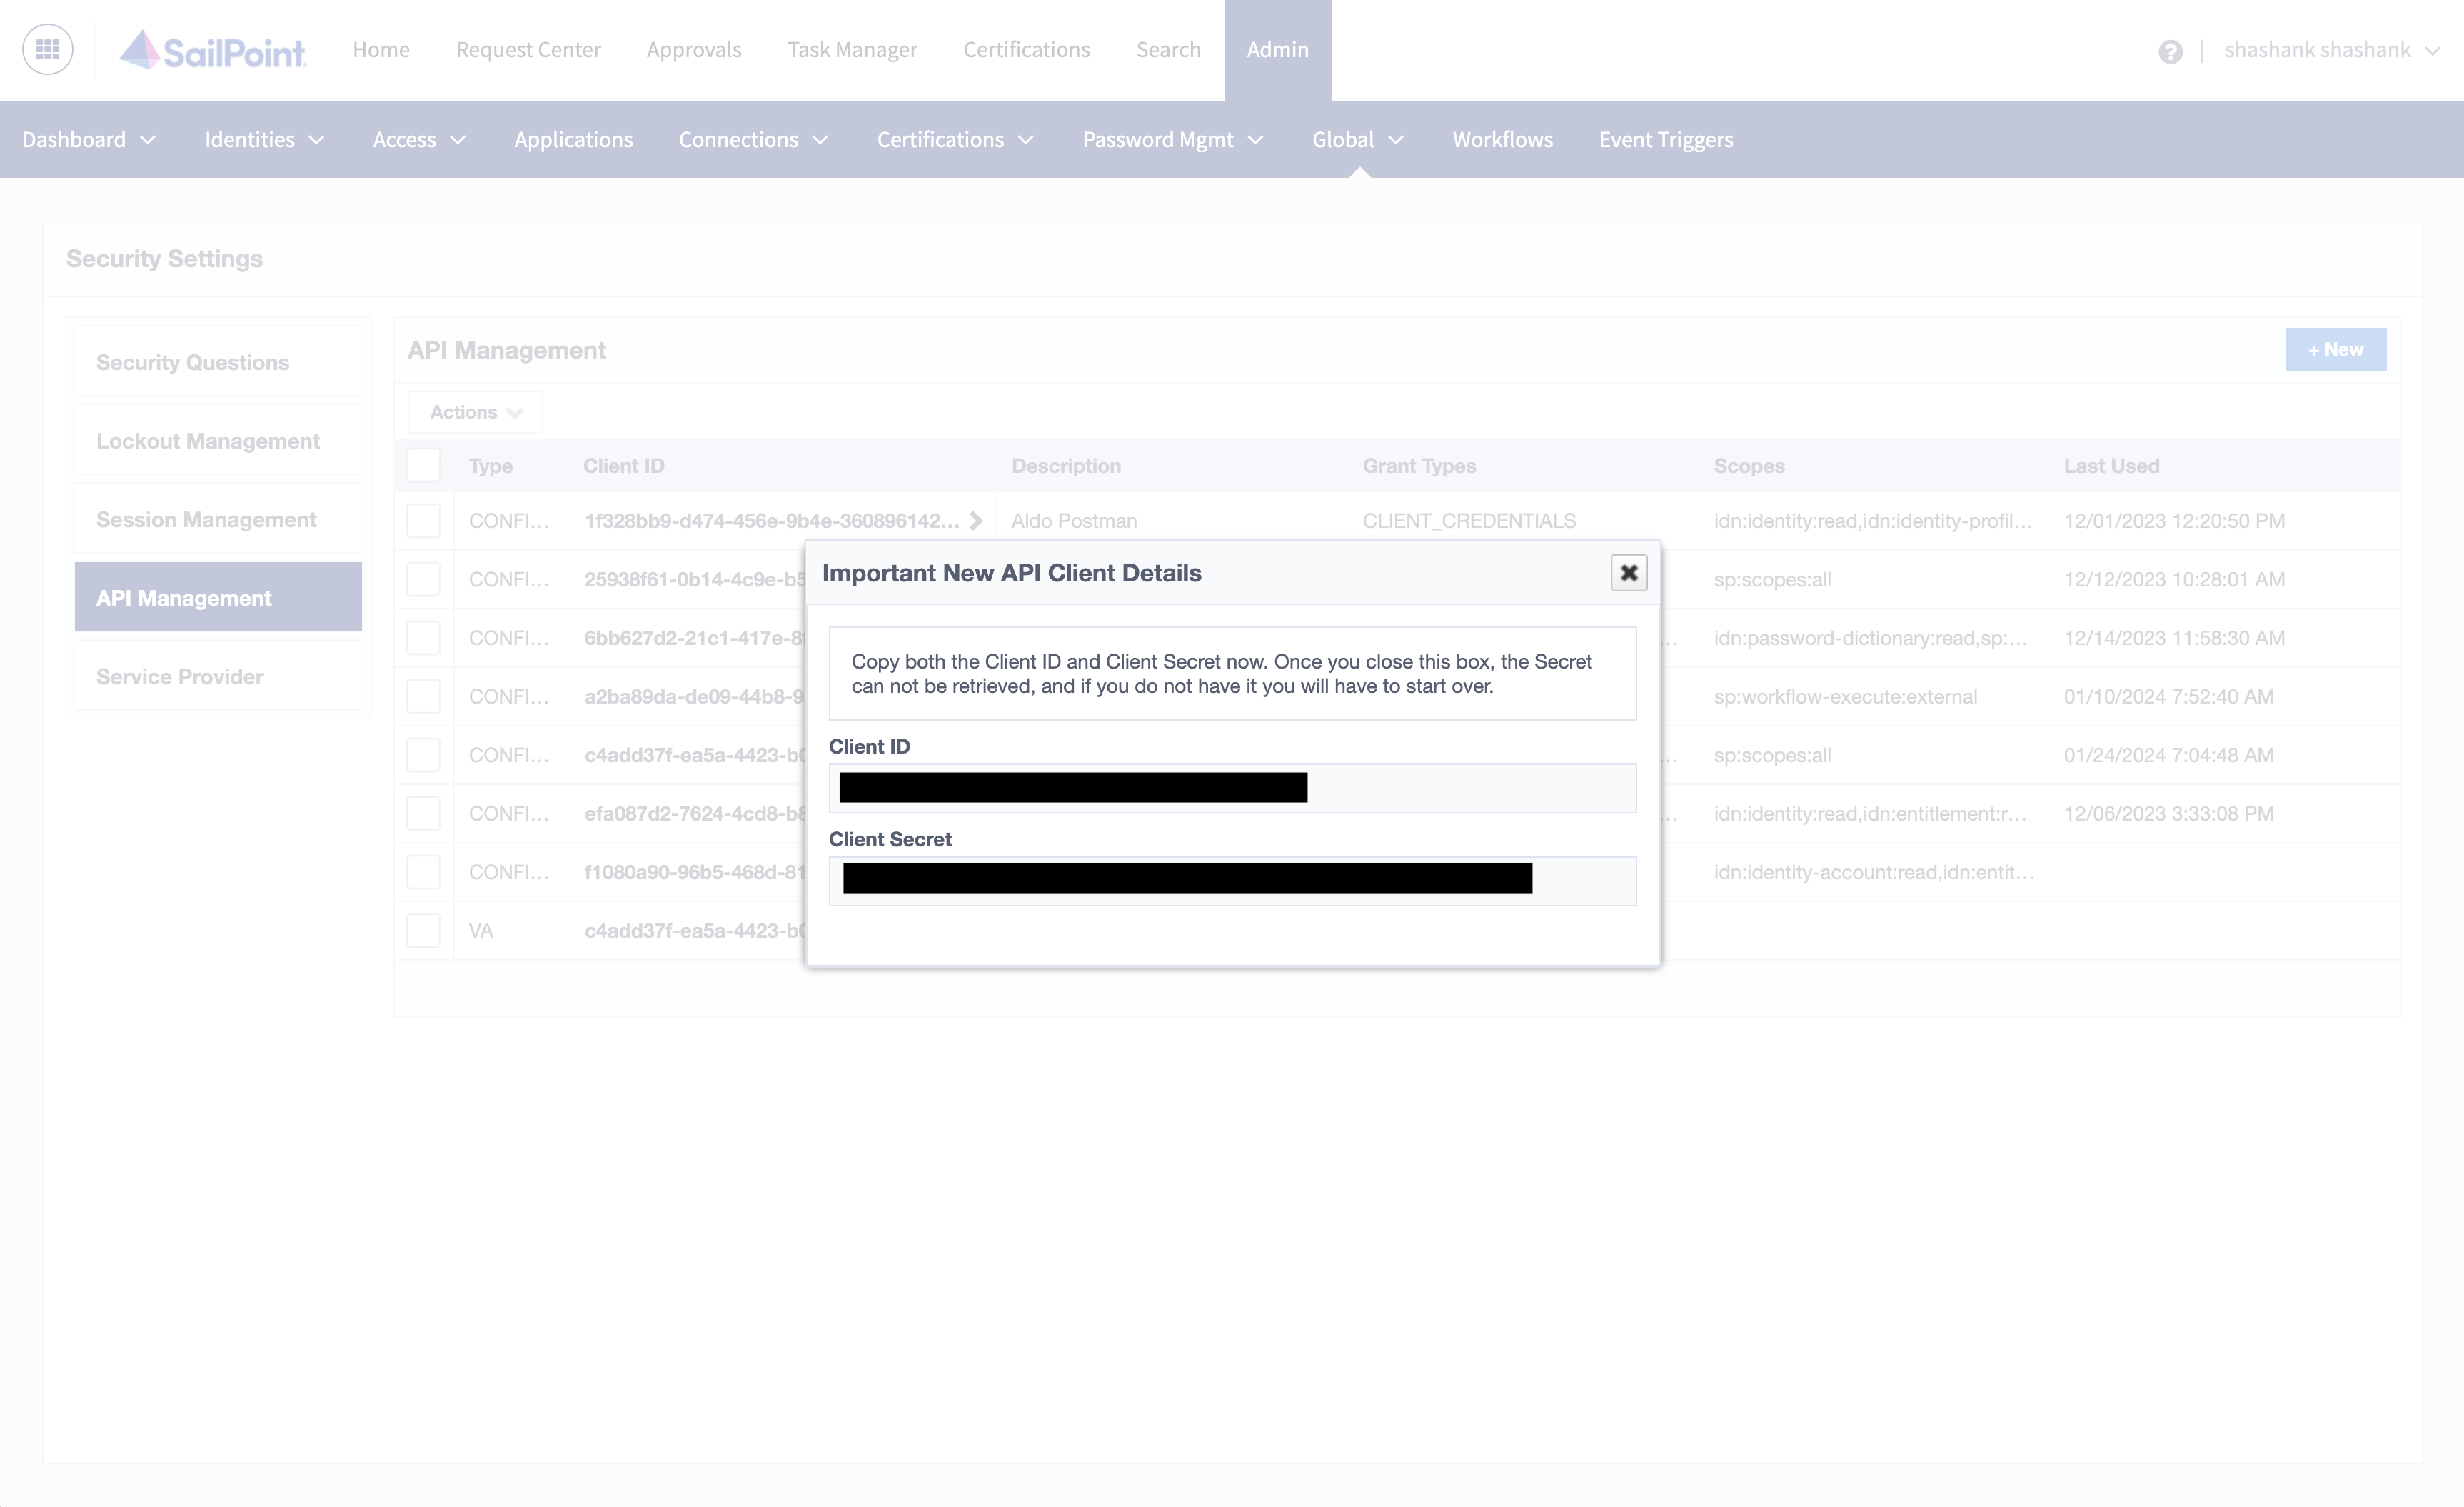
Copy the Client ID and Client Secret and store in a secure place
Using OAuth2 with a Personal Access Token (PAT) and Client Credentials Flow
This flow is suitable for synchronizing objects in Sailpoint that may require admin or user context, that are not able to be synchronized via the method above. Objects such as Identities require this context.
- Login to your Sailpoint instance as a user with Admin role
- Select your user Id in the top right hand corner of the Sailpoint Console, and select Preferences
- From the left-side, select
Personal Access Tokens and then select New Token - Grant the token the Scopes that you may require to synchronize, to collect all objects in the SGNL template, select:
idn:identity:read, idn:identity-self:read, idn:identity-account:read, idn:entitlement:read, idn:accounts:read
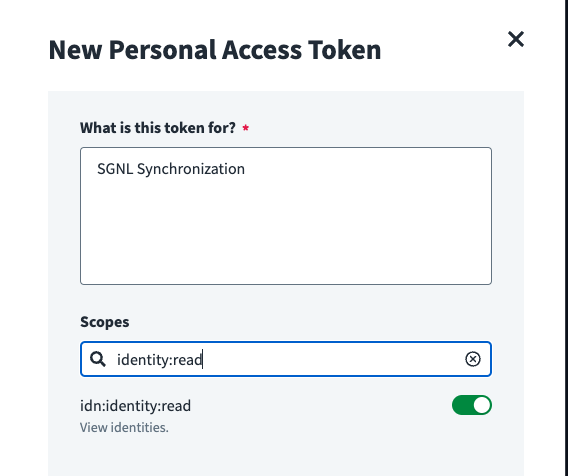
- Create the Token, and save the Client Id and Client Secret in a secure place
Configuring SGNL
- Login to the SGNL Console
- From the left menu, select Systems of Record
- Click “Add System of Record” or “Add”.
- The SGNL SoR Catalog will show up on the screen
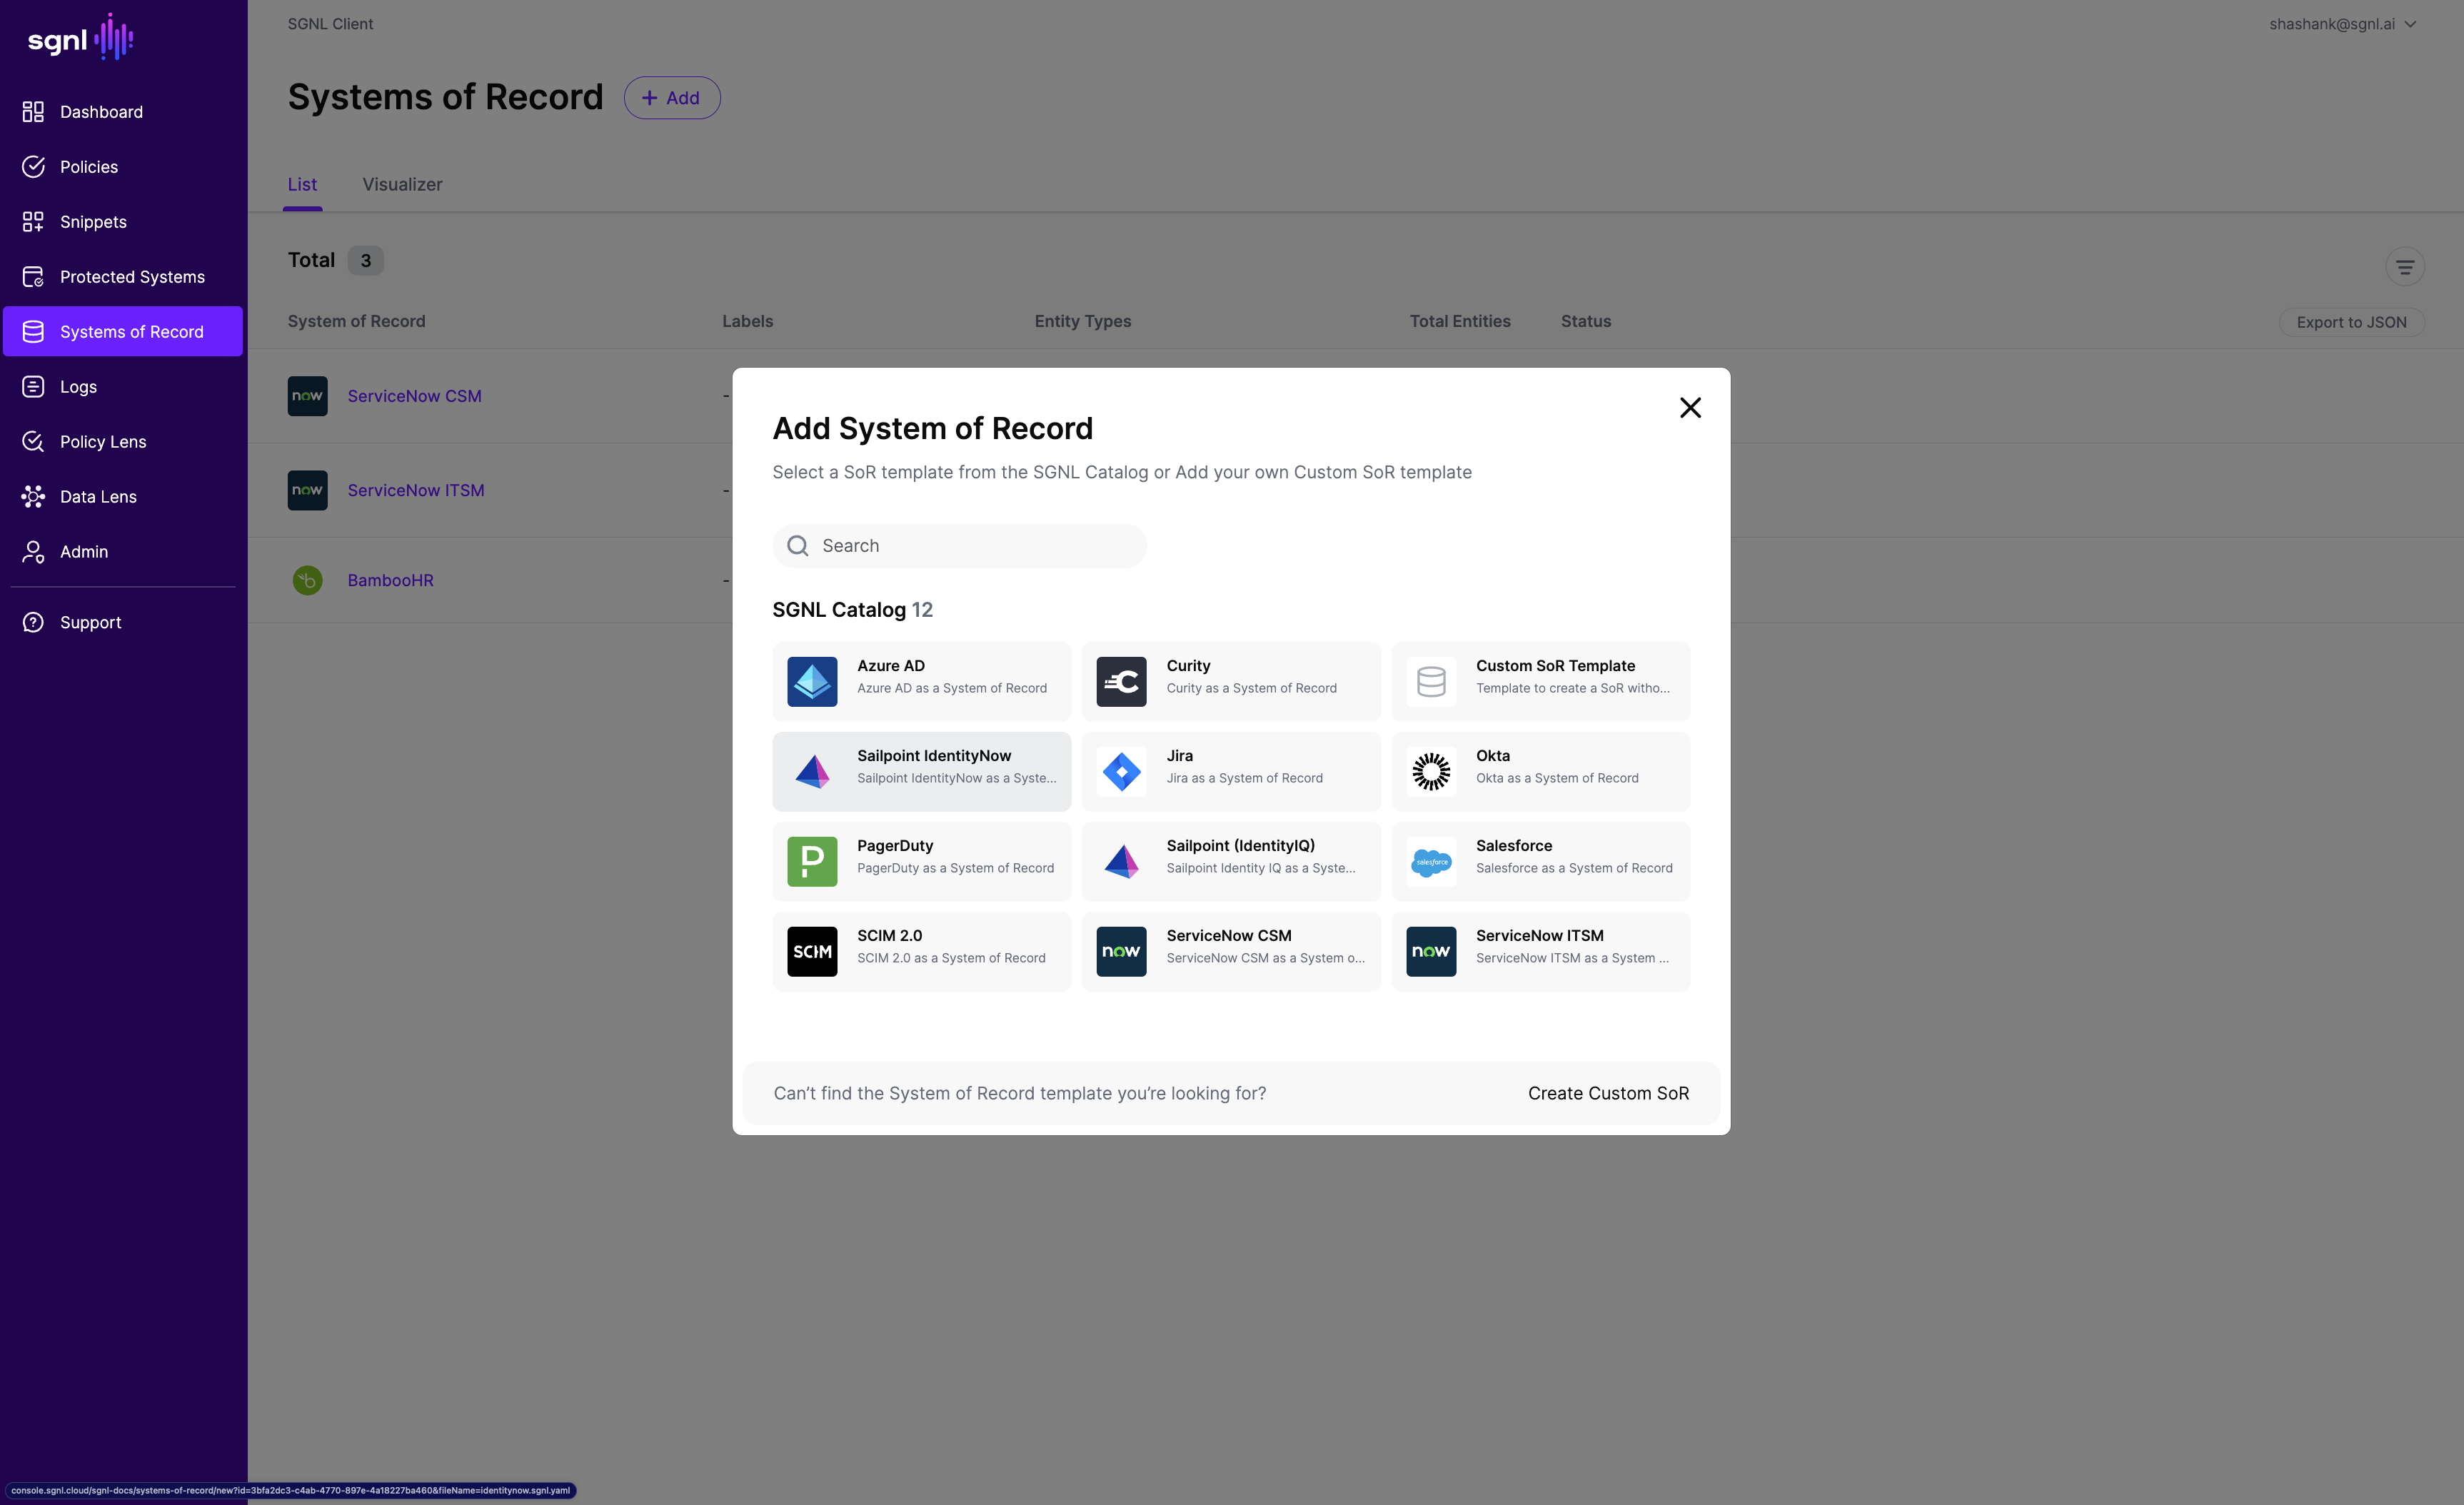
- Click on “Sailpoint IdentityNow”, which will open up the New System of Record screen with some configuration options pre-populated from the Sailpoint IdentityNow SoR template.
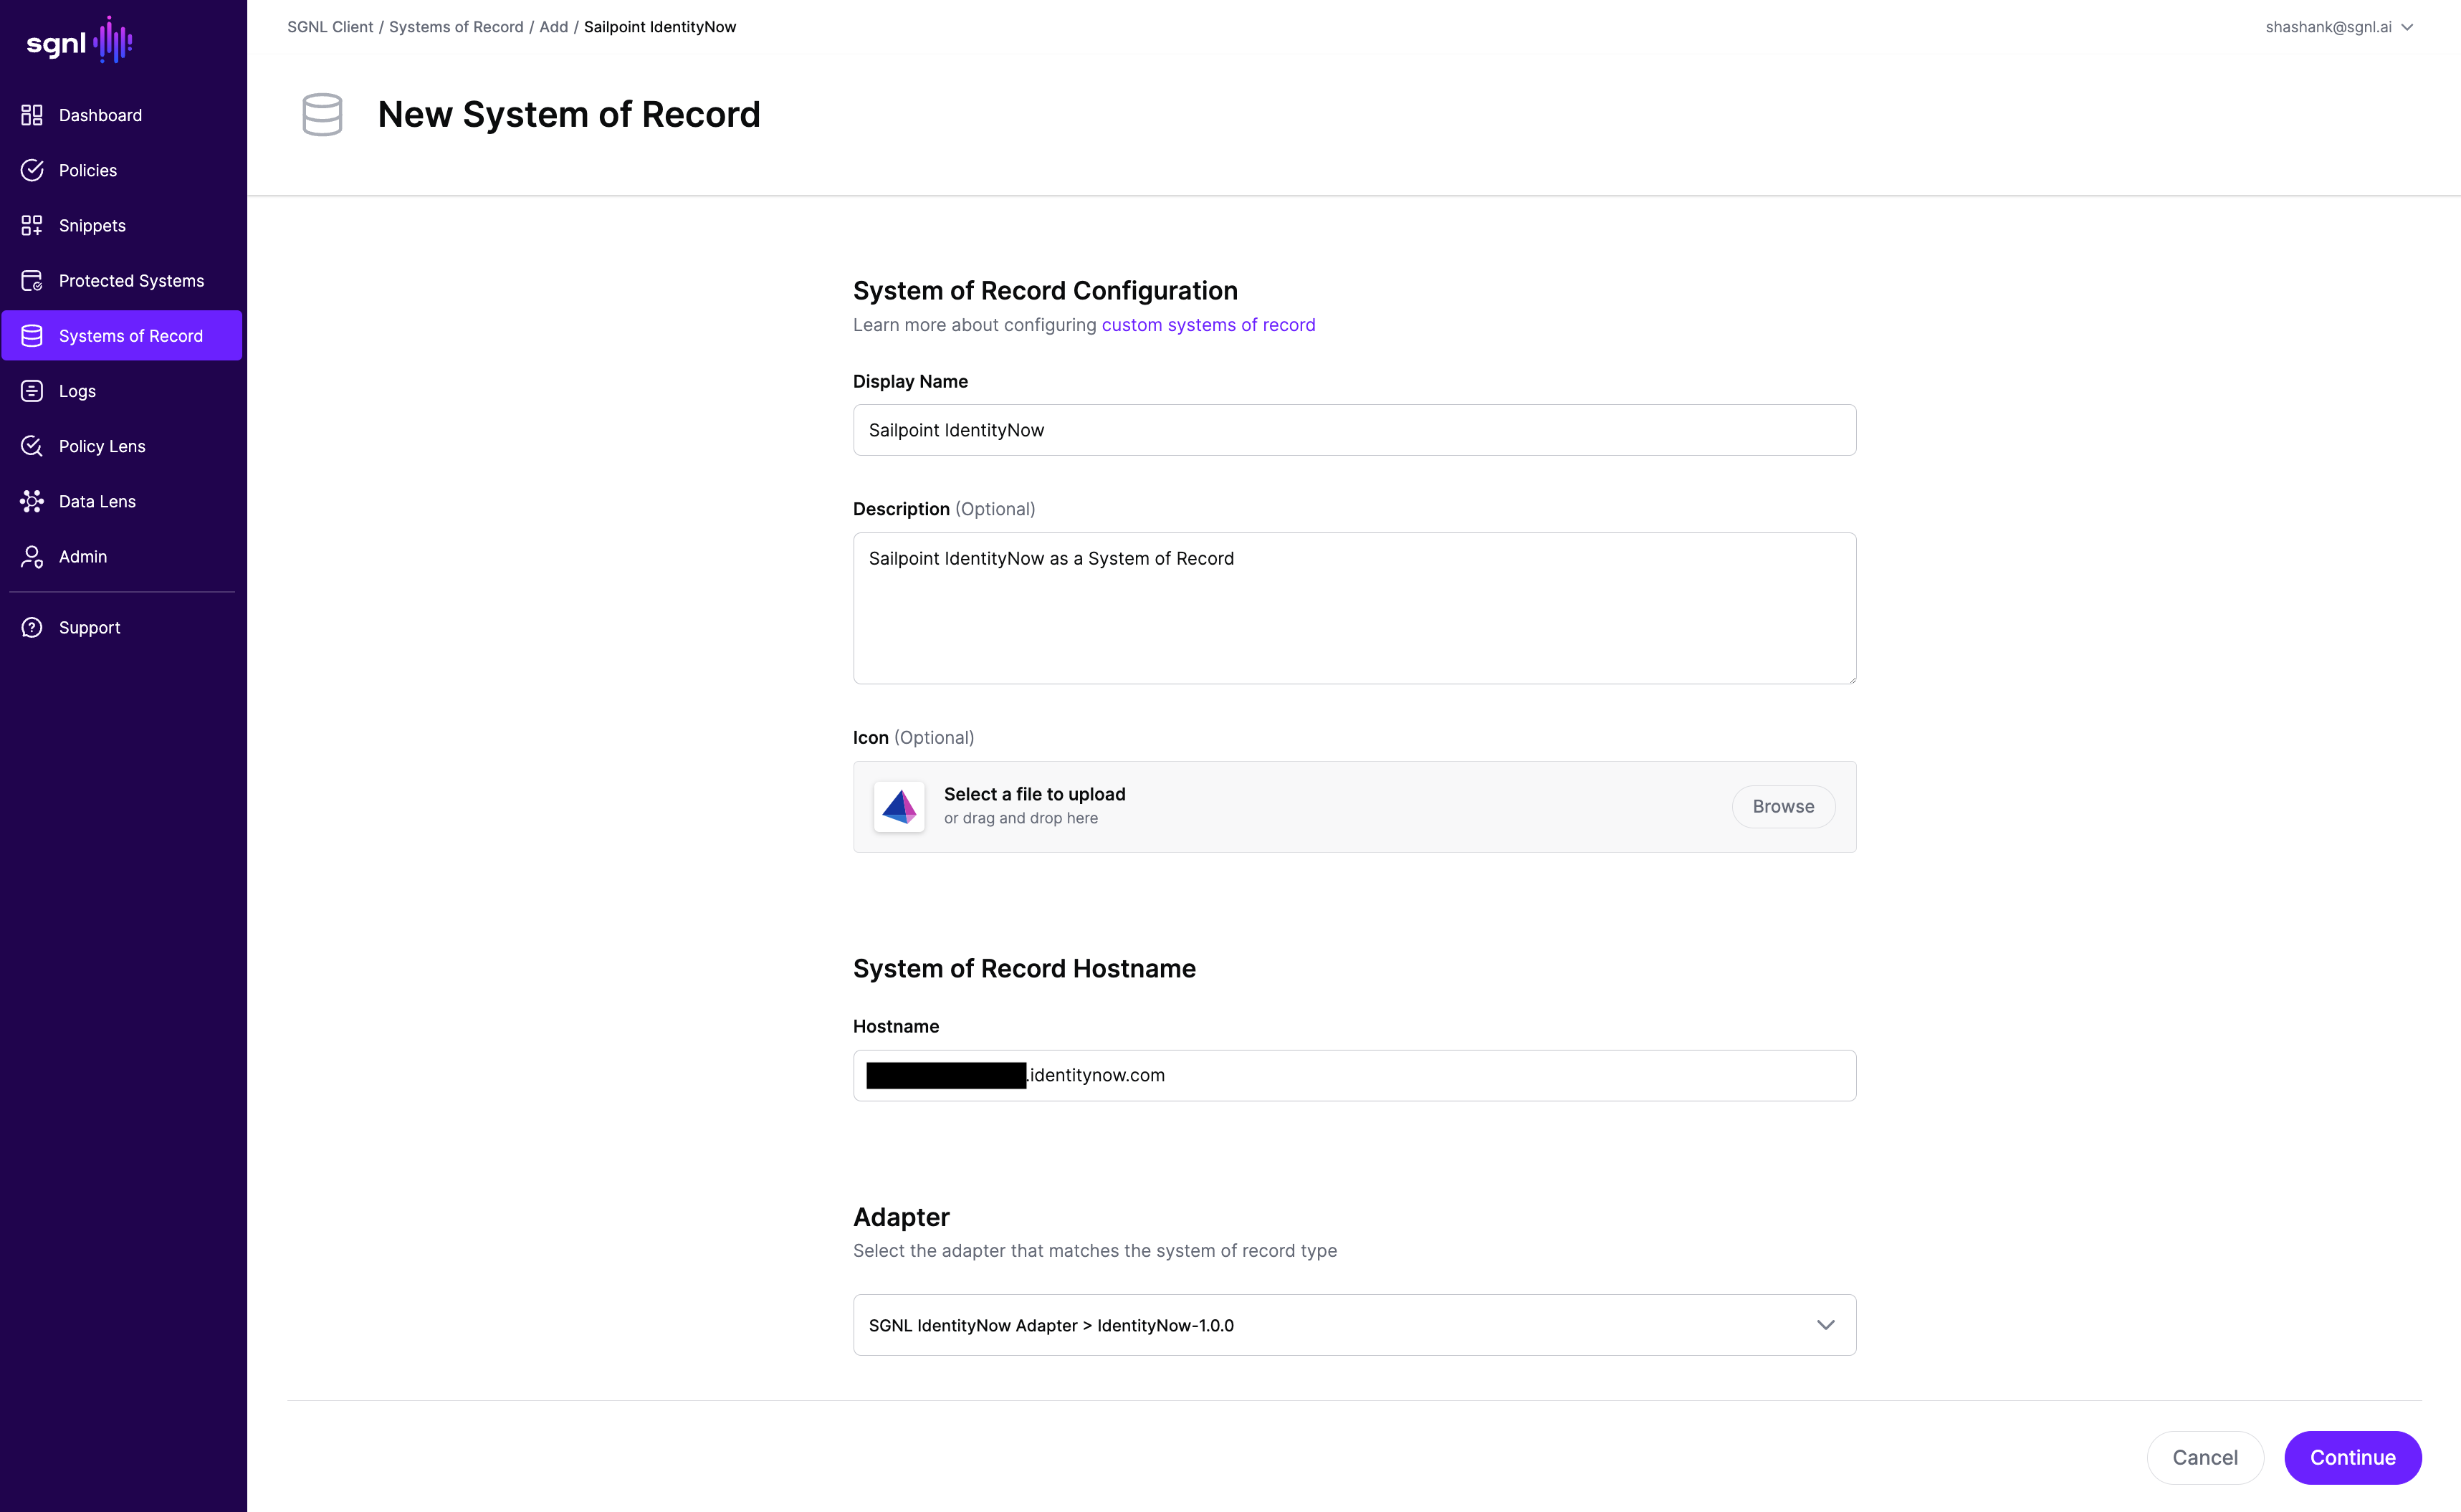
- Enter the URL of your Sailpoint instance. This is the URL you use to login into your Sailpoint instance
- Choose the correct adapter that matches the Sailpoint System of Record Type
- Select OAuth2 Client Credentials as the Authentication Method and enter the Client ID and Secret copied in the previous section
- Update the Token URL for your Sailpoint instance - replace the scaffolding in curly braces with the URL you use to login into your Sailpoint instance
- Click Continue to save your Sailpoint IdentityNow SoR. You will be taken to the Sailpoint IdentityNow System of Record page.
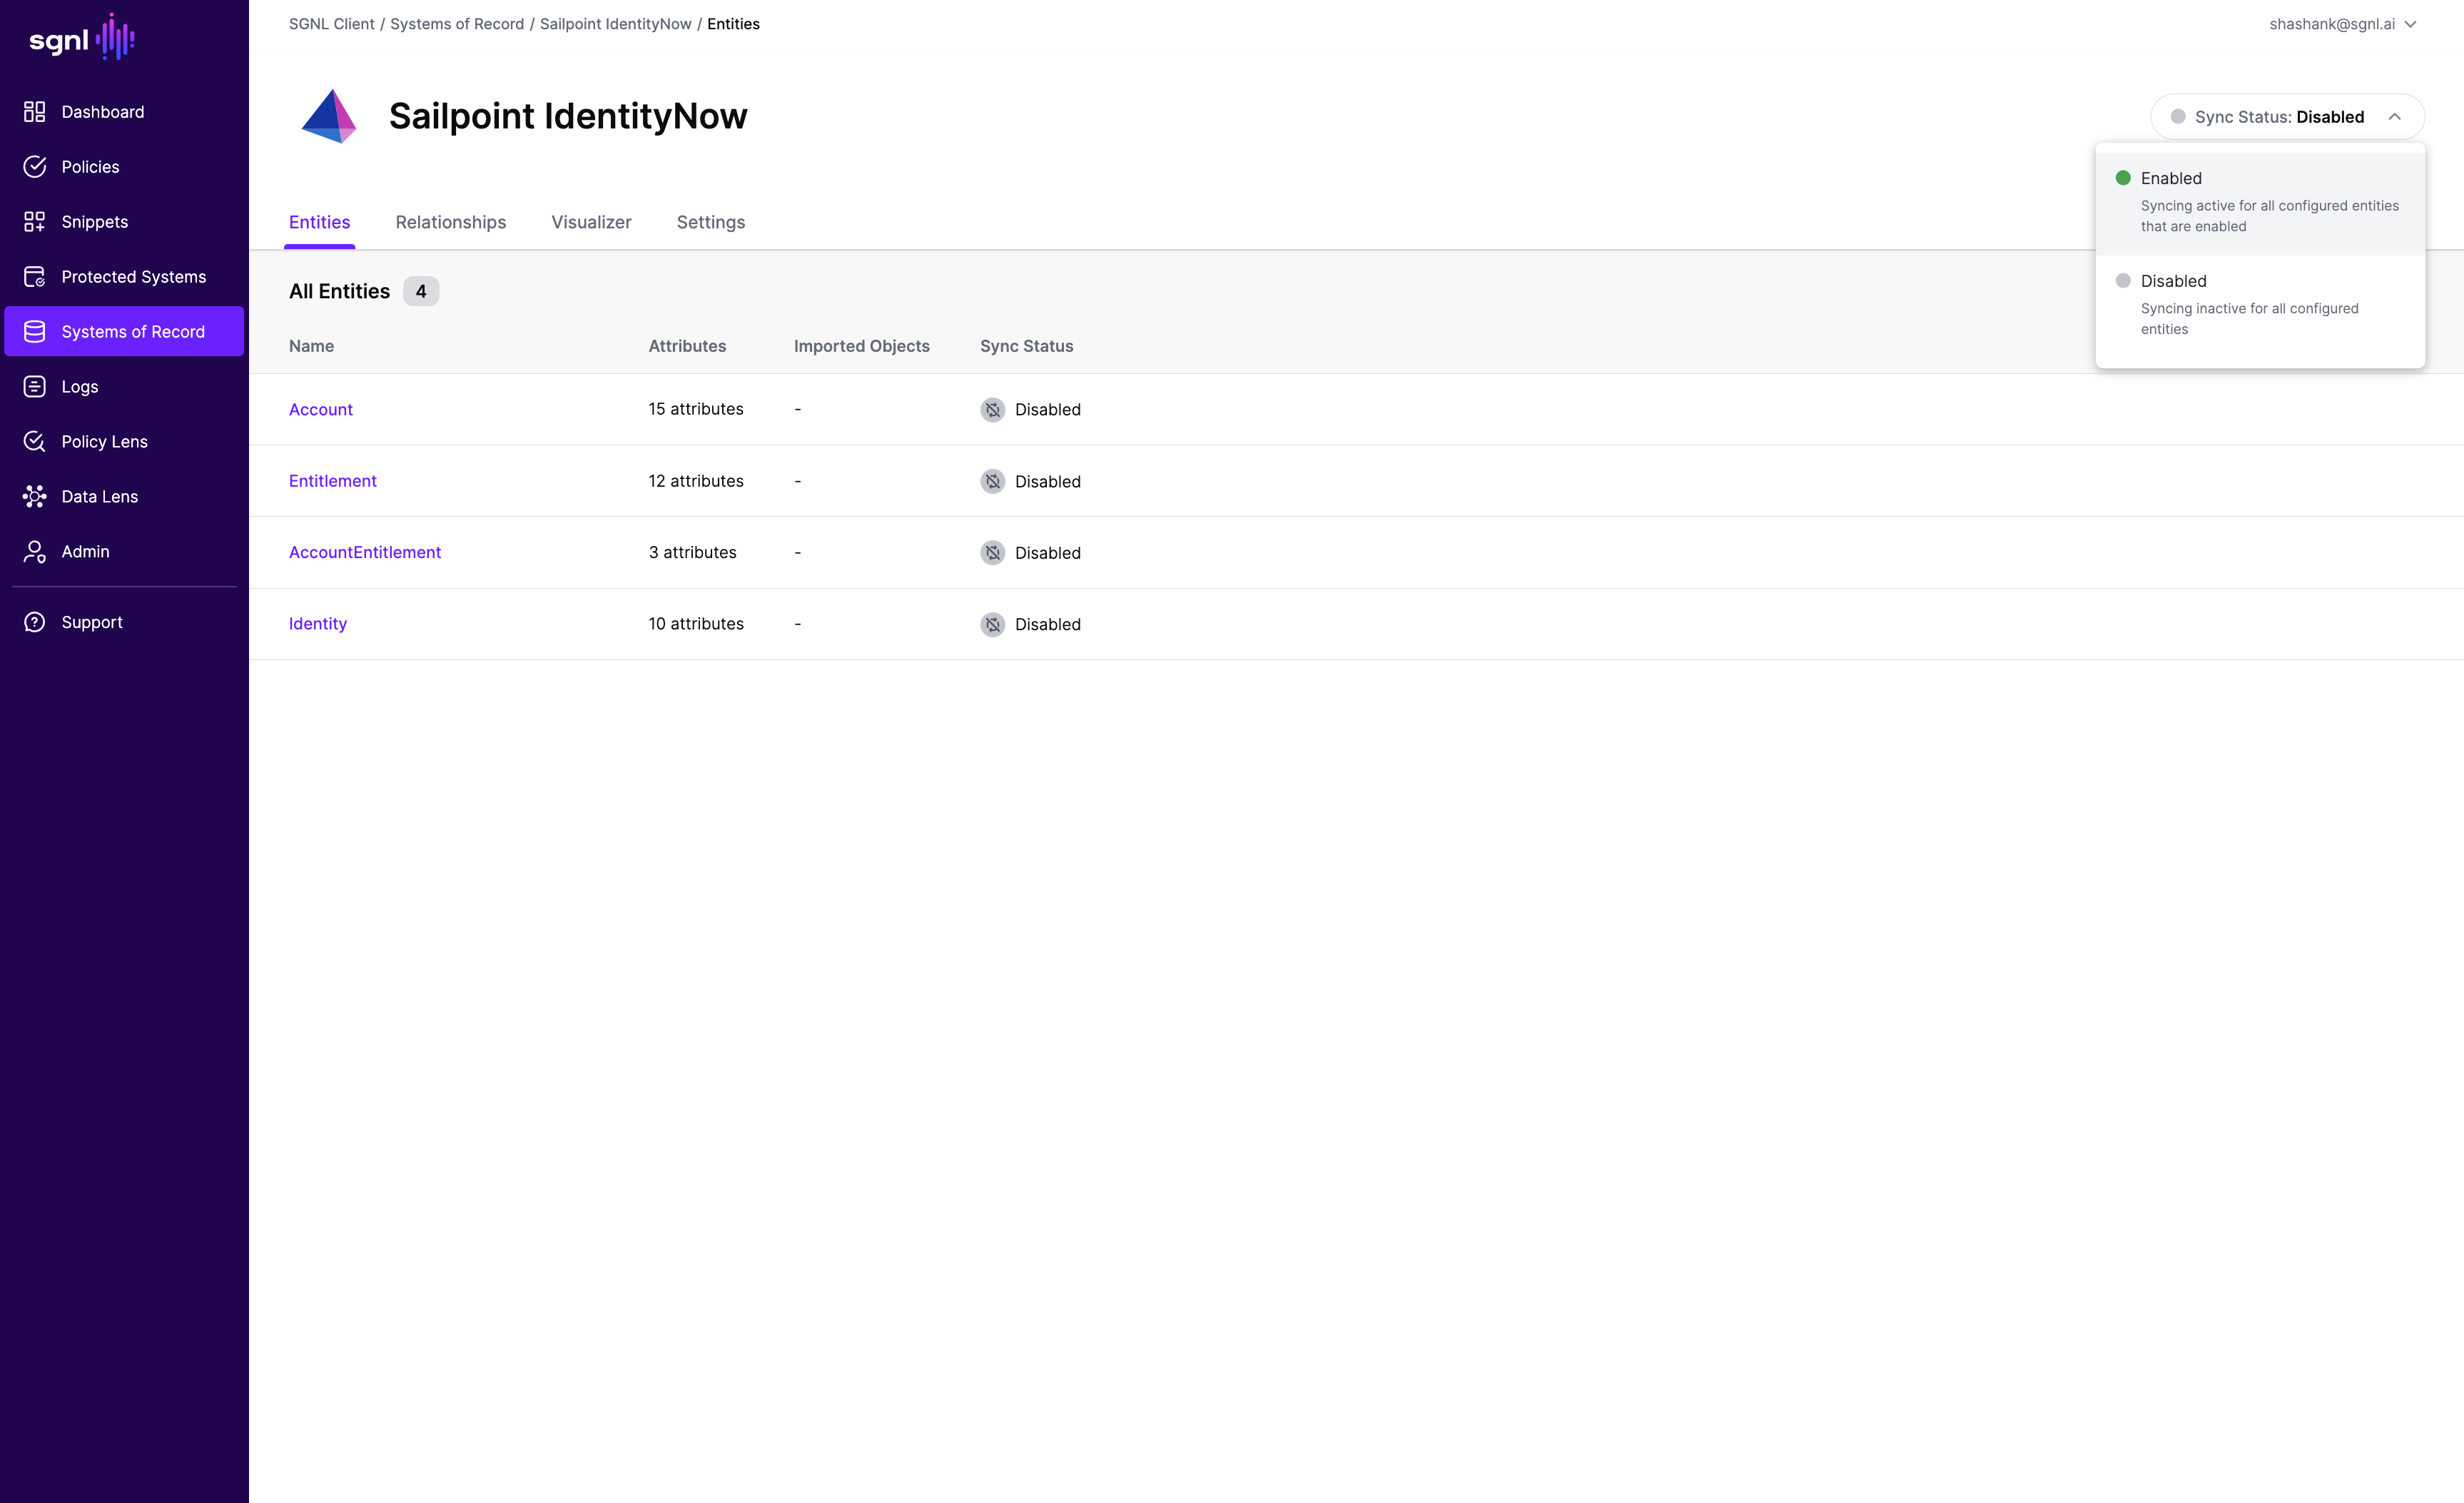
- All entities and relationships are created as defined in the Sailpoint IdentityNow template. If applicable, you can edit an entity and modify any properties of the entity or the associated attributes. Hover over the entity on the screen above to see the Edit button as shown above.
- You can check the relationships created through the Relationships tab. However, relationships cannot be modified. You will need to delete an existing one, and create a new relationship.
- (If applicable) You can also create relationships joining entities and attributes in Sailpoint IdentityNow to entities and attributes in other Systems of Record configured in SGNL. For more information on relationships, please refer to our Relationships page.
- Note that synchronization is disabled by default when a new System of Record is created. You can choose to enable synchronization on Entities individually. Hover over the entity to see the Enable Sync button, and click on it.
- Repeat for all Entities you want to synchronize to SGNL. Finally, Enable synchronization for the System of Record.
- Go to SGNL Ingestion Logs to confirm that ingestion has started. Wait a few seconds for ingestion to complete.

- After some time, SGNL should complete ingesting the data from your Sailpoint IdentityNow instance into the SGNL graph. The number of objects ingested per entity are displayed on the Sailpoint IdentityNow screen. You should then be able to construct policies based on your Sailpoint IdentityNow data and make access evaluation calls to SGNL.
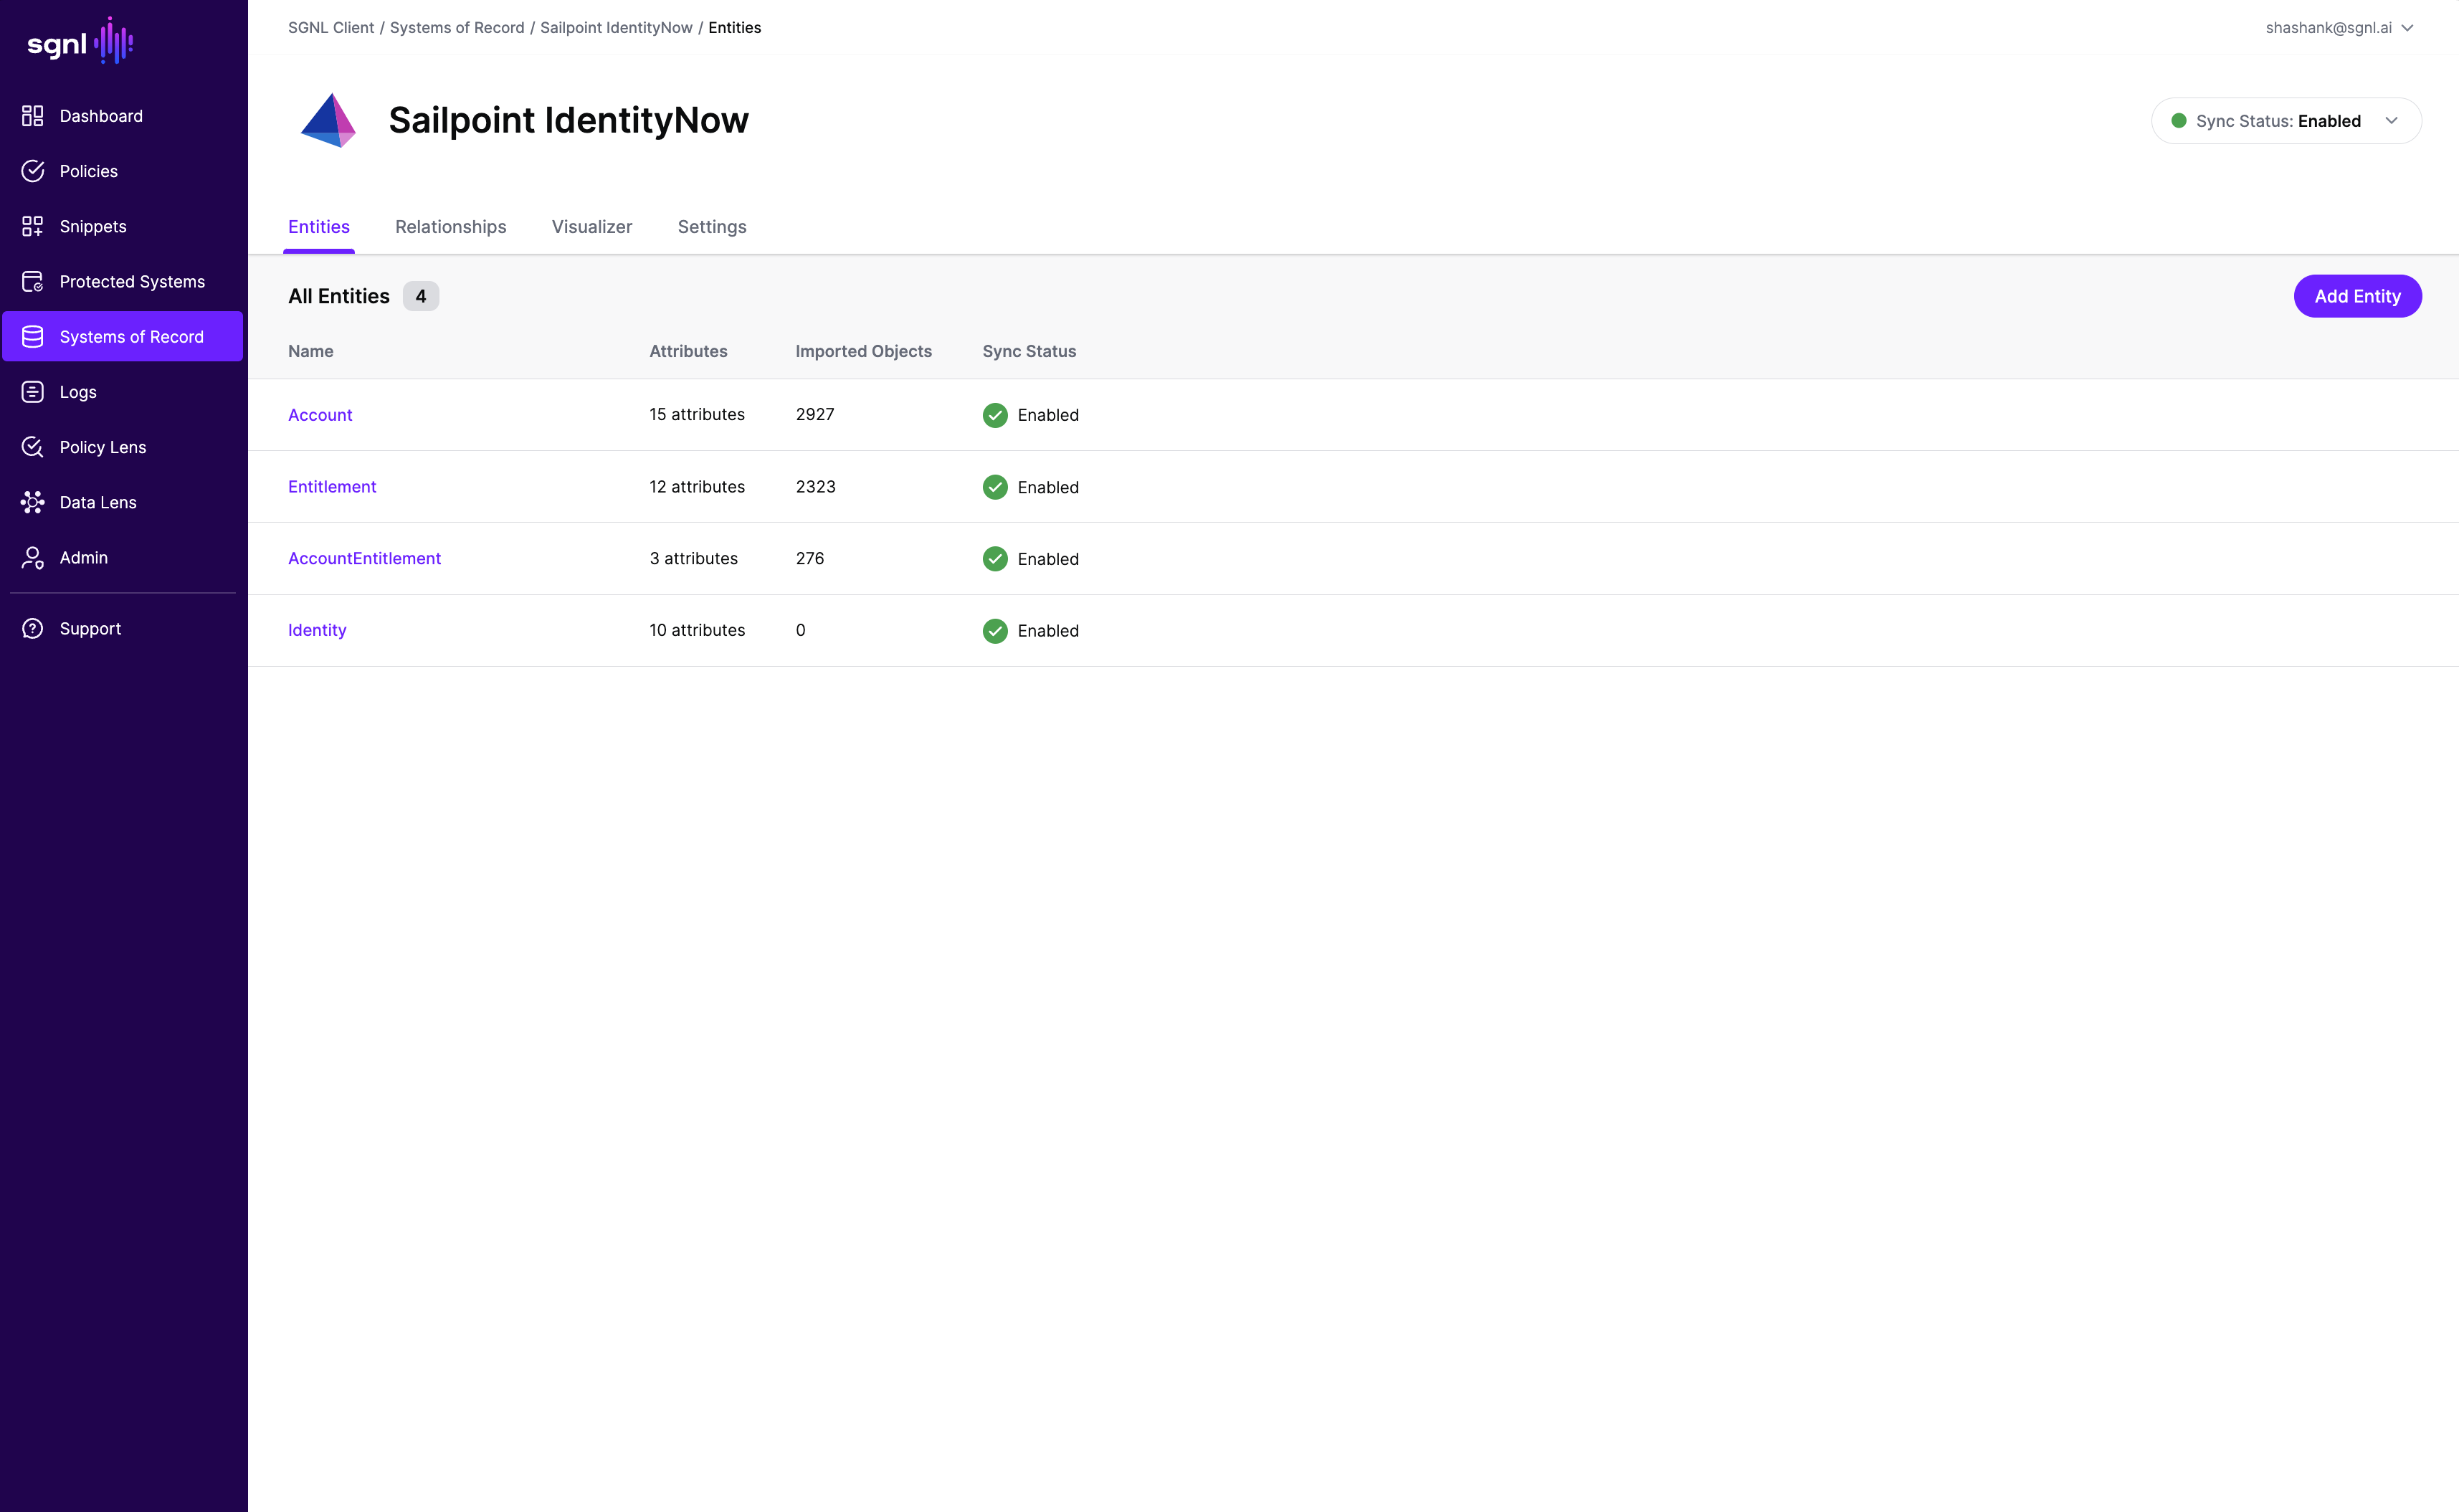 18. Once ingestion is complete and Sailpoint IdentityNow data is in the SGNL graph, you can use Data Lens to explore the SGNL graph.


 18. Once ingestion is complete and Sailpoint IdentityNow data is in the SGNL graph, you can use Data Lens to explore the SGNL graph.