Manage user data via APIs (api)
Perform requests any time (refresh_token, offline_access)
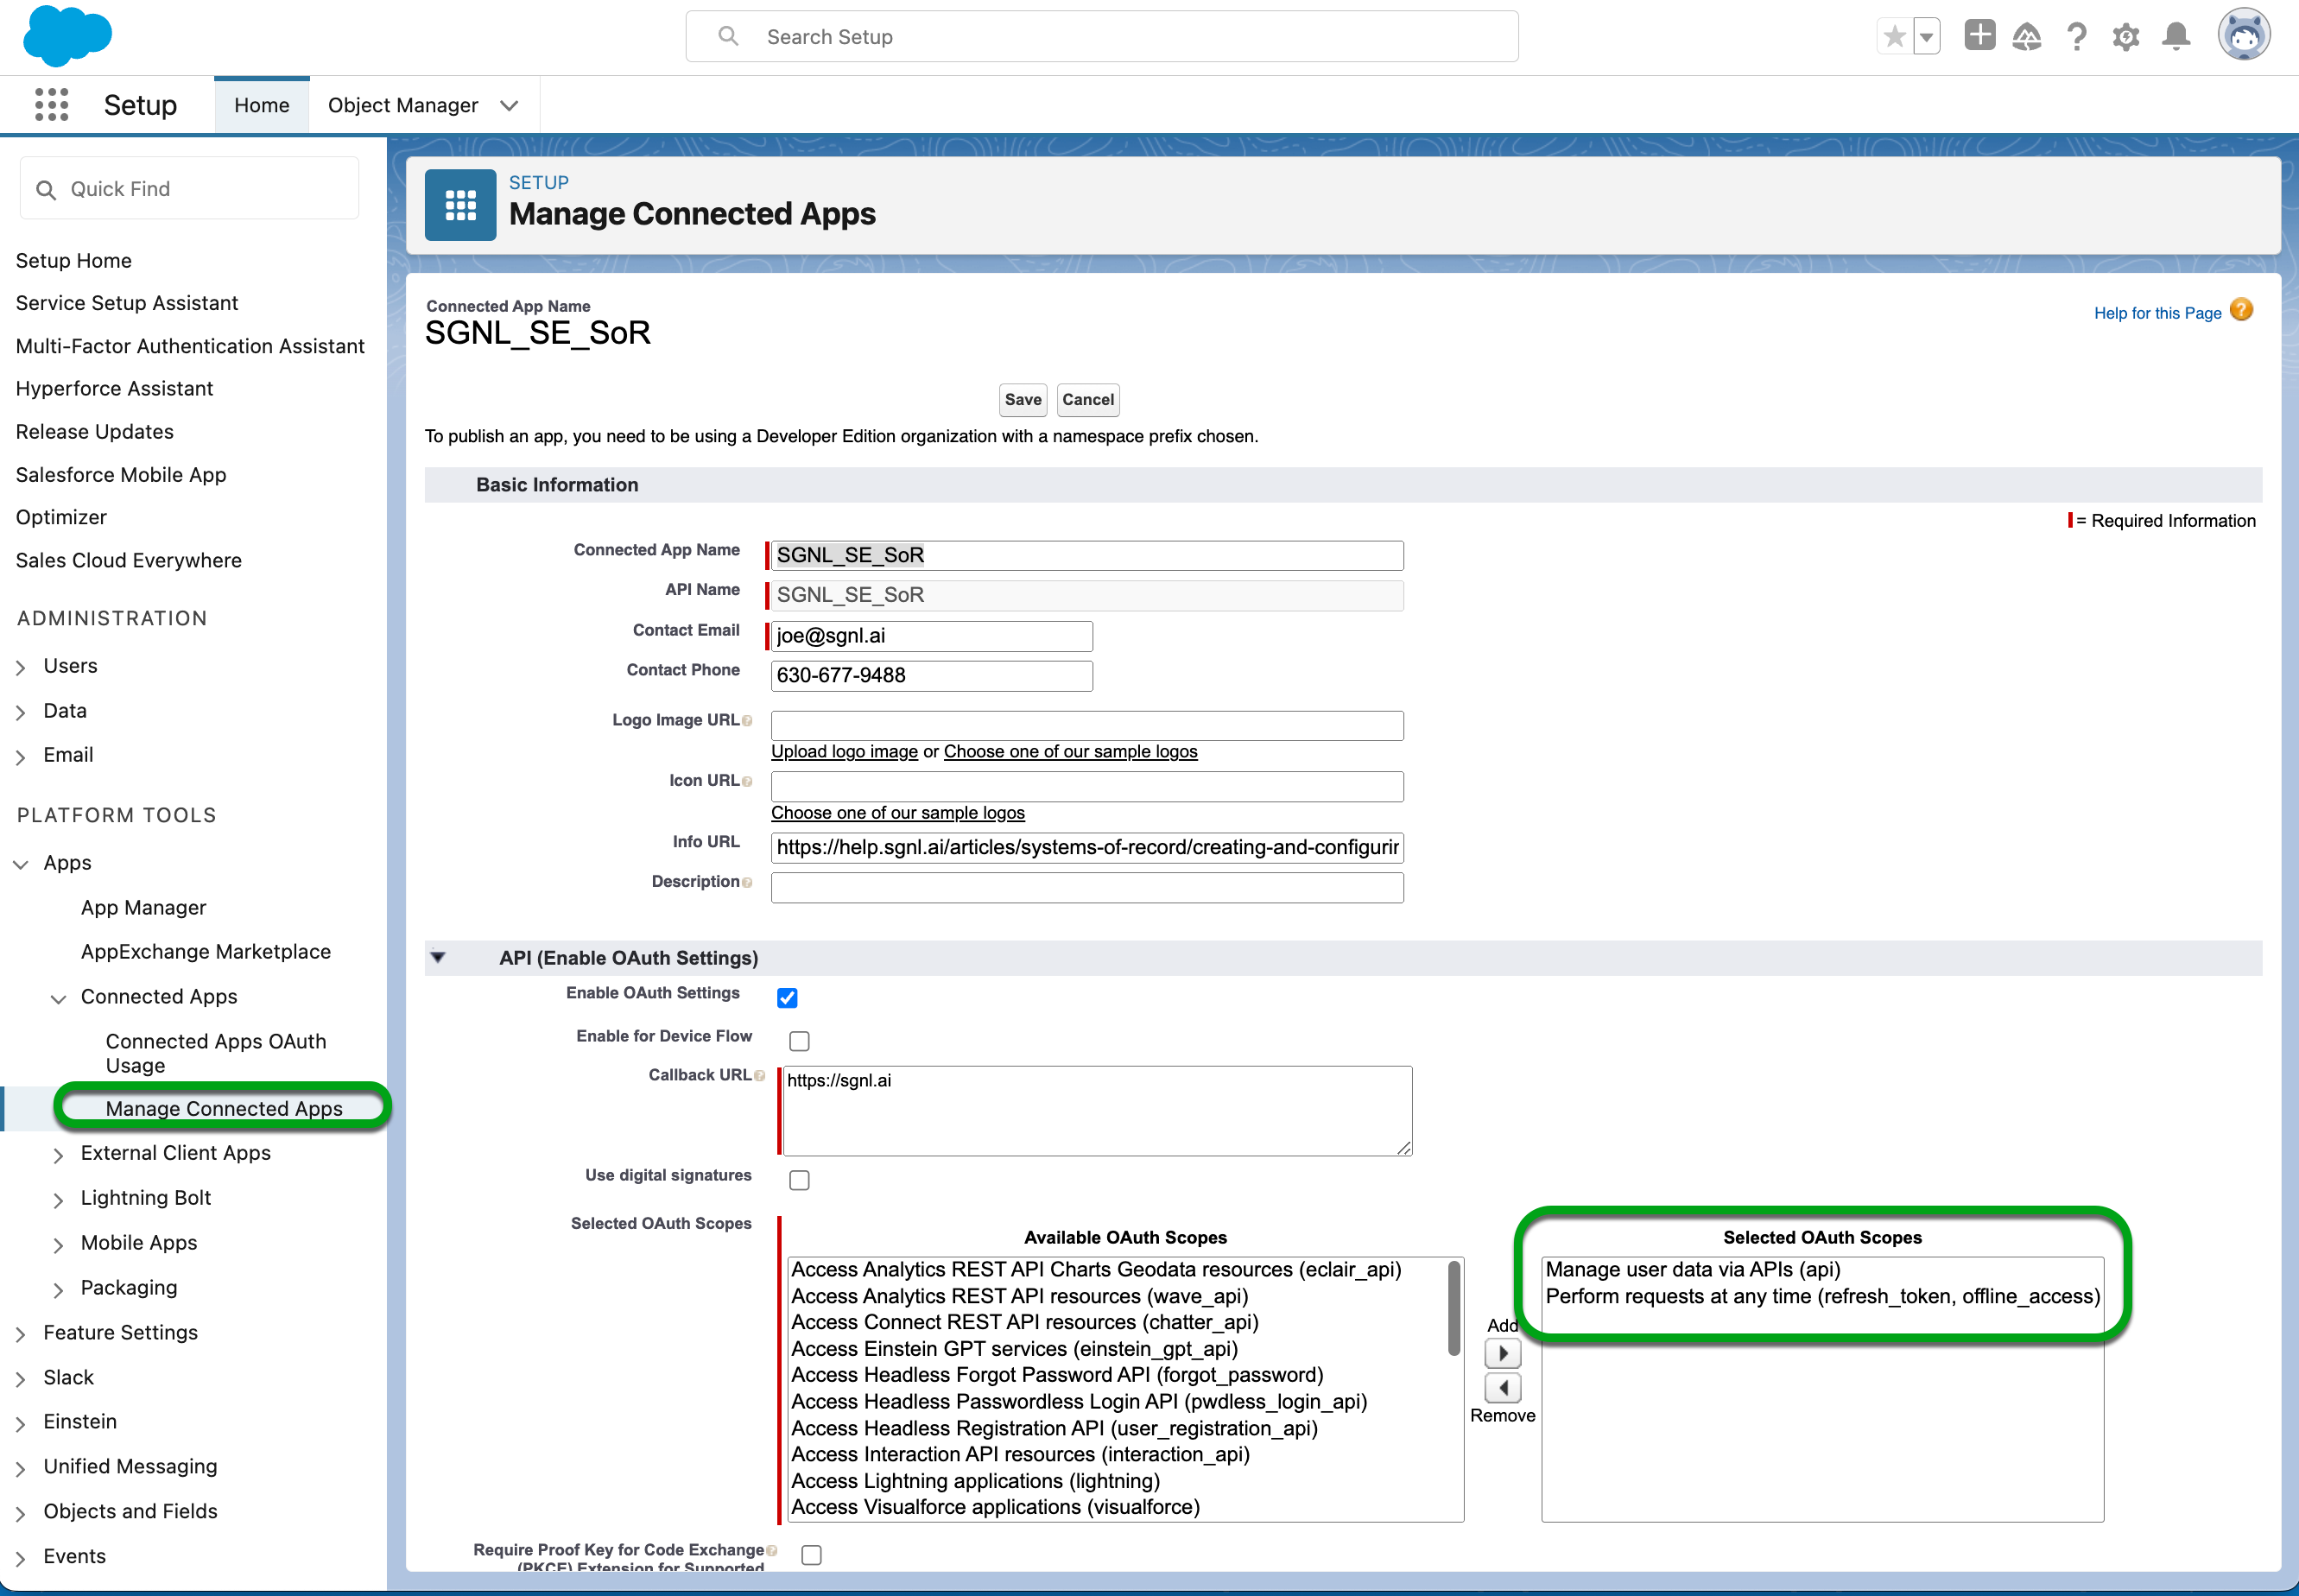
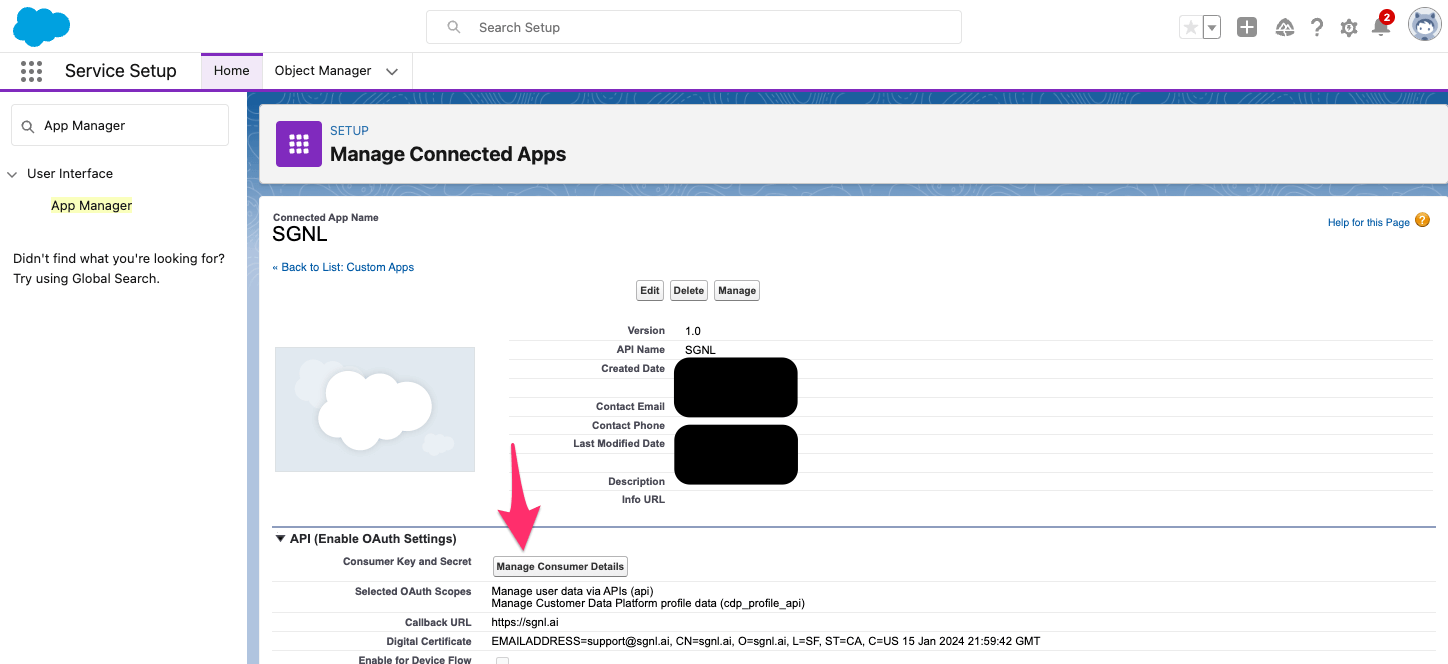
Choose to “Manage Consumer Details”, and copy the Consumer Key (OAuth Client Id) and Consumer Secret (OAuth Client Secret) - note these for use in SGNL
Login to the SGNL Console
From the left menu, select Identity Data Fabric
Click “Add System of Record” or “Add”.
The SGNL SoR Catalog will show up on the screen:
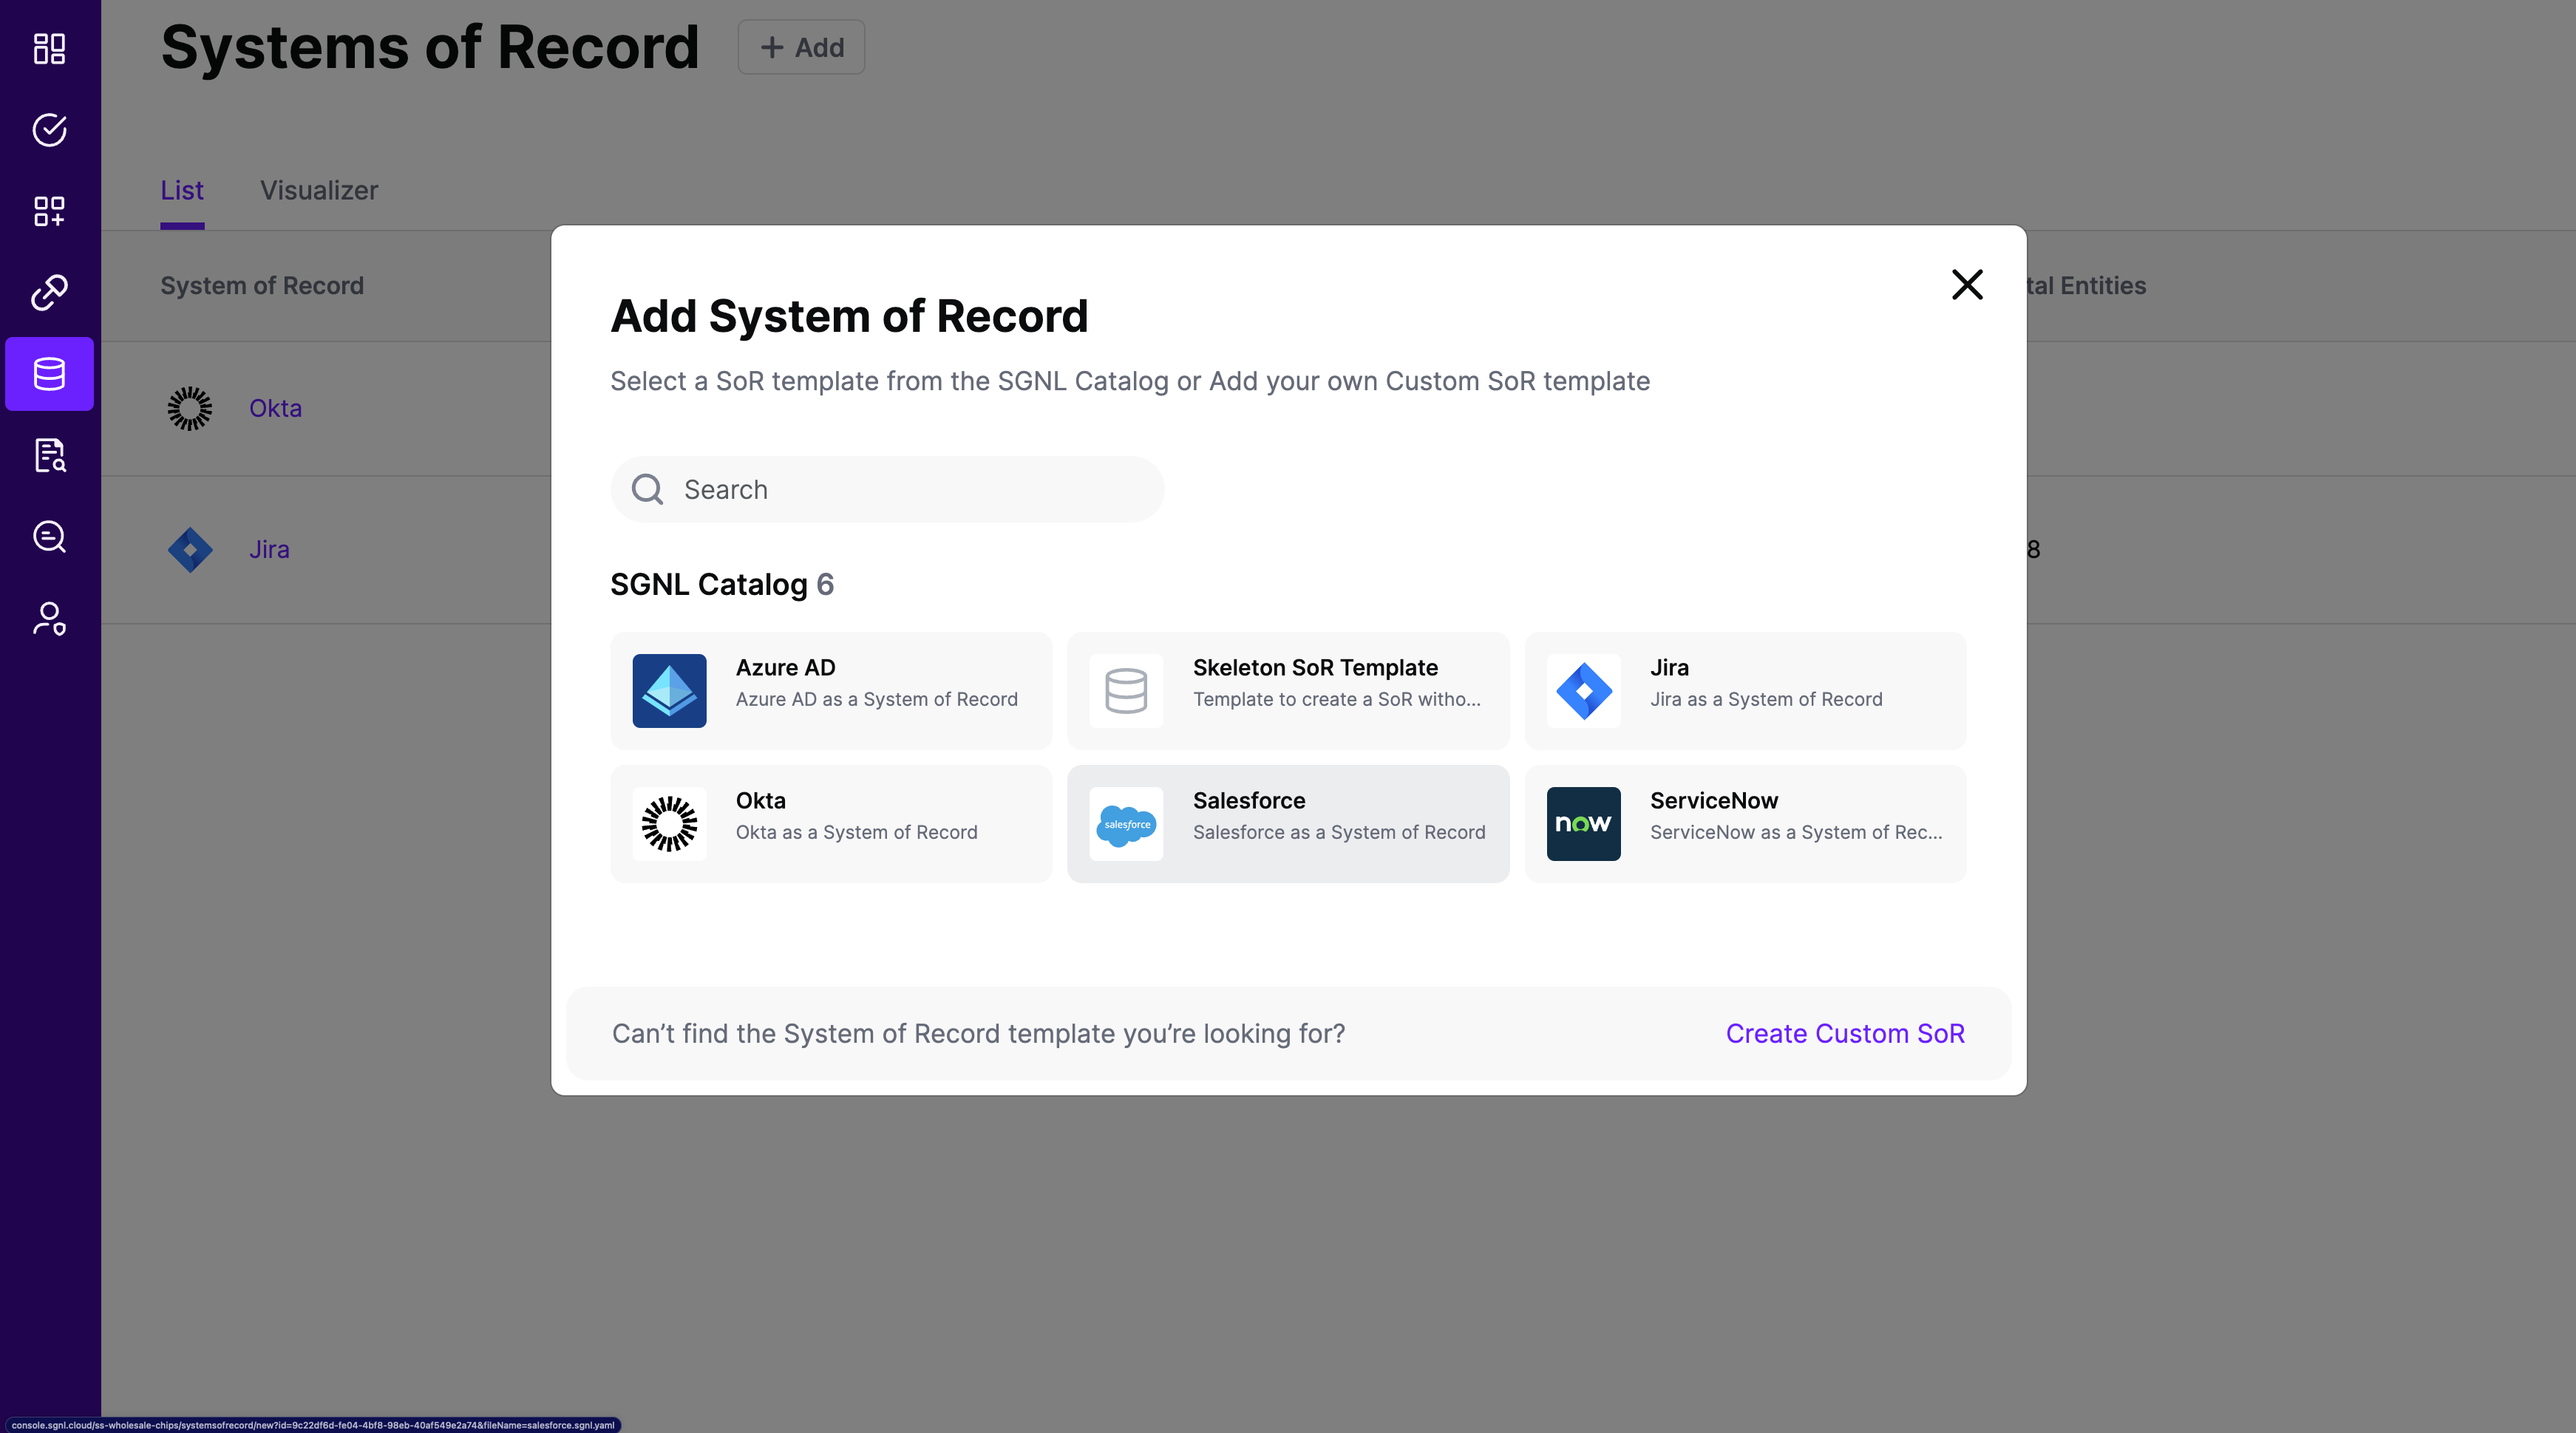
Click on “Salesforce” which will open up the New System of Record screen with some configuration options pre-populated from the Salesforce SoR template:
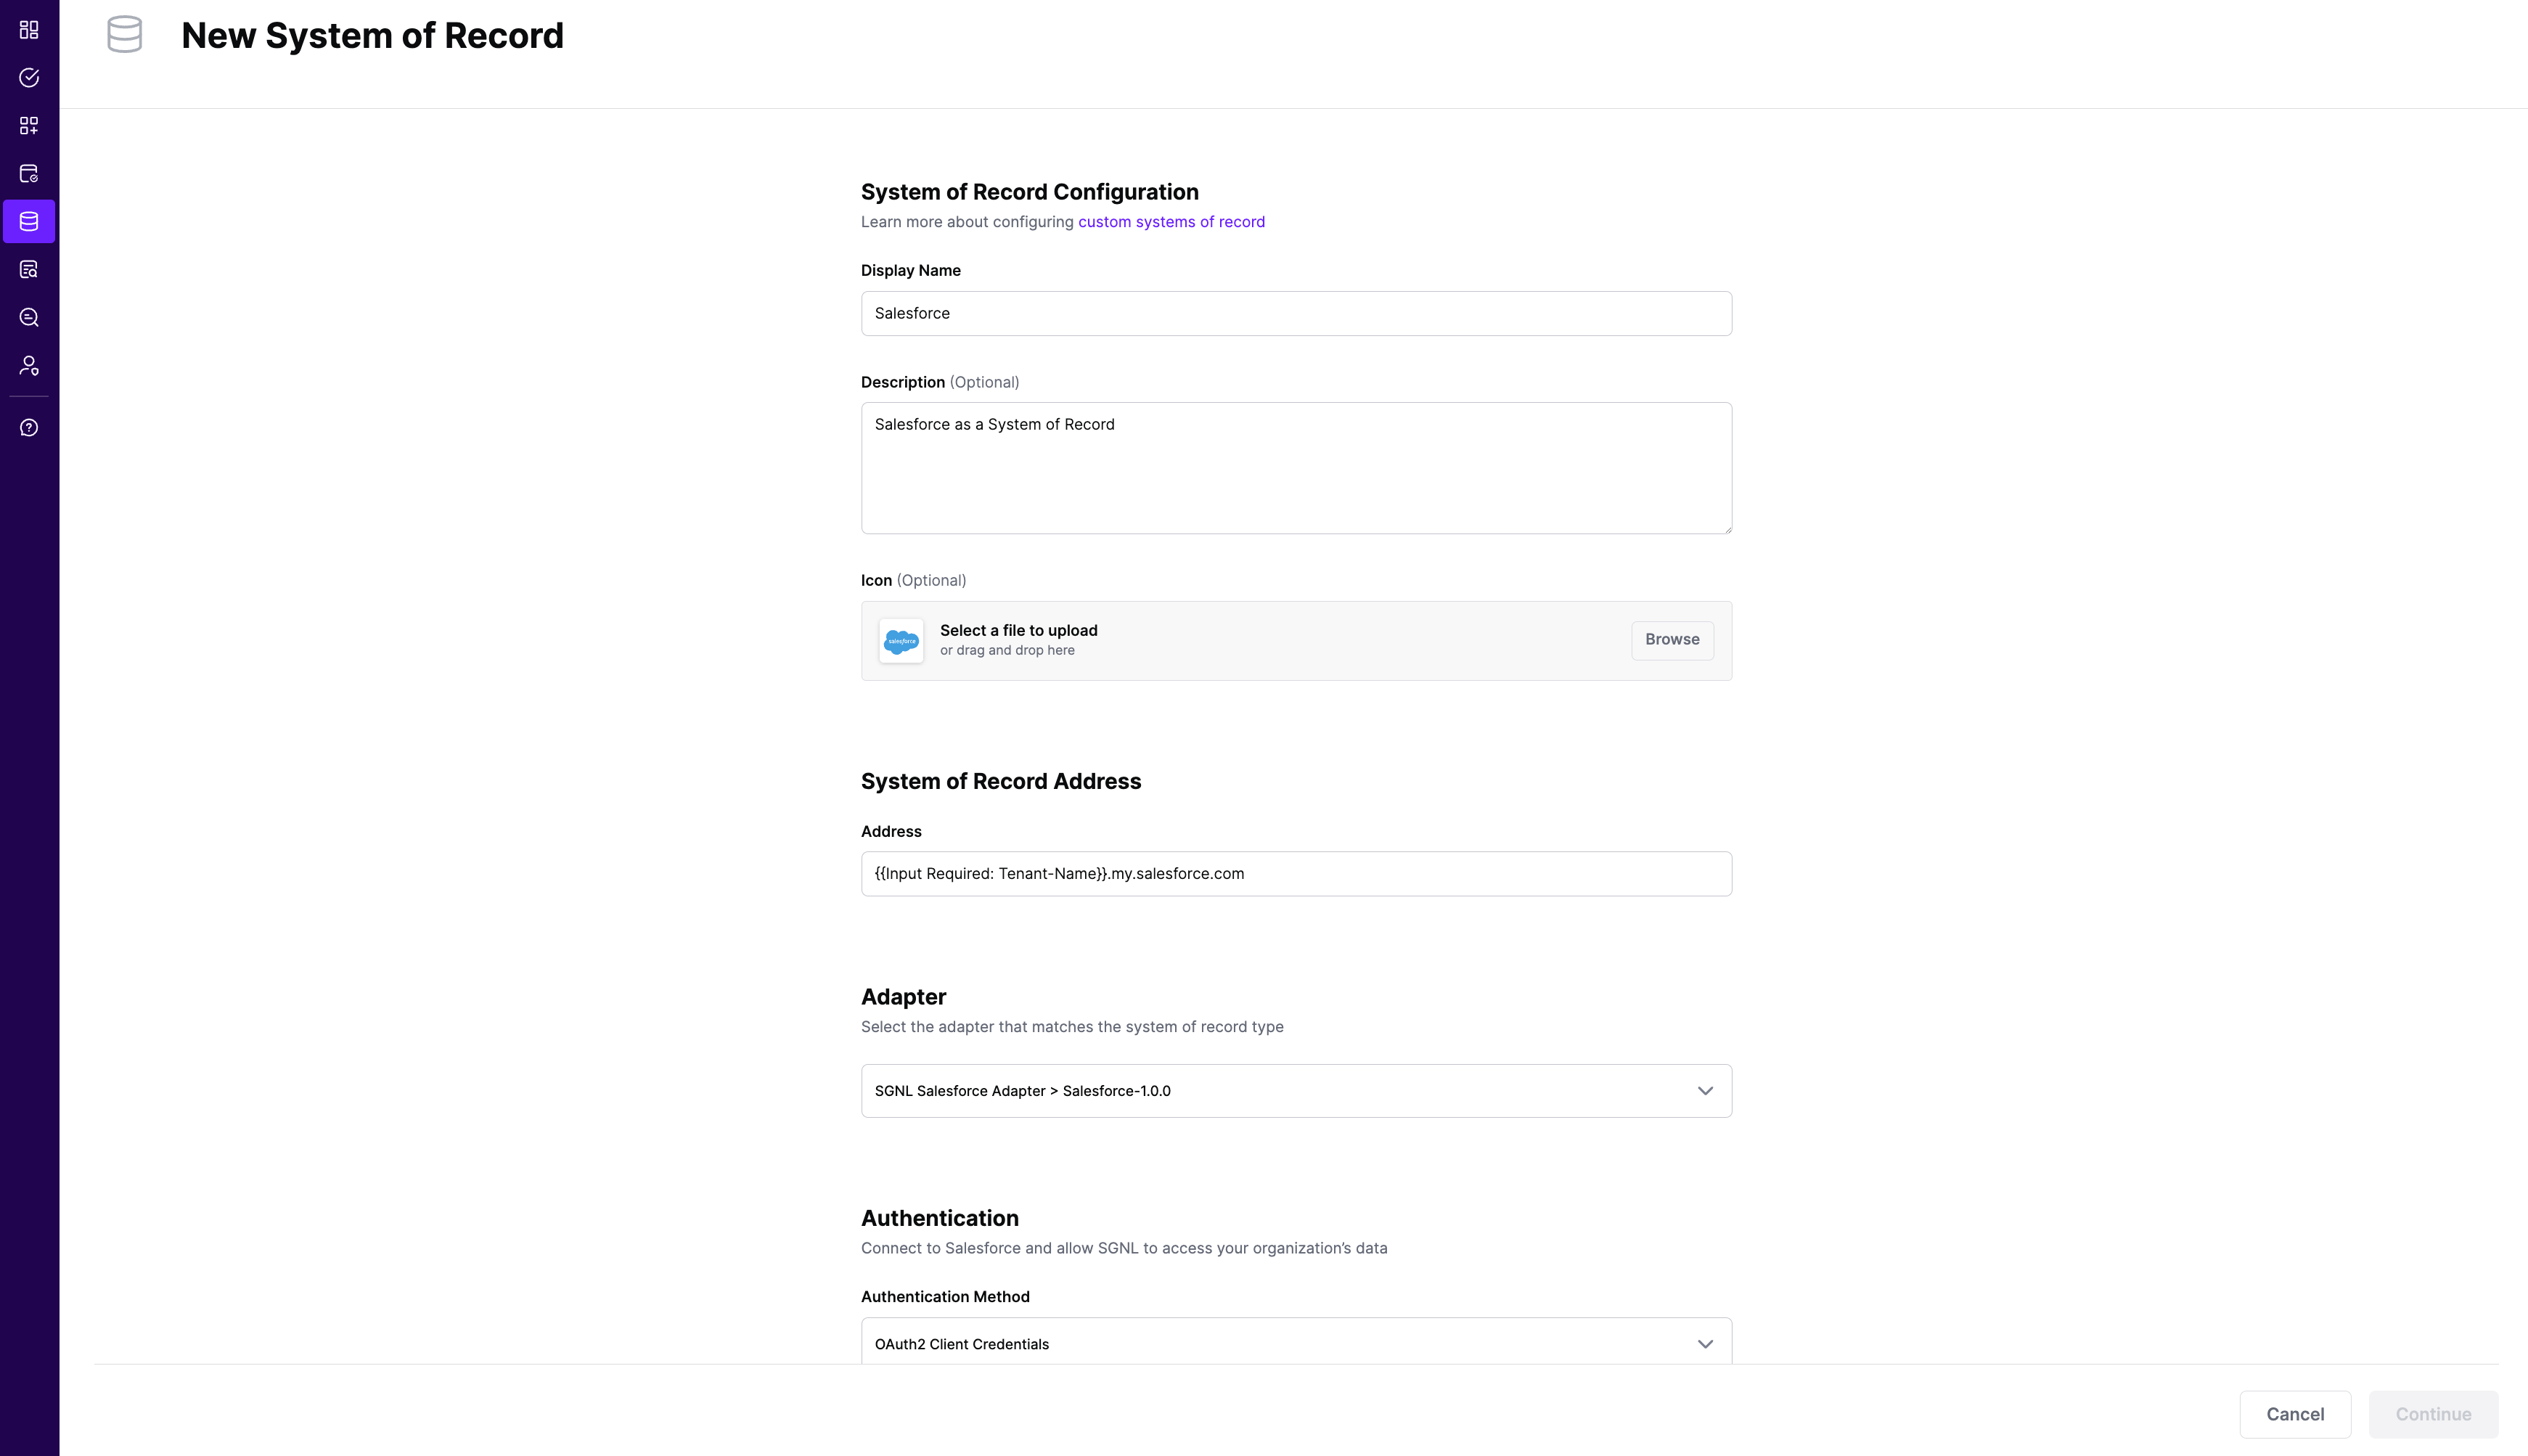
Choose the correct adapter that matches the System of Record Type.
Replace all fields that have the {{Input Required:}} placeholder with relevant information. Choose OAuth2 Client Credentials as the Authentication Method. For Salesforce, the following fields are required:
Click “Continue” to save your Salesforce System of Record. You will be taken to the Salesforce System of Record page.
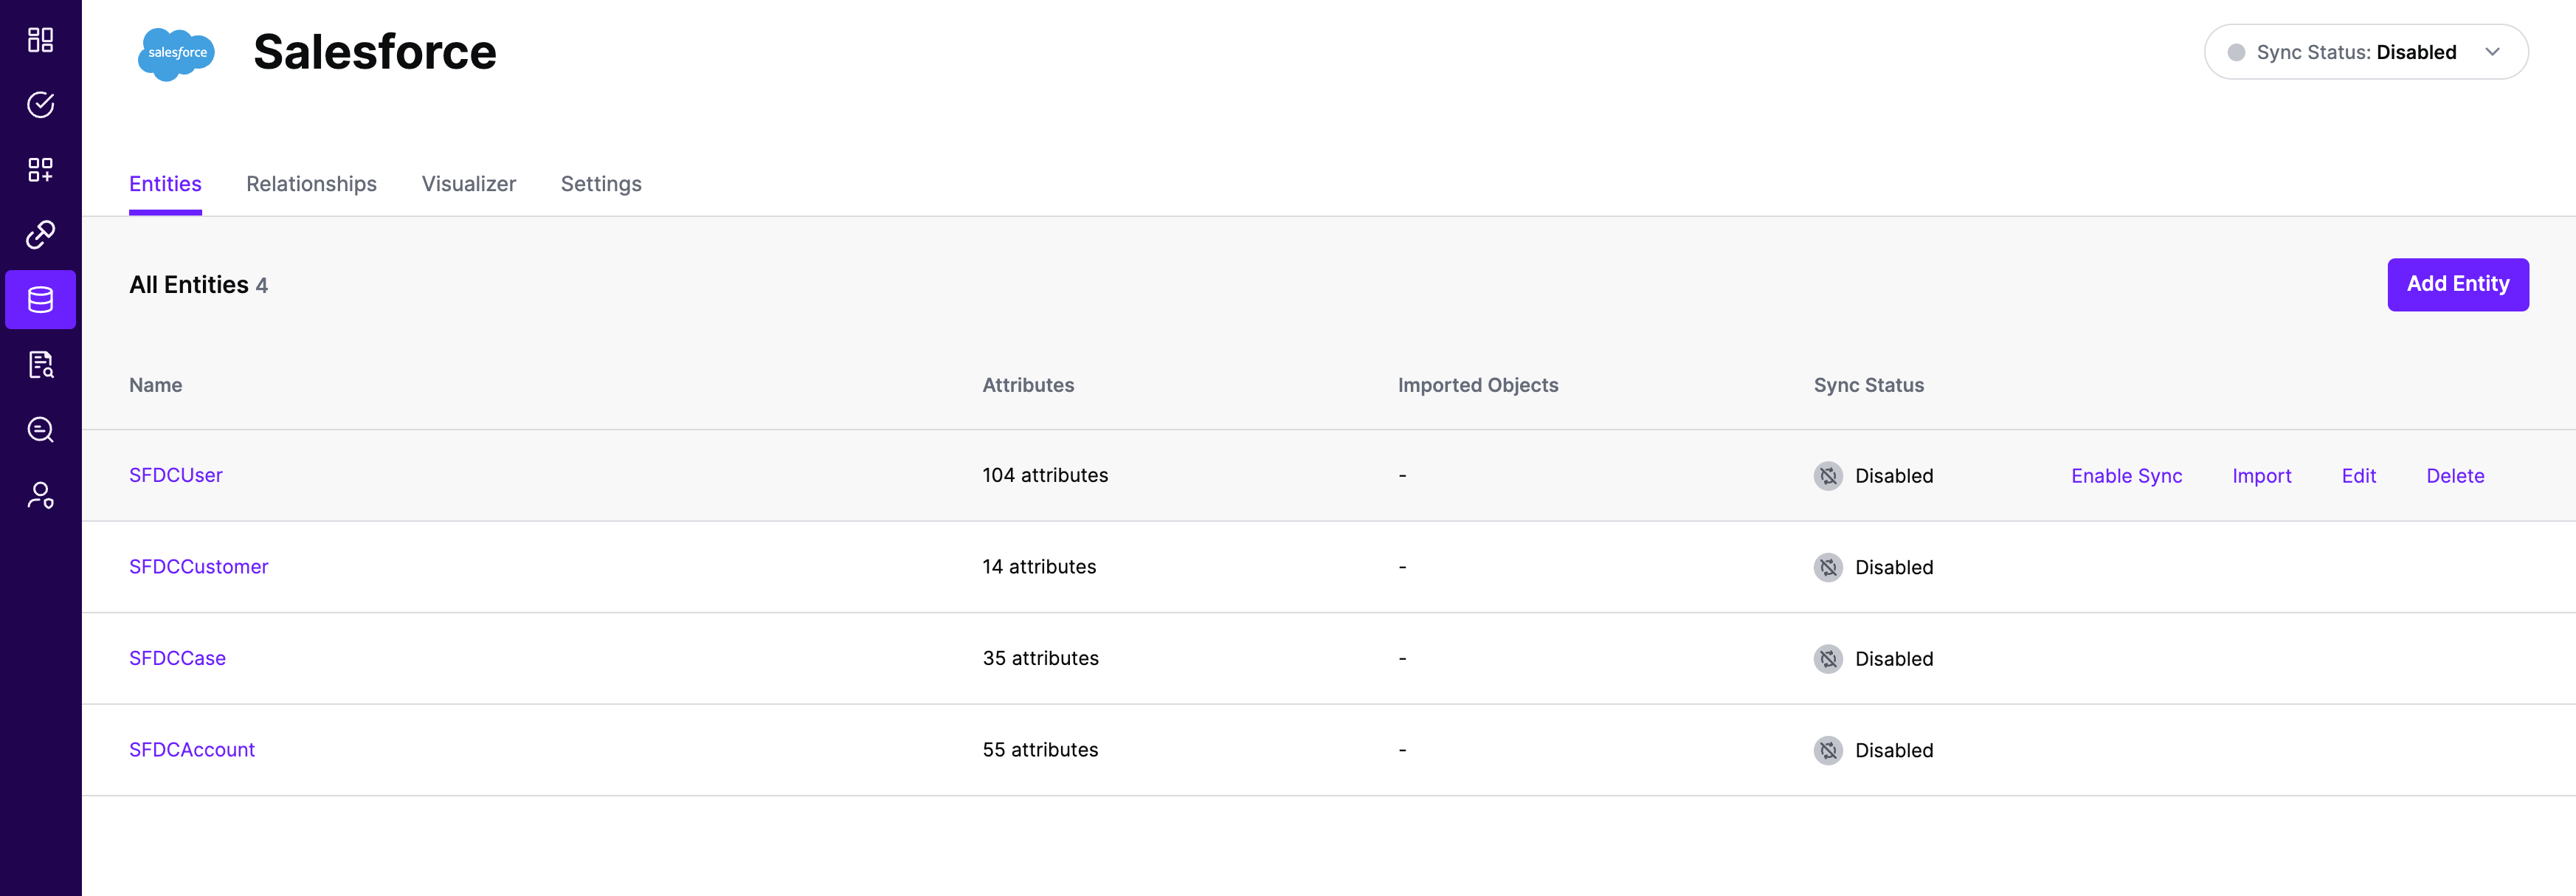
All entities and relationships are created as defined in the Salesforce template. If applicable, you can edit an entity and modify any properties of the entity or the associated attributes. Hover over the entity on the screen above to see the Edit button as shown above.
You can check the relationships created through the Relationships tab. However, relationships cannot be modified. You will need to delete an existing one, and create a new relationship.
Note that synchronization is disabled by default when a new System of Record is created. You can choose to enable synchronization on Entities individually. Hover over the entity to see the Enable Sync button, and click on it.
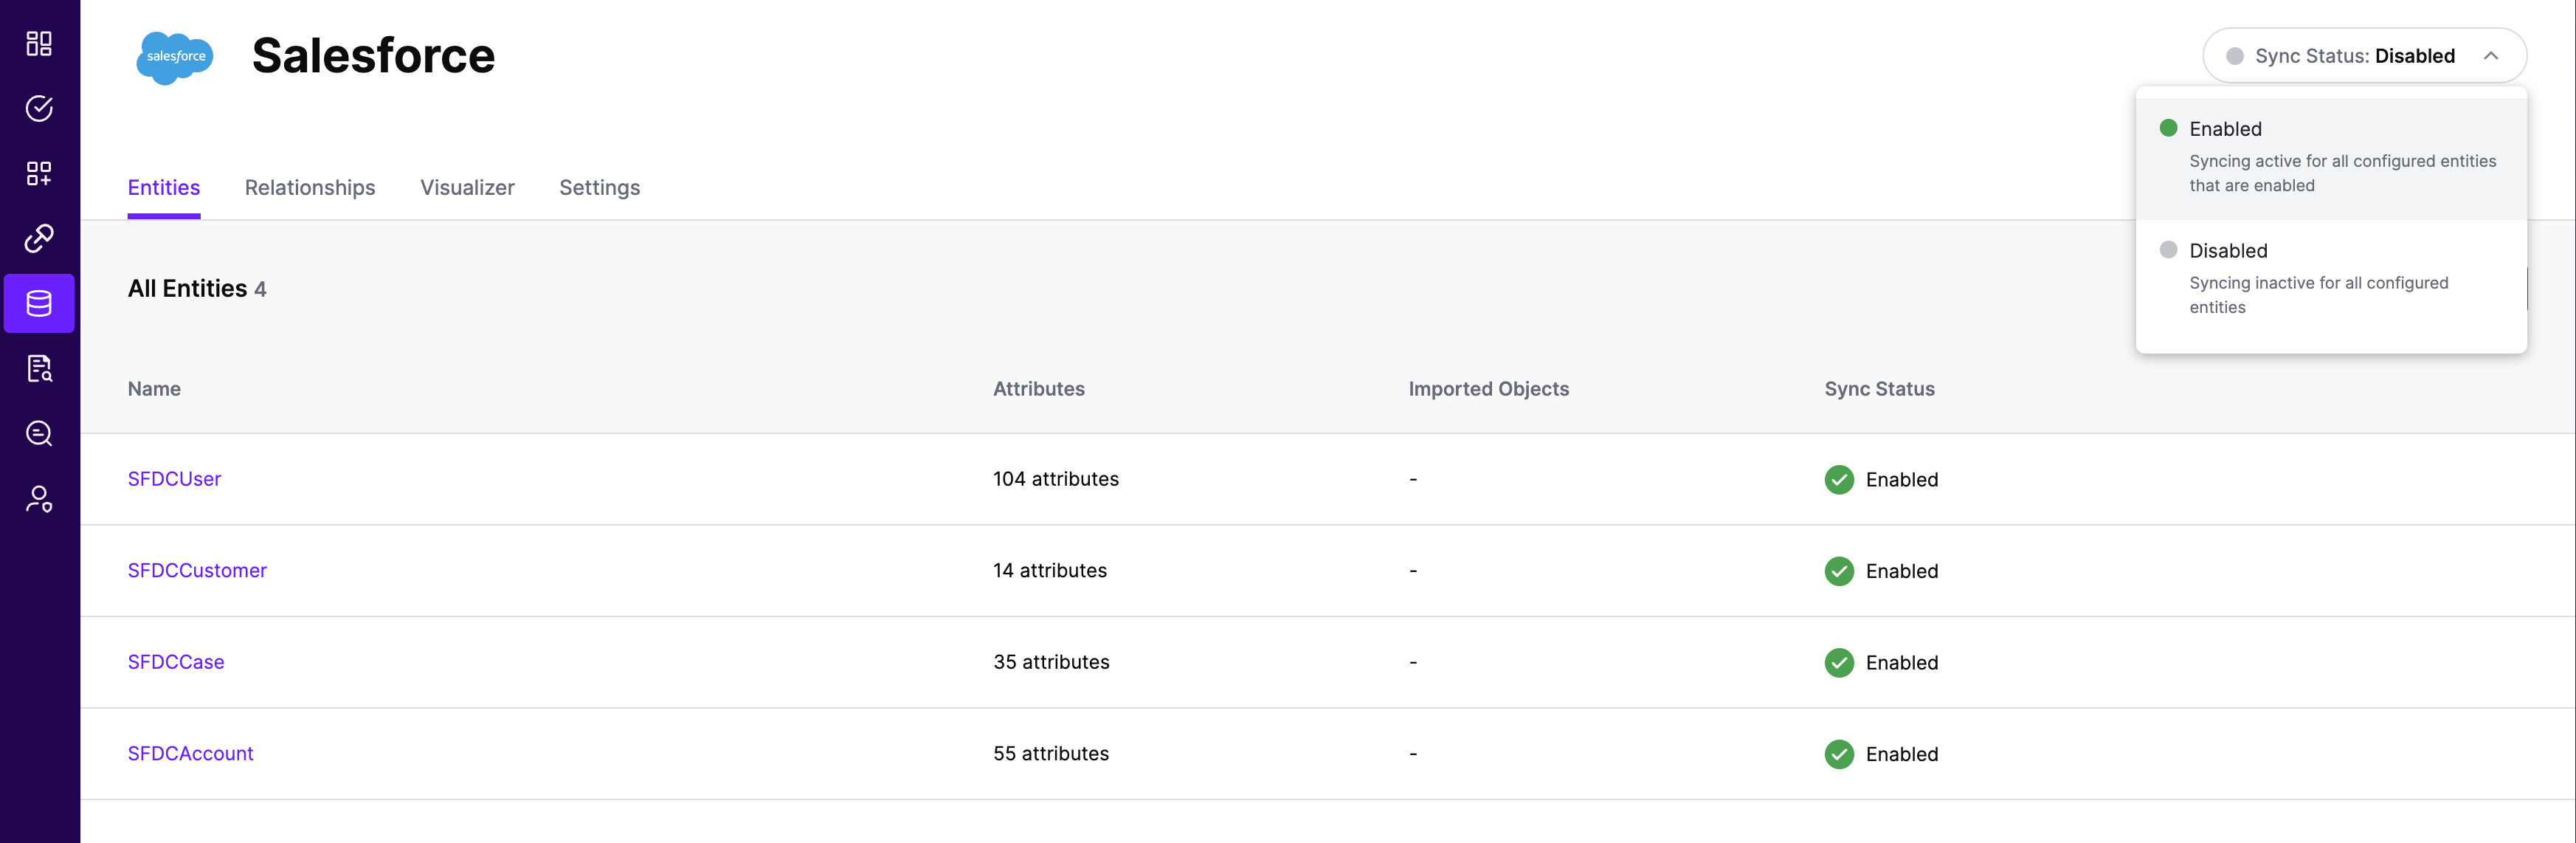
Repeat for all Entities you want to synchronize to SGNL. Finally, Enable synchronization for the System of Record.
After some time, SGNL should complete ingesting the data from your Salesforce instance into the SGNL graph. The number of objects ingested per entity are displayed on the Salesforce screen. You should then be able to construct policies based on your Salesforce data and make access evaluation calls to SGNL.
Once ingestion is complete and Salesforce data is in the SGNL graph, you can use Data Lens to explore the SGNL graph.
In most cases, you will want to reduce the data coming from Salesforce to only the entities, attributes, and objects that you need to sucessfully evaluate your policies or take action within SGNL. Given that, it’s likely that you will want to make use of filters to reduce that data.
As with other SoRs, you can apply the native filtering syntax from the SoR, in this case Salesforce, to the Adapter Config for the System. Filters are configured per Entity and are passed directly to the System of Record at Synchronization time to be evaluated and have only the right data made available to SGNL.
SGNL uses the Salesforce WHERE query parameter to filter data from the Salesforce APIs using SOQL. Salesforce has thorough documentation for the mechanism for using this query parameter, though samples are included below
To use Salesforce filters, simply add the appropriate filter (i.e. the text you would include after WHERE on the Salesforce API) to the relevant entity in the Adapter config.
Sample Adapter Config
{
    "requestTimeoutSeconds": 10,
    "apiVersion": "58.0",
    "filters": {
        "User": "isActive=true",
        "Case": "isClosed=false"
    }
}
10"58.0"ExternalId of each of the Entities in SGNL, available from the SoR -> Entities -> Entity Page (e.g. User), and the externalId of each of the attributes that you want to filter