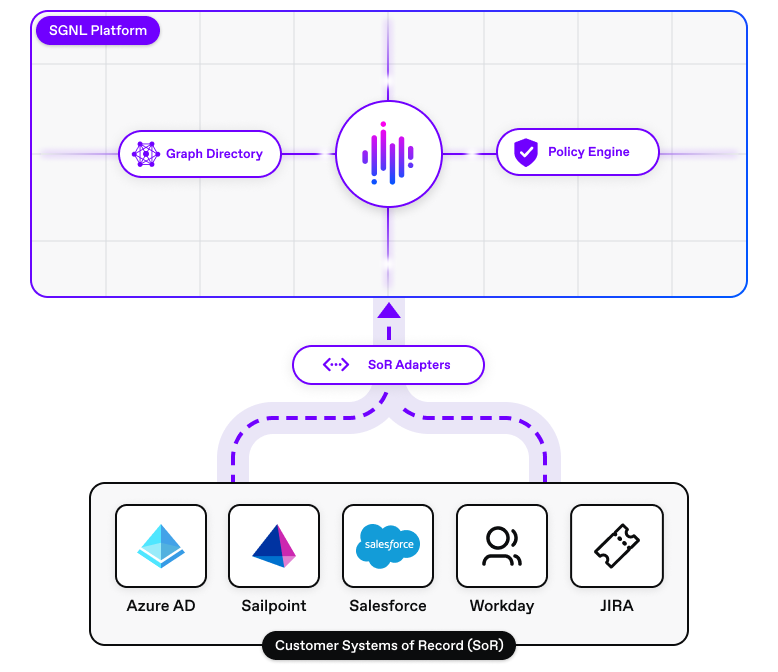
Systems of Record (SoR) provide SGNL with valuable business context in order to make policy decisions. When you configure a System of Record, you tell SGNL how to connect to the source, as well as describe the types of objects and attributes you want to bring into the SGNL graph.
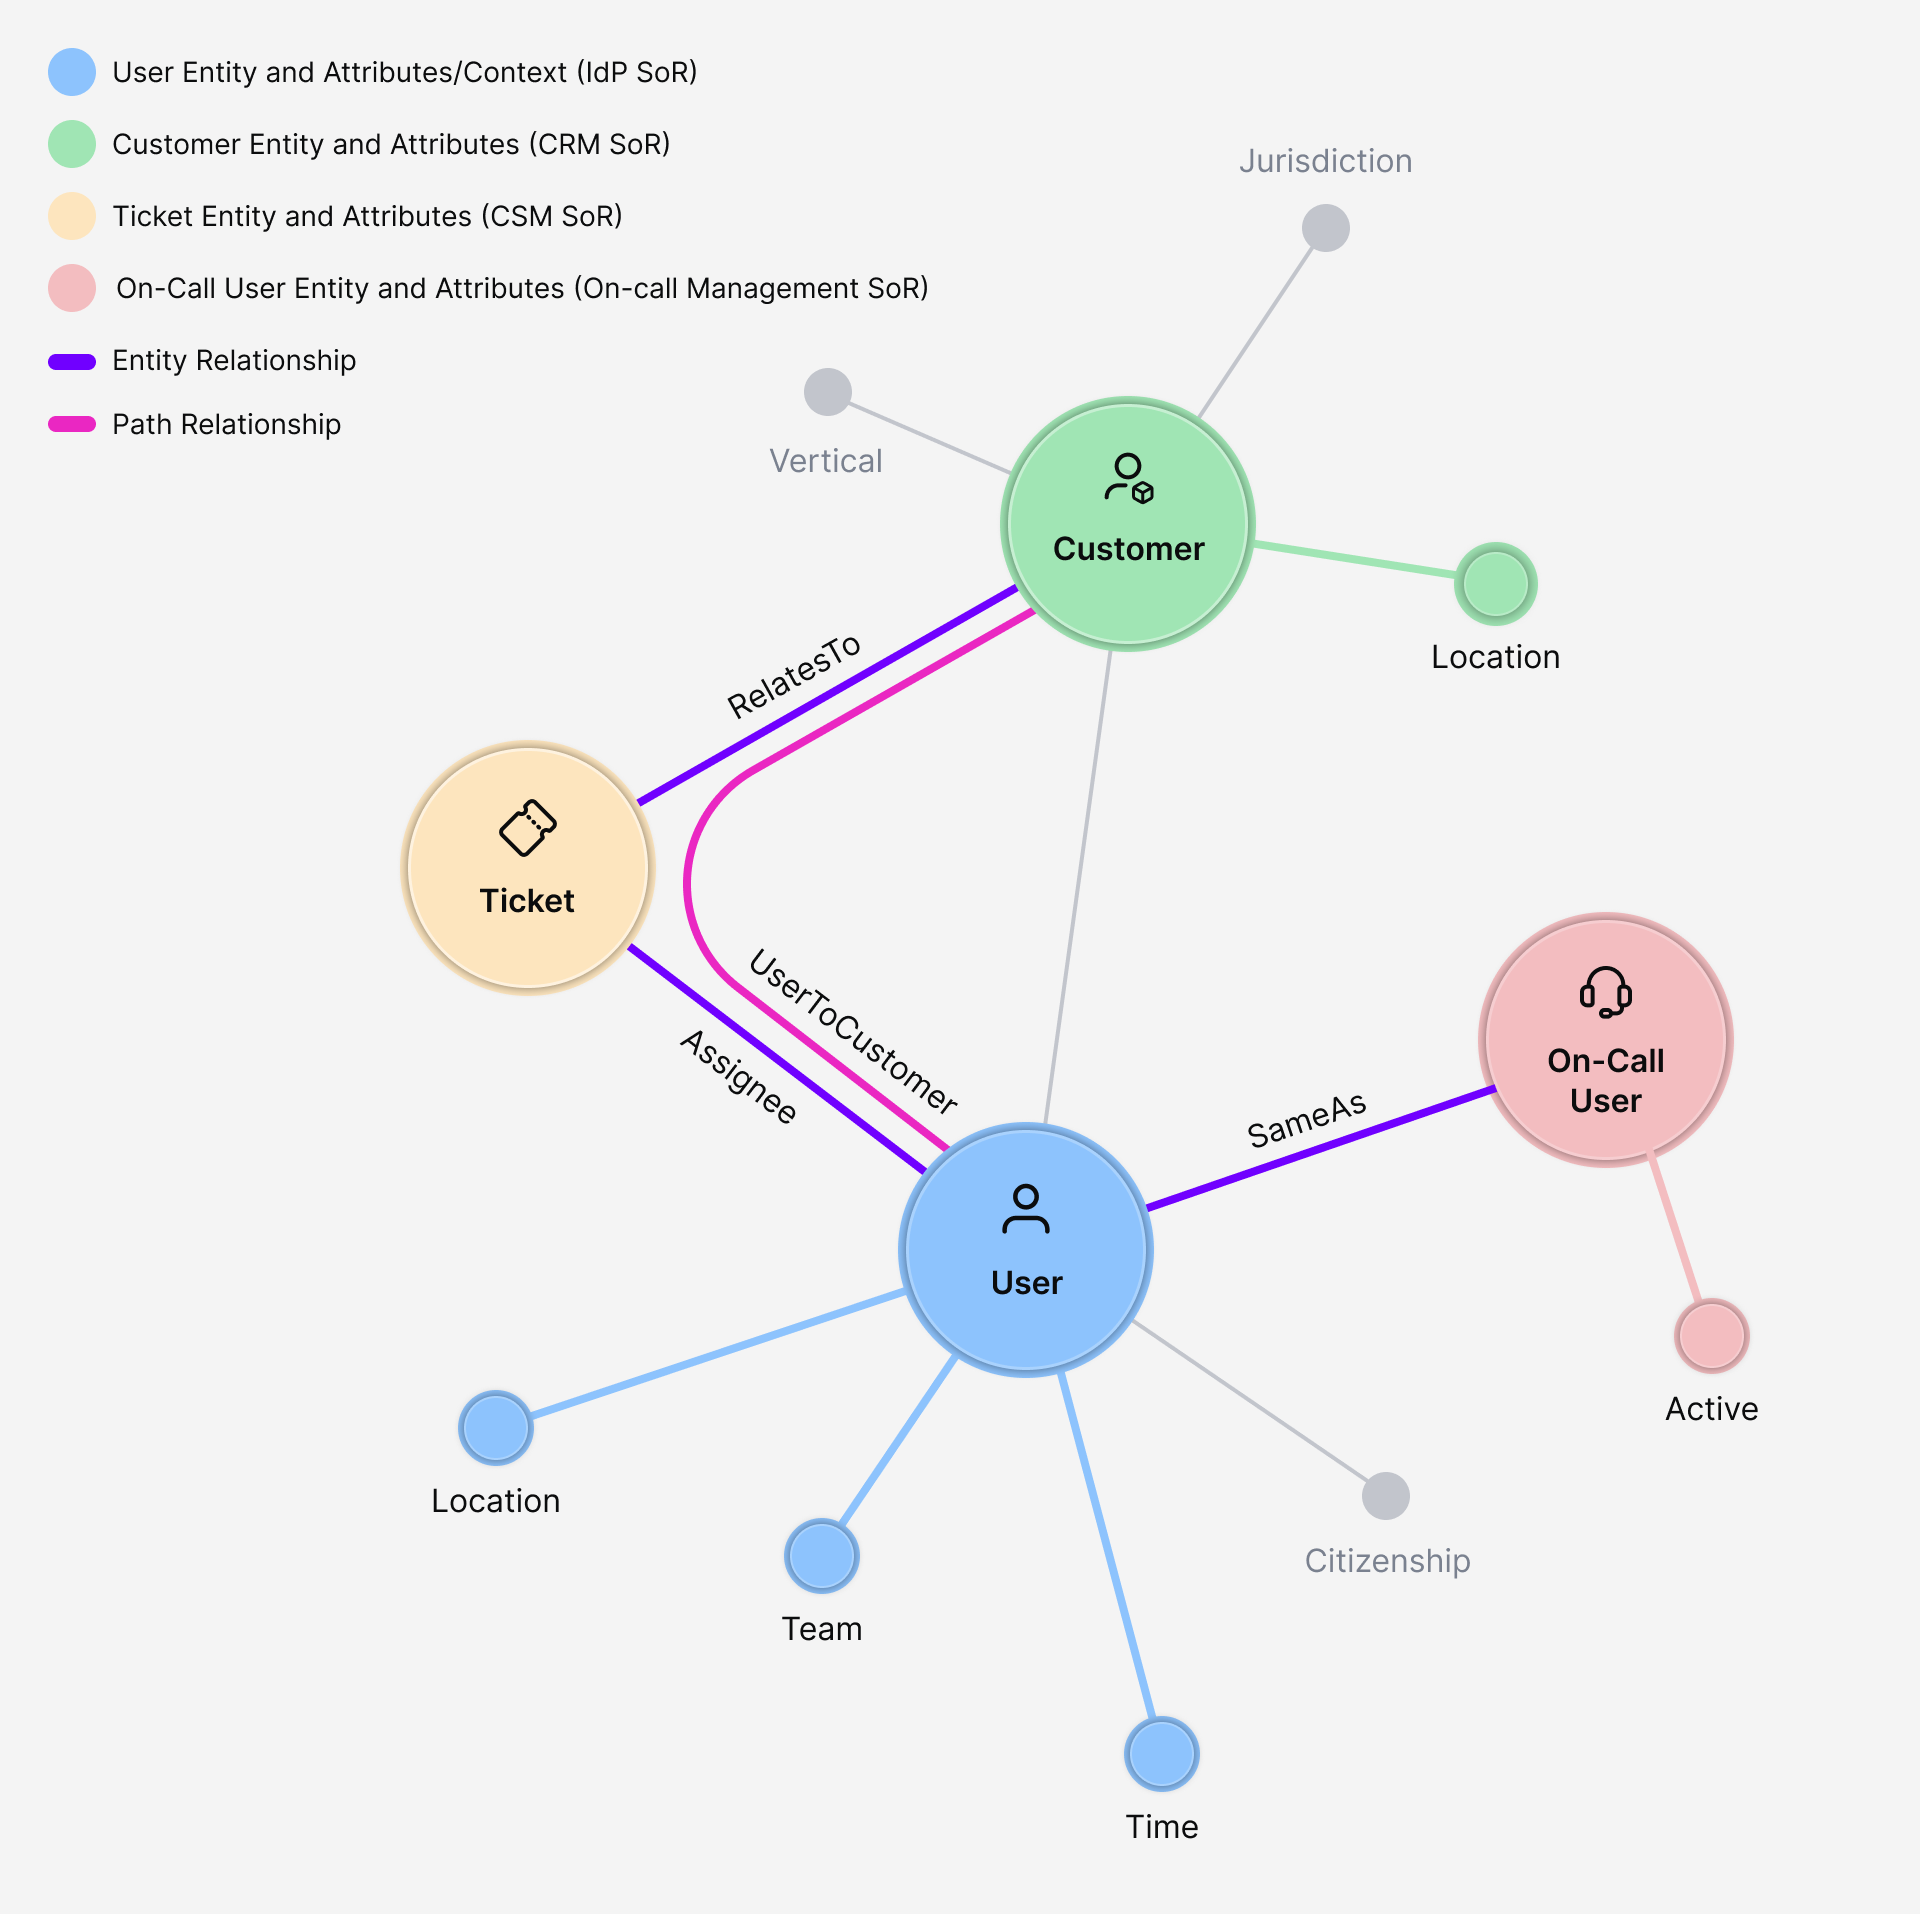
Once the Systems of Record are configured and data ingestion commences, SGNL begins to construct a graph from the ingested data. Consider a graph created by integrating employee data from an Identity Provider (IdP), ticket data from a Customer Service Management system, customer data from a CRM, and on-call schedules from an on-call management system. In SGNL, nodes represent entities, and edges represent relationships.
For example, consider an access policy stating that Employees who are Engineers can only work on a Customer ticket if they are assigned to the ticket and are also on-call at the time. The graph includes all necessary context for SGNL to make this decision. Any changes in ticket assignments or on-call status are automatically updated by SGNL, maintaining the accuracy of the relationships in the graph. For instance, if an engineer is removed as an assignee from a ticket, the Assignee relationship is also removed, and consequently, the policy will no longer apply to that user.
Entities and their Attributes for a SoR may be created either through a SoR Template YAML file in Catalogs (recommended), or directly through the SGNL Console.
SGNL allows the creation of SoRs using YAML templates. Please refer to SGNL Catalog and Templates documentation.
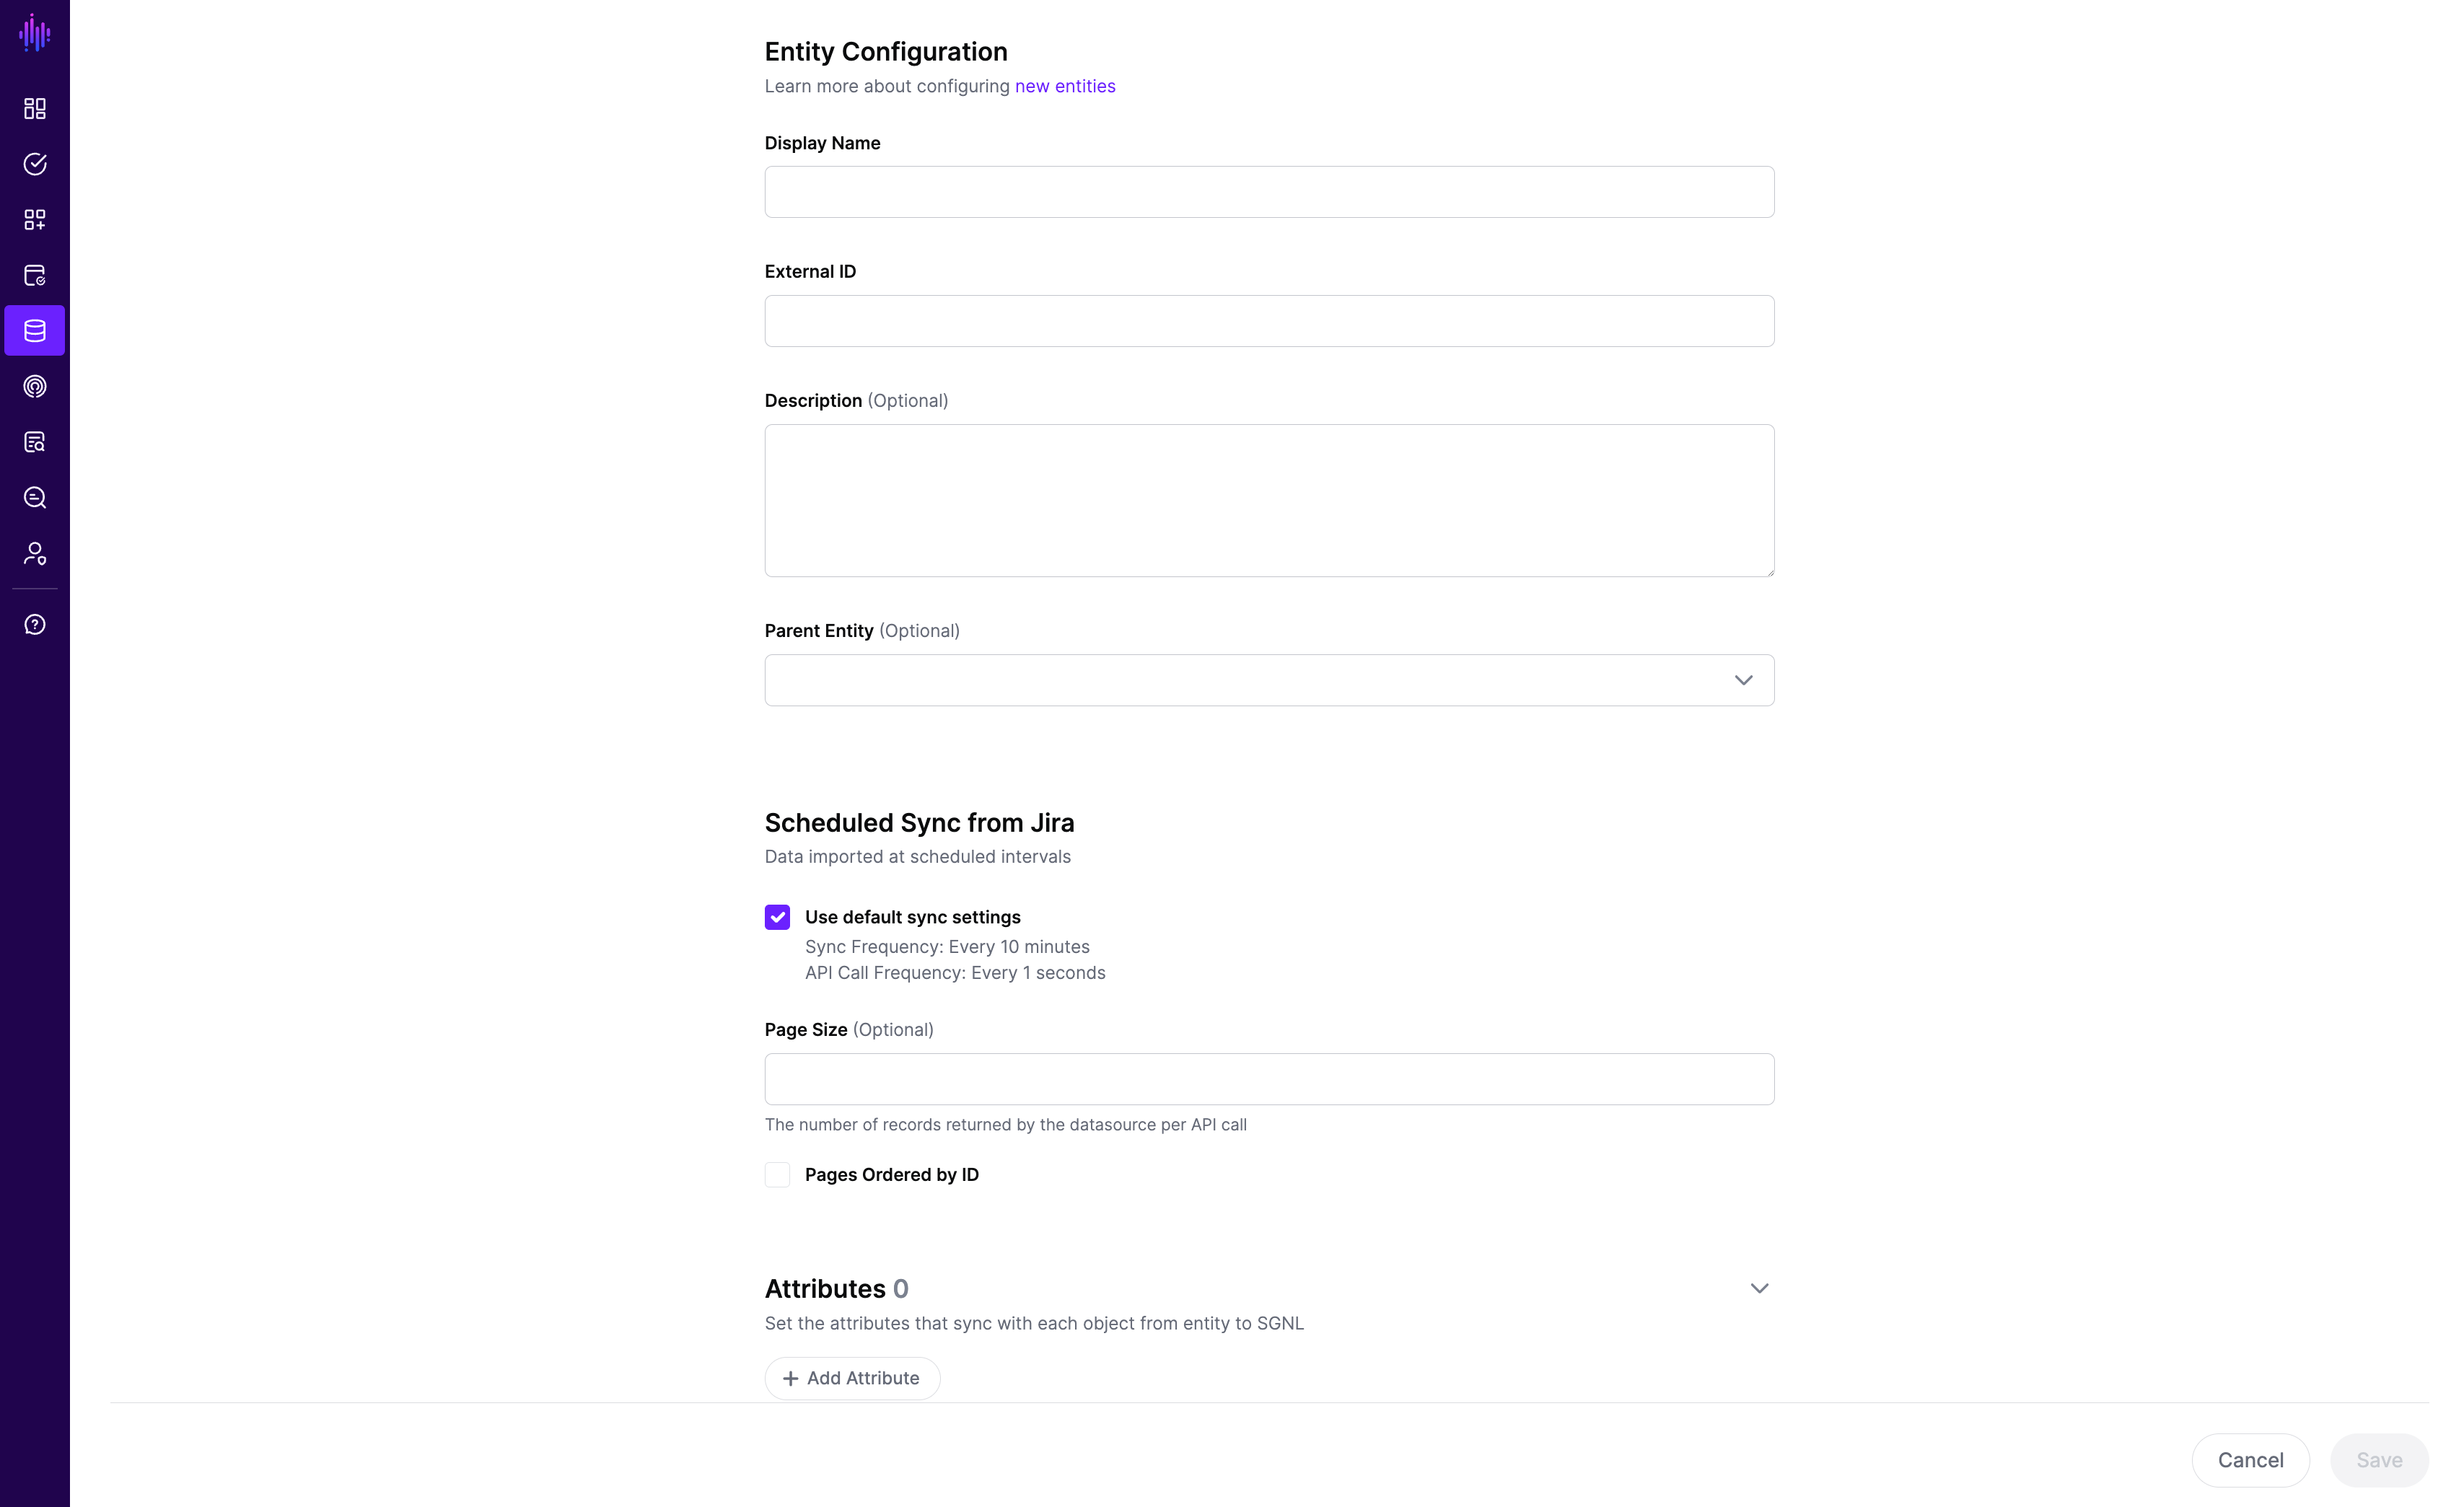
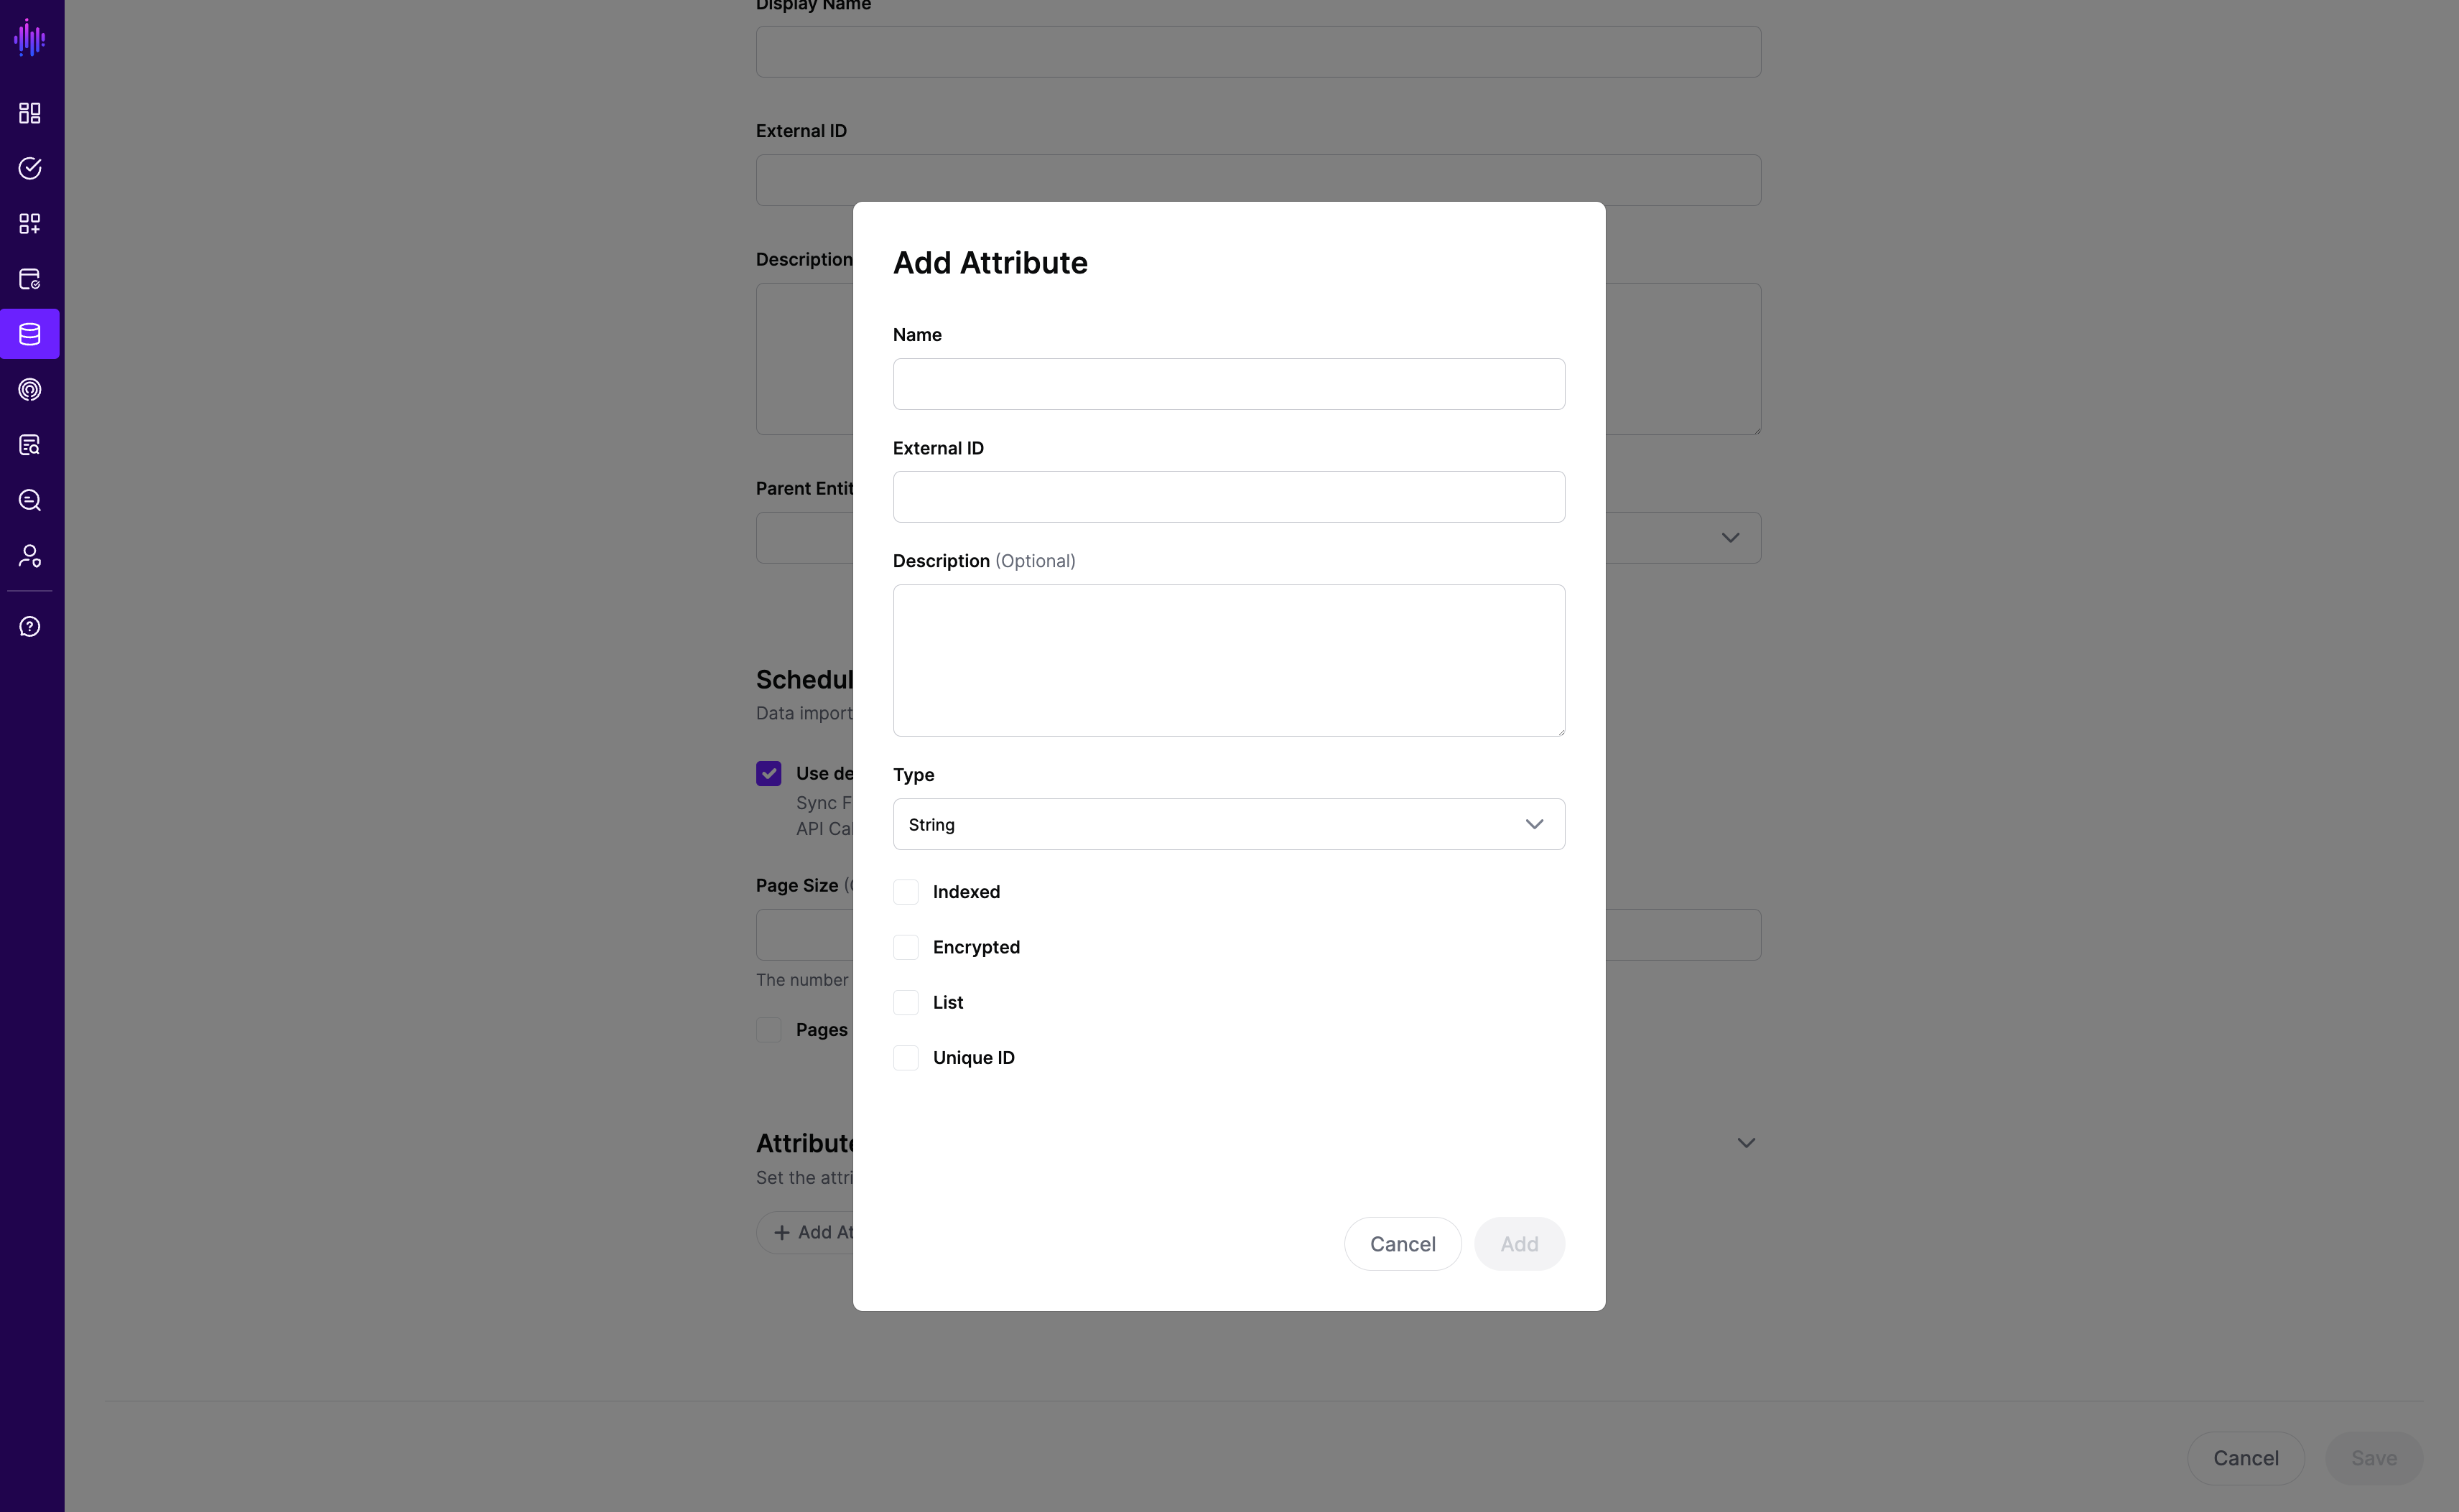
If you are quickly testing Entities and Attributes creation and synchronization, you can create them through the SGNL Console.
SGNL’s Synchronization Safety feature protects your access decisions from unintended large-scale changes in your Systems of Record. When a synchronization run detects that deletions exceed a configurable threshold, SGNL prevents those changes from affecting your graph, alerting you and giving you time to investigate, then resolve the issue.
While SGNL is designed to keep your graph current with your Systems of Record, there are scenarios where rapid, sweeping changes may not accurately reflect your desired state:
Synchronization Safety acts as a safeguard, ensuring that access decisions remain stable and accurate even when upstream systems experience issues.
Synchronization Safety is configured on a per-entity basis. Before committing deletions to the SGNL graph, the system calculates the percentage of objects that would be deleted in the current synchronization run. If this percentage meets or exceeds your configured threshold, SGNL:
To configure Synchronization Safety for an entity:
Enable/Disable
Deletion Threshold (%)
Next Sync Behavior
Choose how SGNL should handle subsequent synchronizations after exceeding the assigned threshold:
When Synchronization Safety prevents deletions, take these steps:
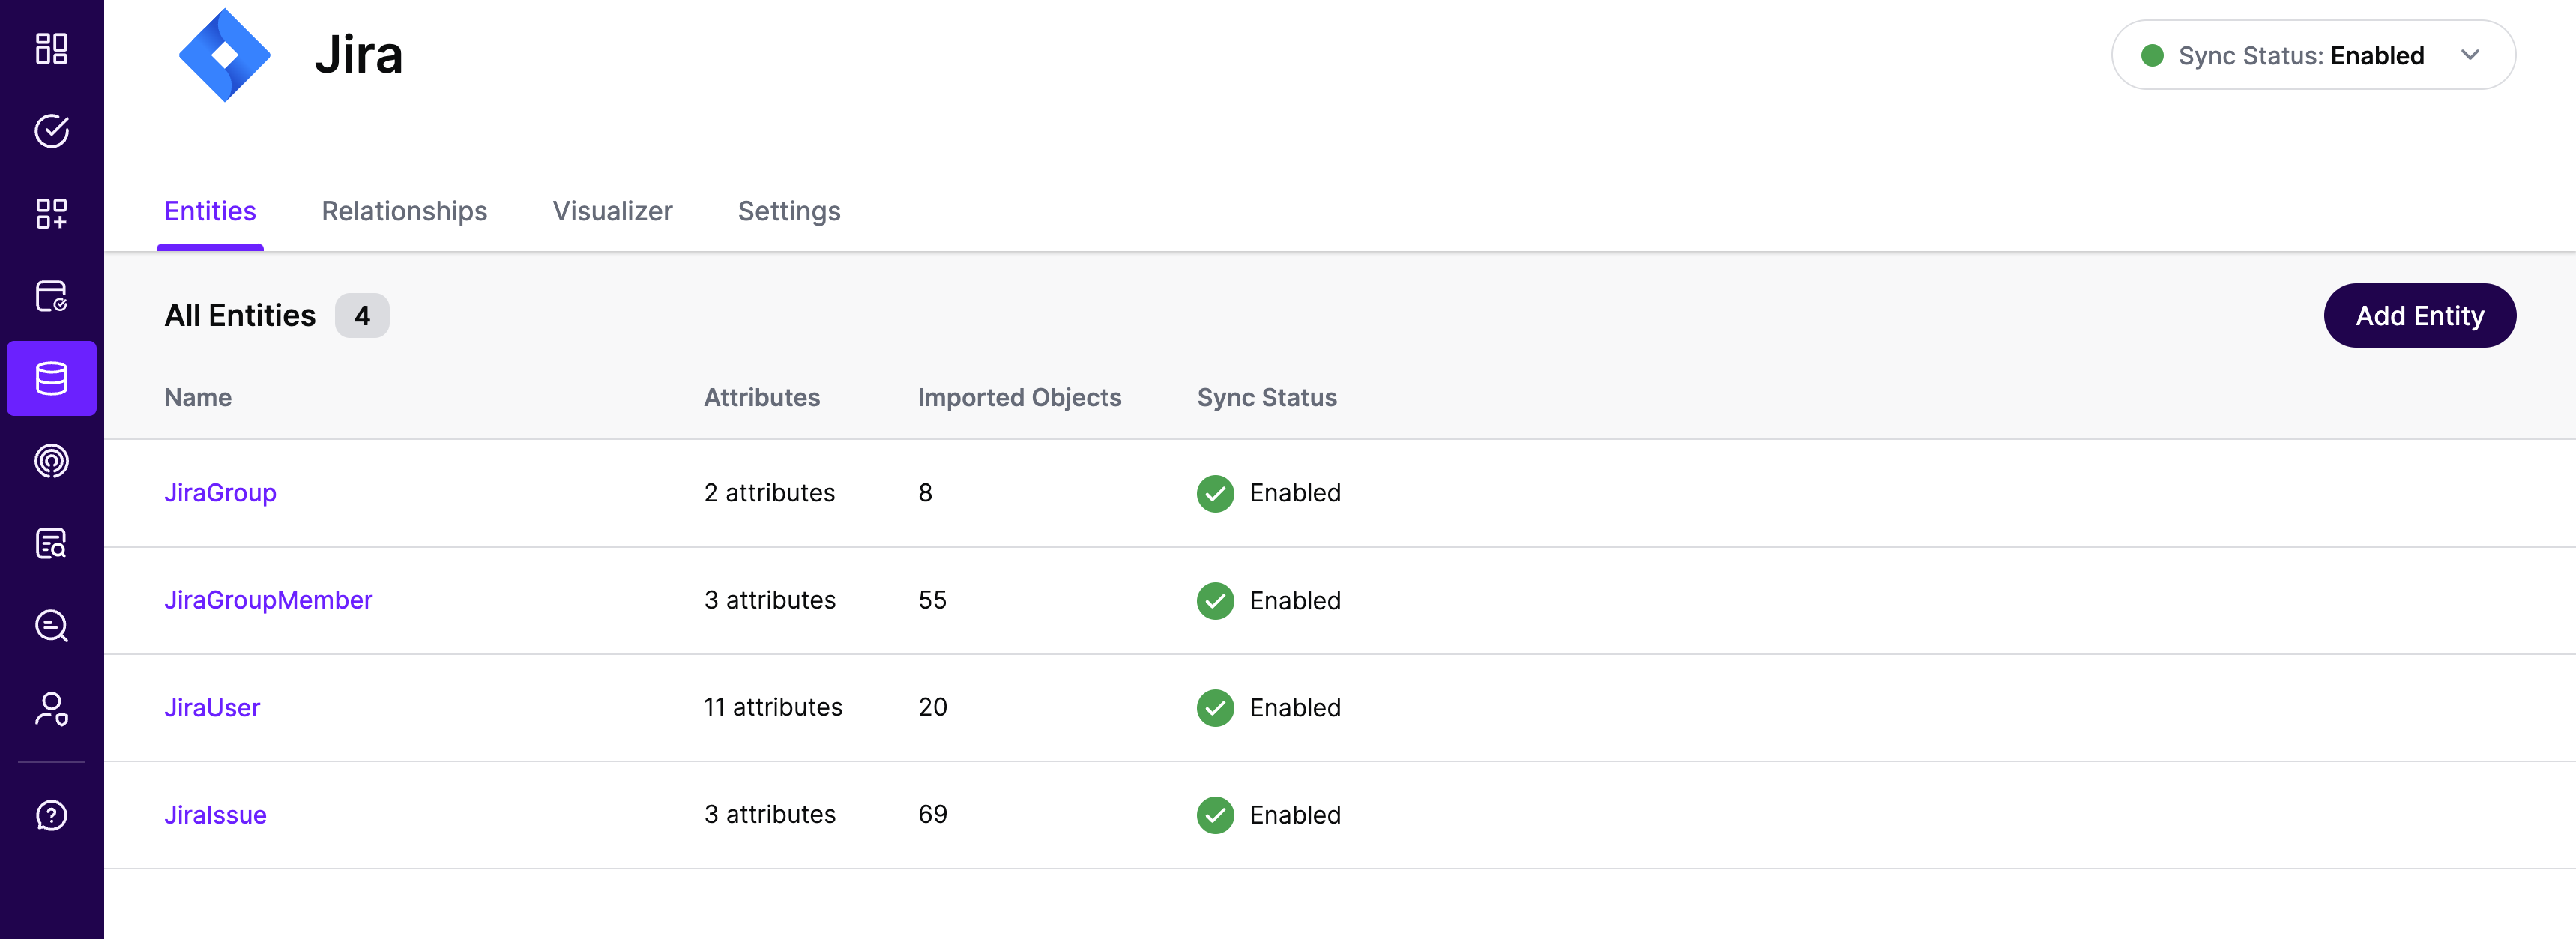
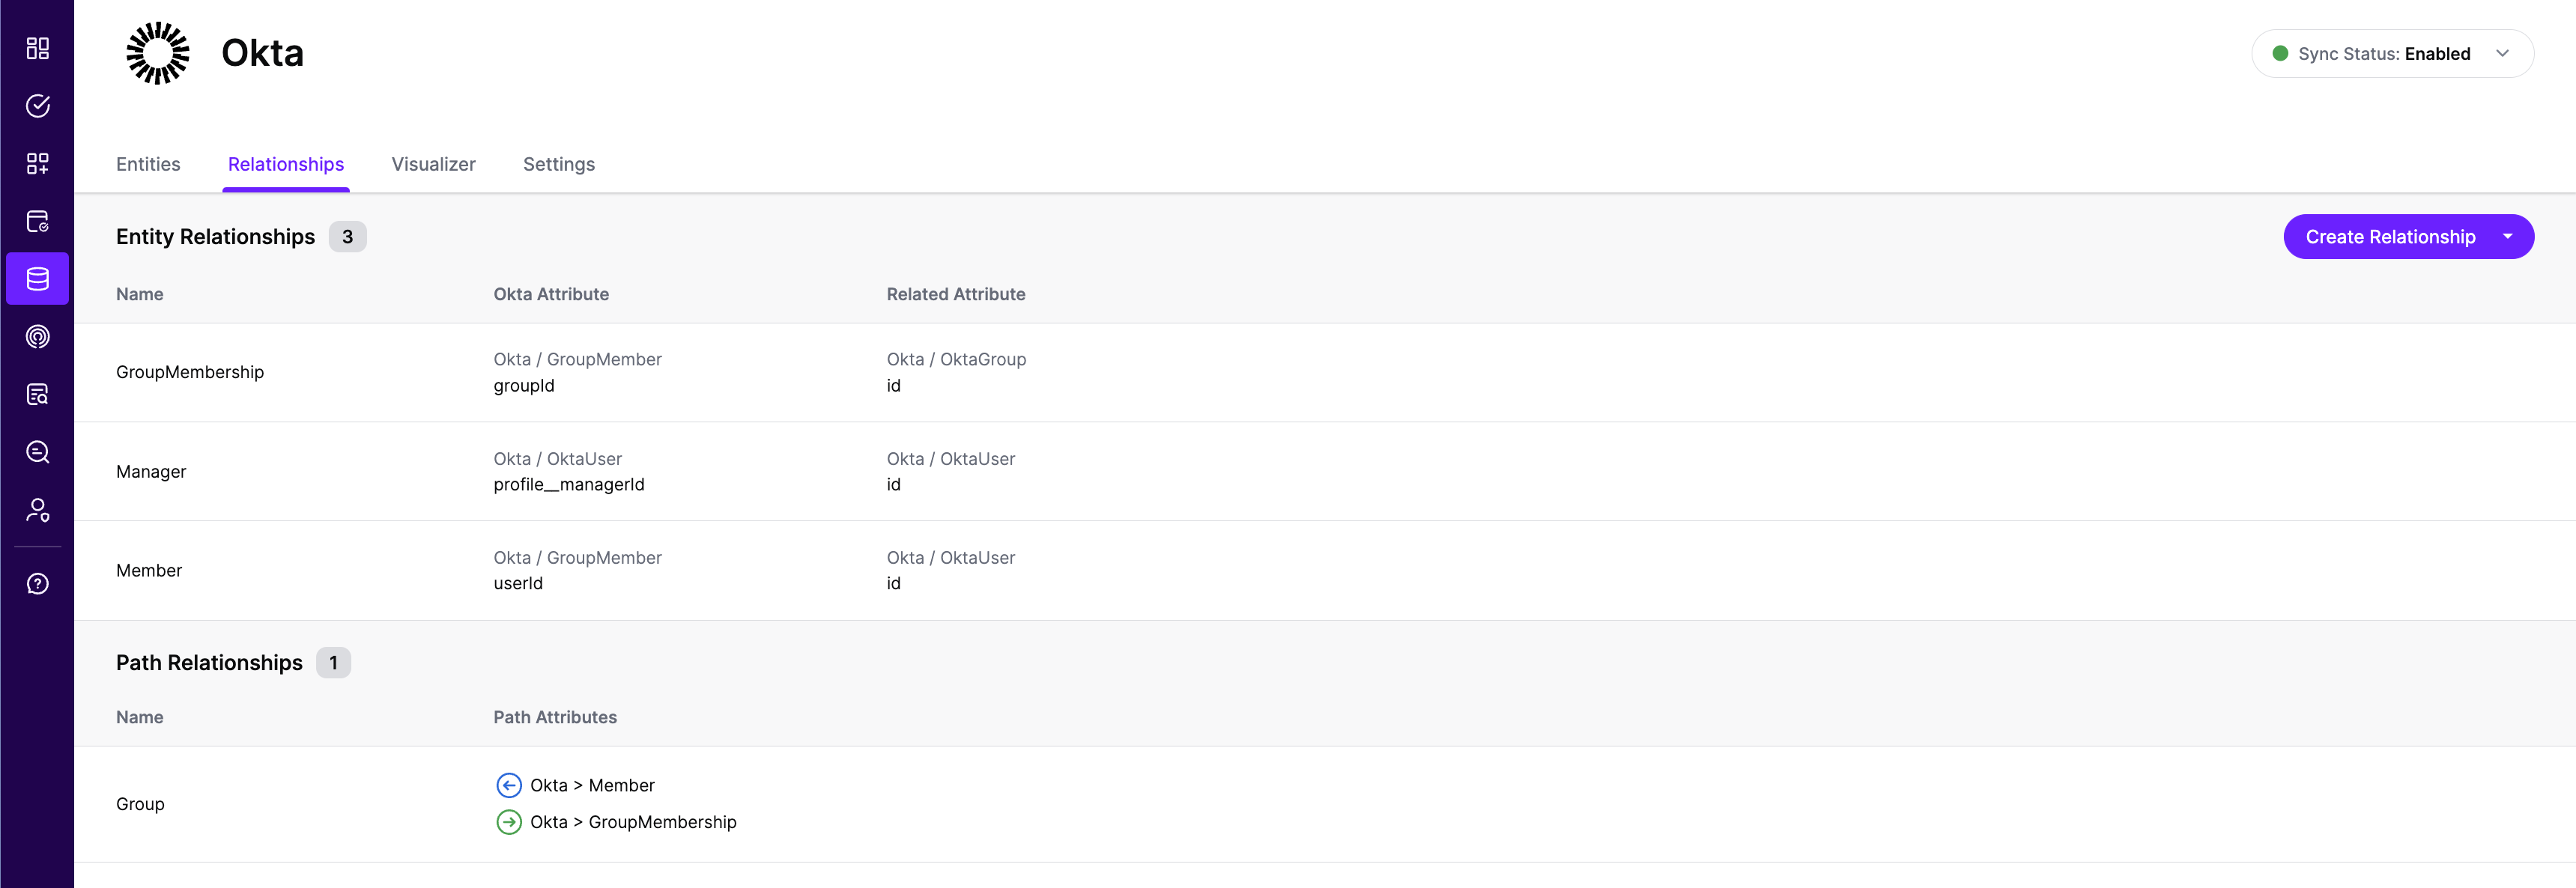
SGNL automatically creates relationships between entities for most well-known SoRs that are launched through SGNL-managed catalogs and templates. For any such SoR, you can check out the created relationships in the SoR’s Relationships tab. For example, SGNL creates the following relationships for Okta:
SGNL also allows the creation of custom relationships between entities. Such relationships can then be referred to in policies for access evaluation. SGNL supports three types of relationships:
Entity relationships are used to associate entities that may be related in some way. There are two types of Entity relationships:
Create a Same-As relationship between two entities when they represent the same type. For example, the User entity and On-Call User entity in the example graph represent the type User.
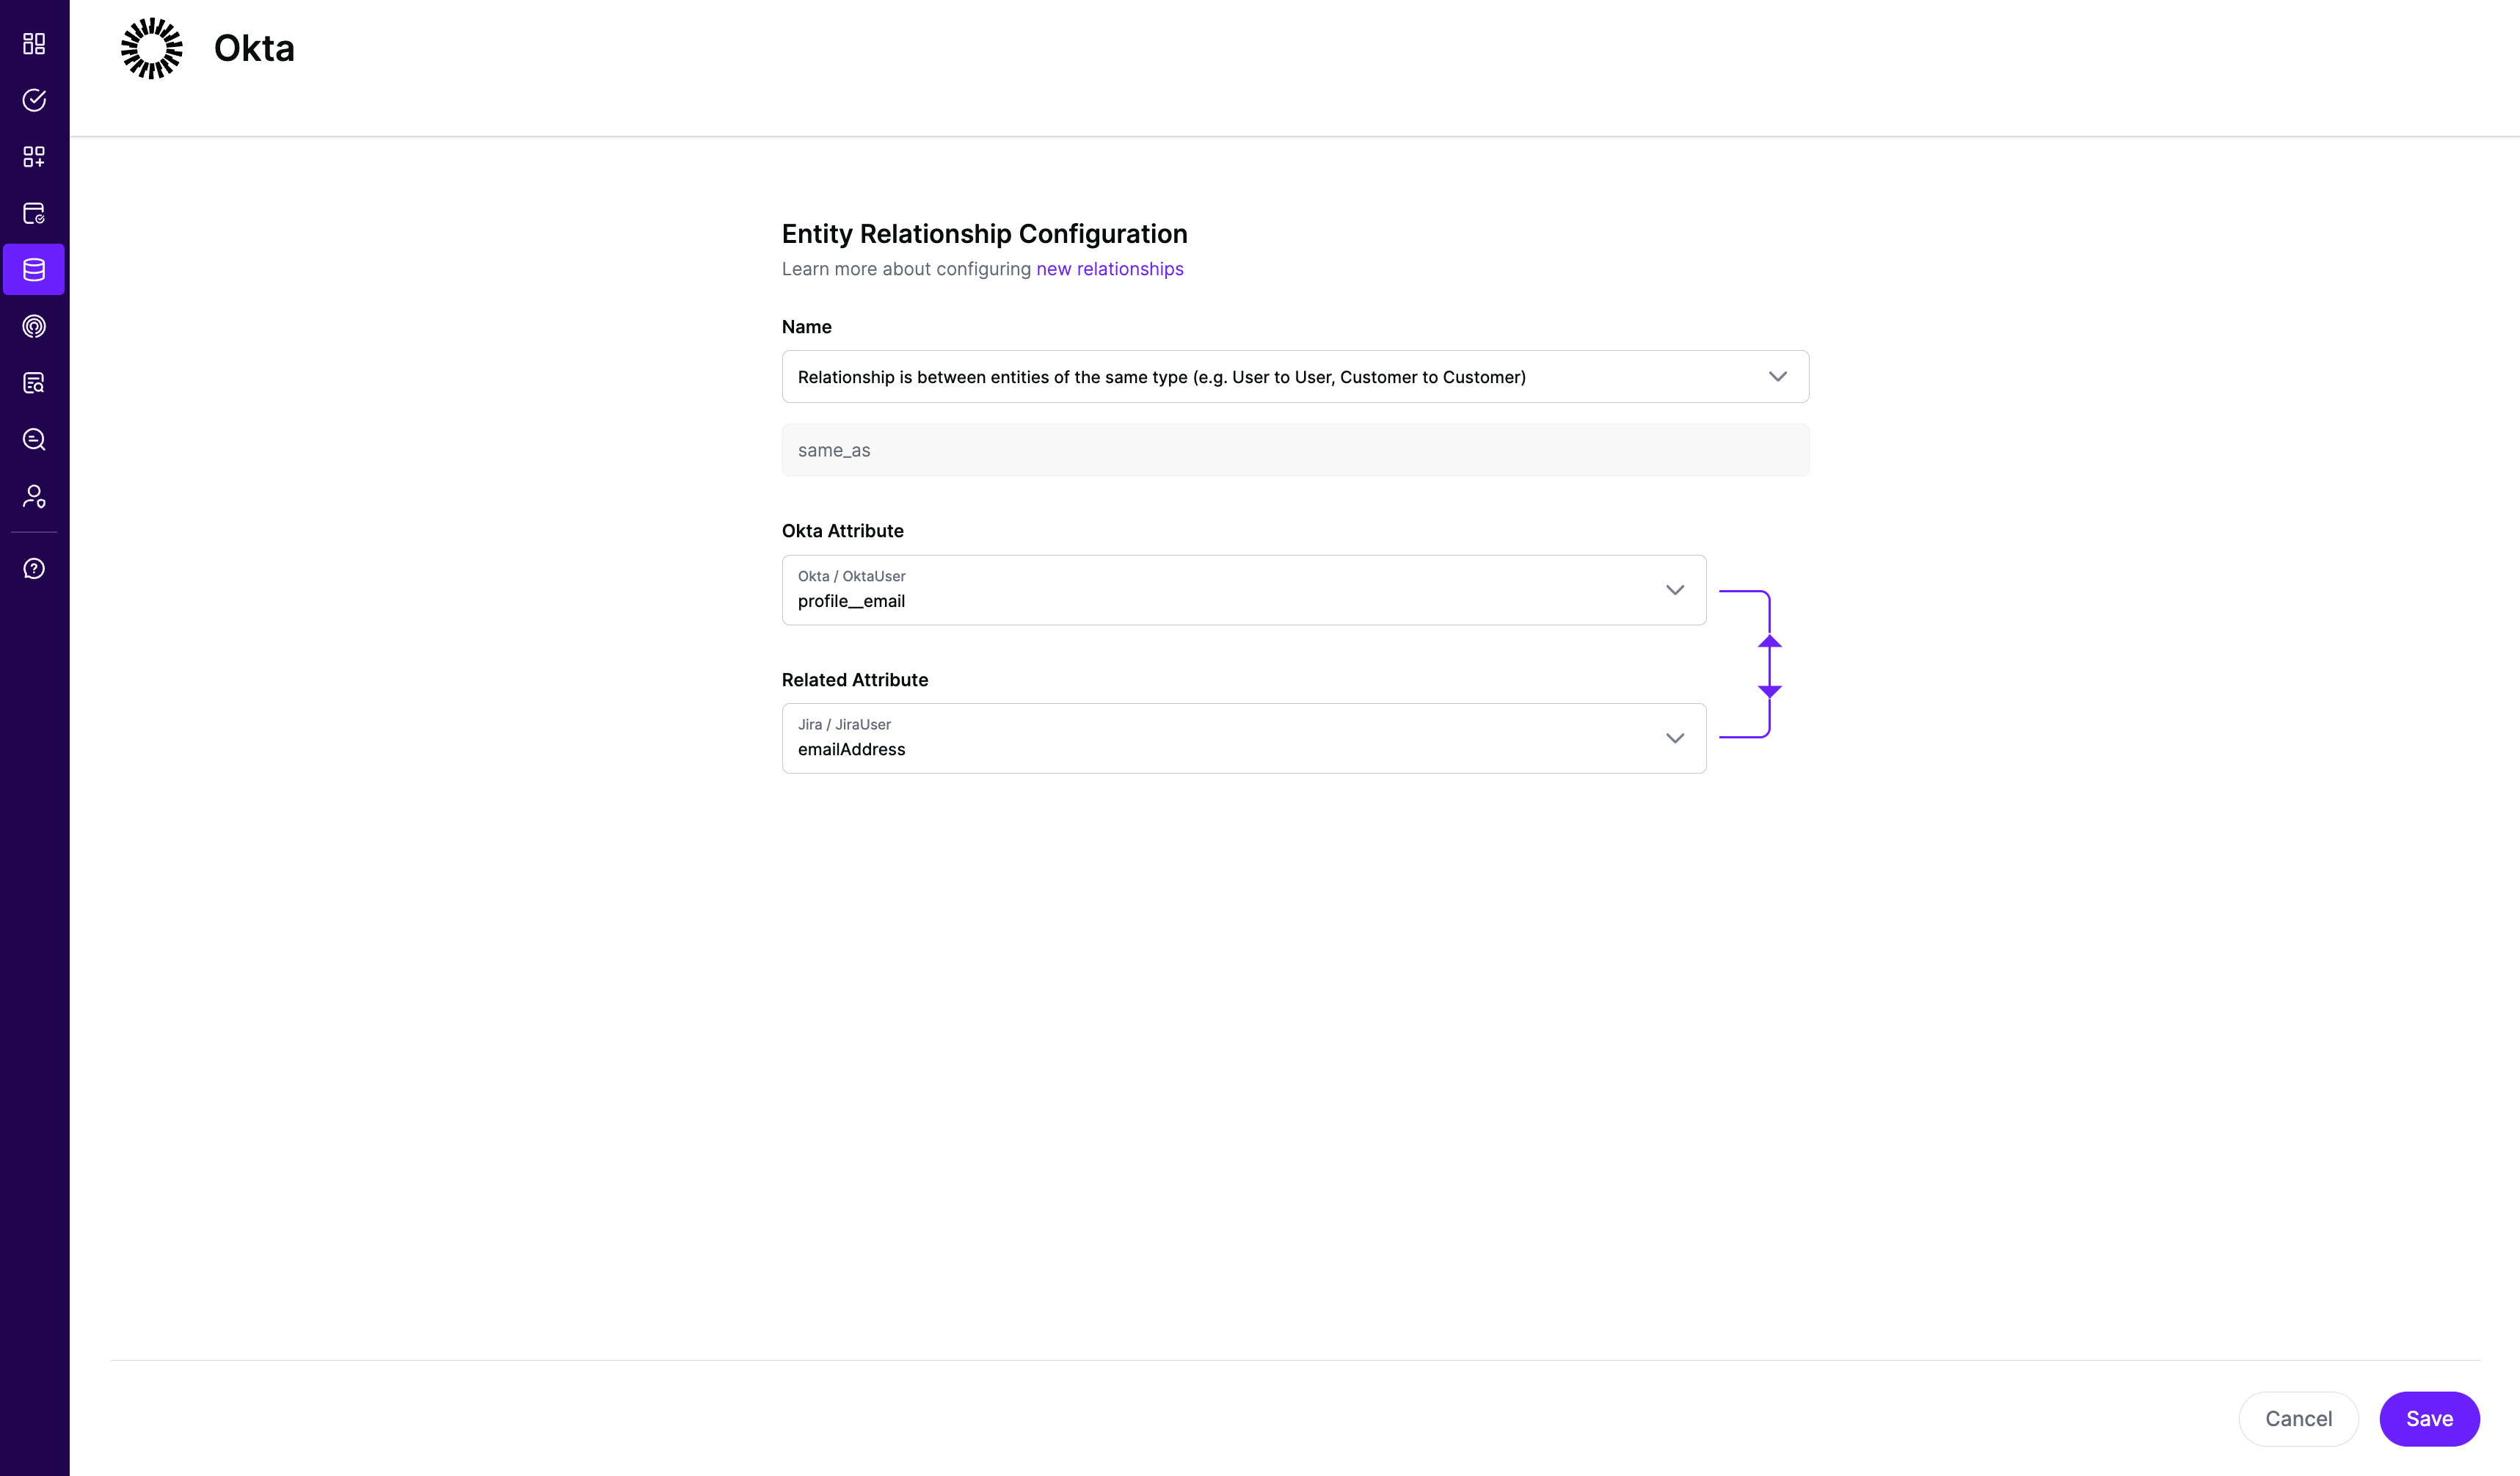
In the above figure, we are creating a Same-As relationship between an Okta User and a Jira User and indicating the corresponding attributes that are common between the two entities.
Create a Custom Entity relationship between two entities when they represent different types. For example, when you want to connect a Ticket entity to a User entity by a AssignedTo relationship.
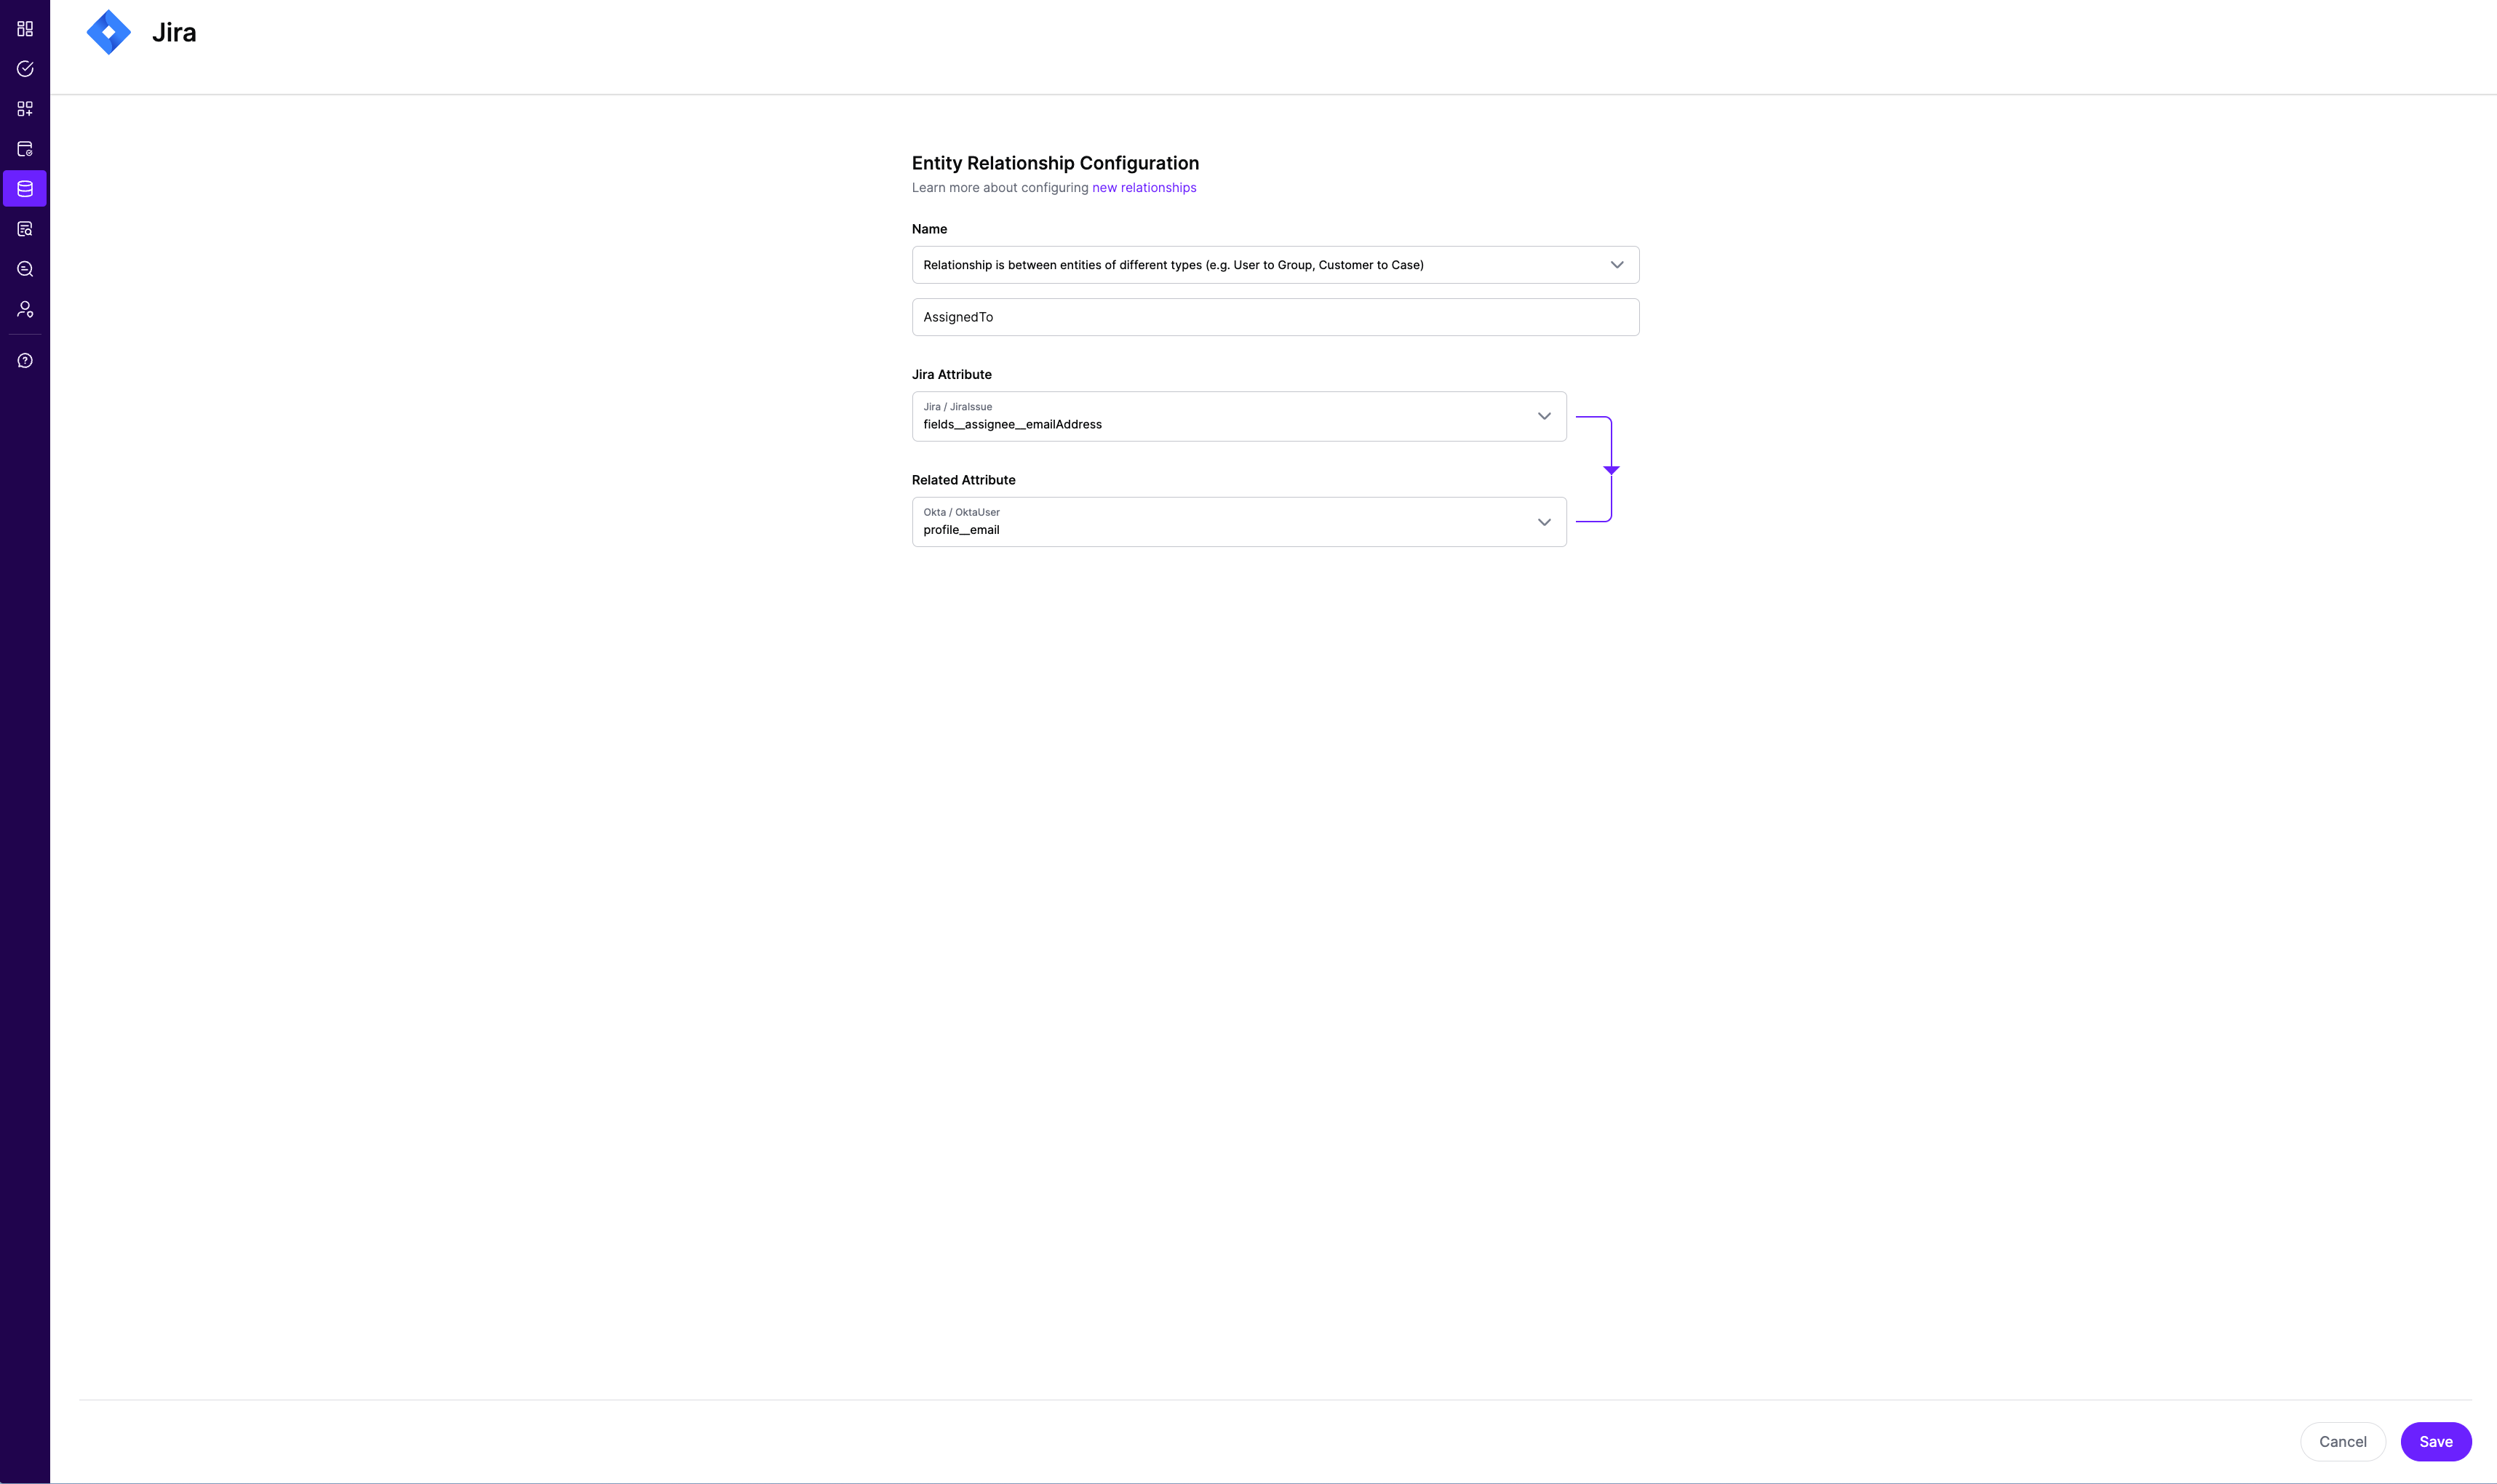
In the above figure, we are creating a AssignedTo relationship between a Jira Issue and an Okta User and indicating the corresponding attributes that are common between the two entities.
Path relationships in the SGNL Graph enable you to define a path through multiple relationships. Once a path relationship is created, it can be directly referenced in a Policy Snippet. If a match is found during policy evaluation, access is granted.
Consider the graph above. If you want to implement a policy that restricts a user from accessing customer details in the CRM unless they are assigned a ticket created by that customer, you can create a Path relationship. This relationship, which could be named “UserToCustomer,” would traverse two relationships in the path: “Assignee” and “RelatesTo.” The “UserToCustomer” relationship can then be referenced in the SGNL policy snippet.
When a customer creates a ticket in the Customer Service Management (CSM) system and a user is assigned to that ticket, the policy evaluates to true. As a result, the user is allowed to access the customer’s details in the CRM. This approach ensures that access is granted based on relevant and specific criteria, maintaining both security and efficiency in data handling.
In certain scenarios, the business context provided by Systems of Record (SoR) can be quite complex, featuring multiple nestings of multi-valued complex attributes. These complex attributes may refer to a different entity within the SoR, adding to the complexity.
Example:
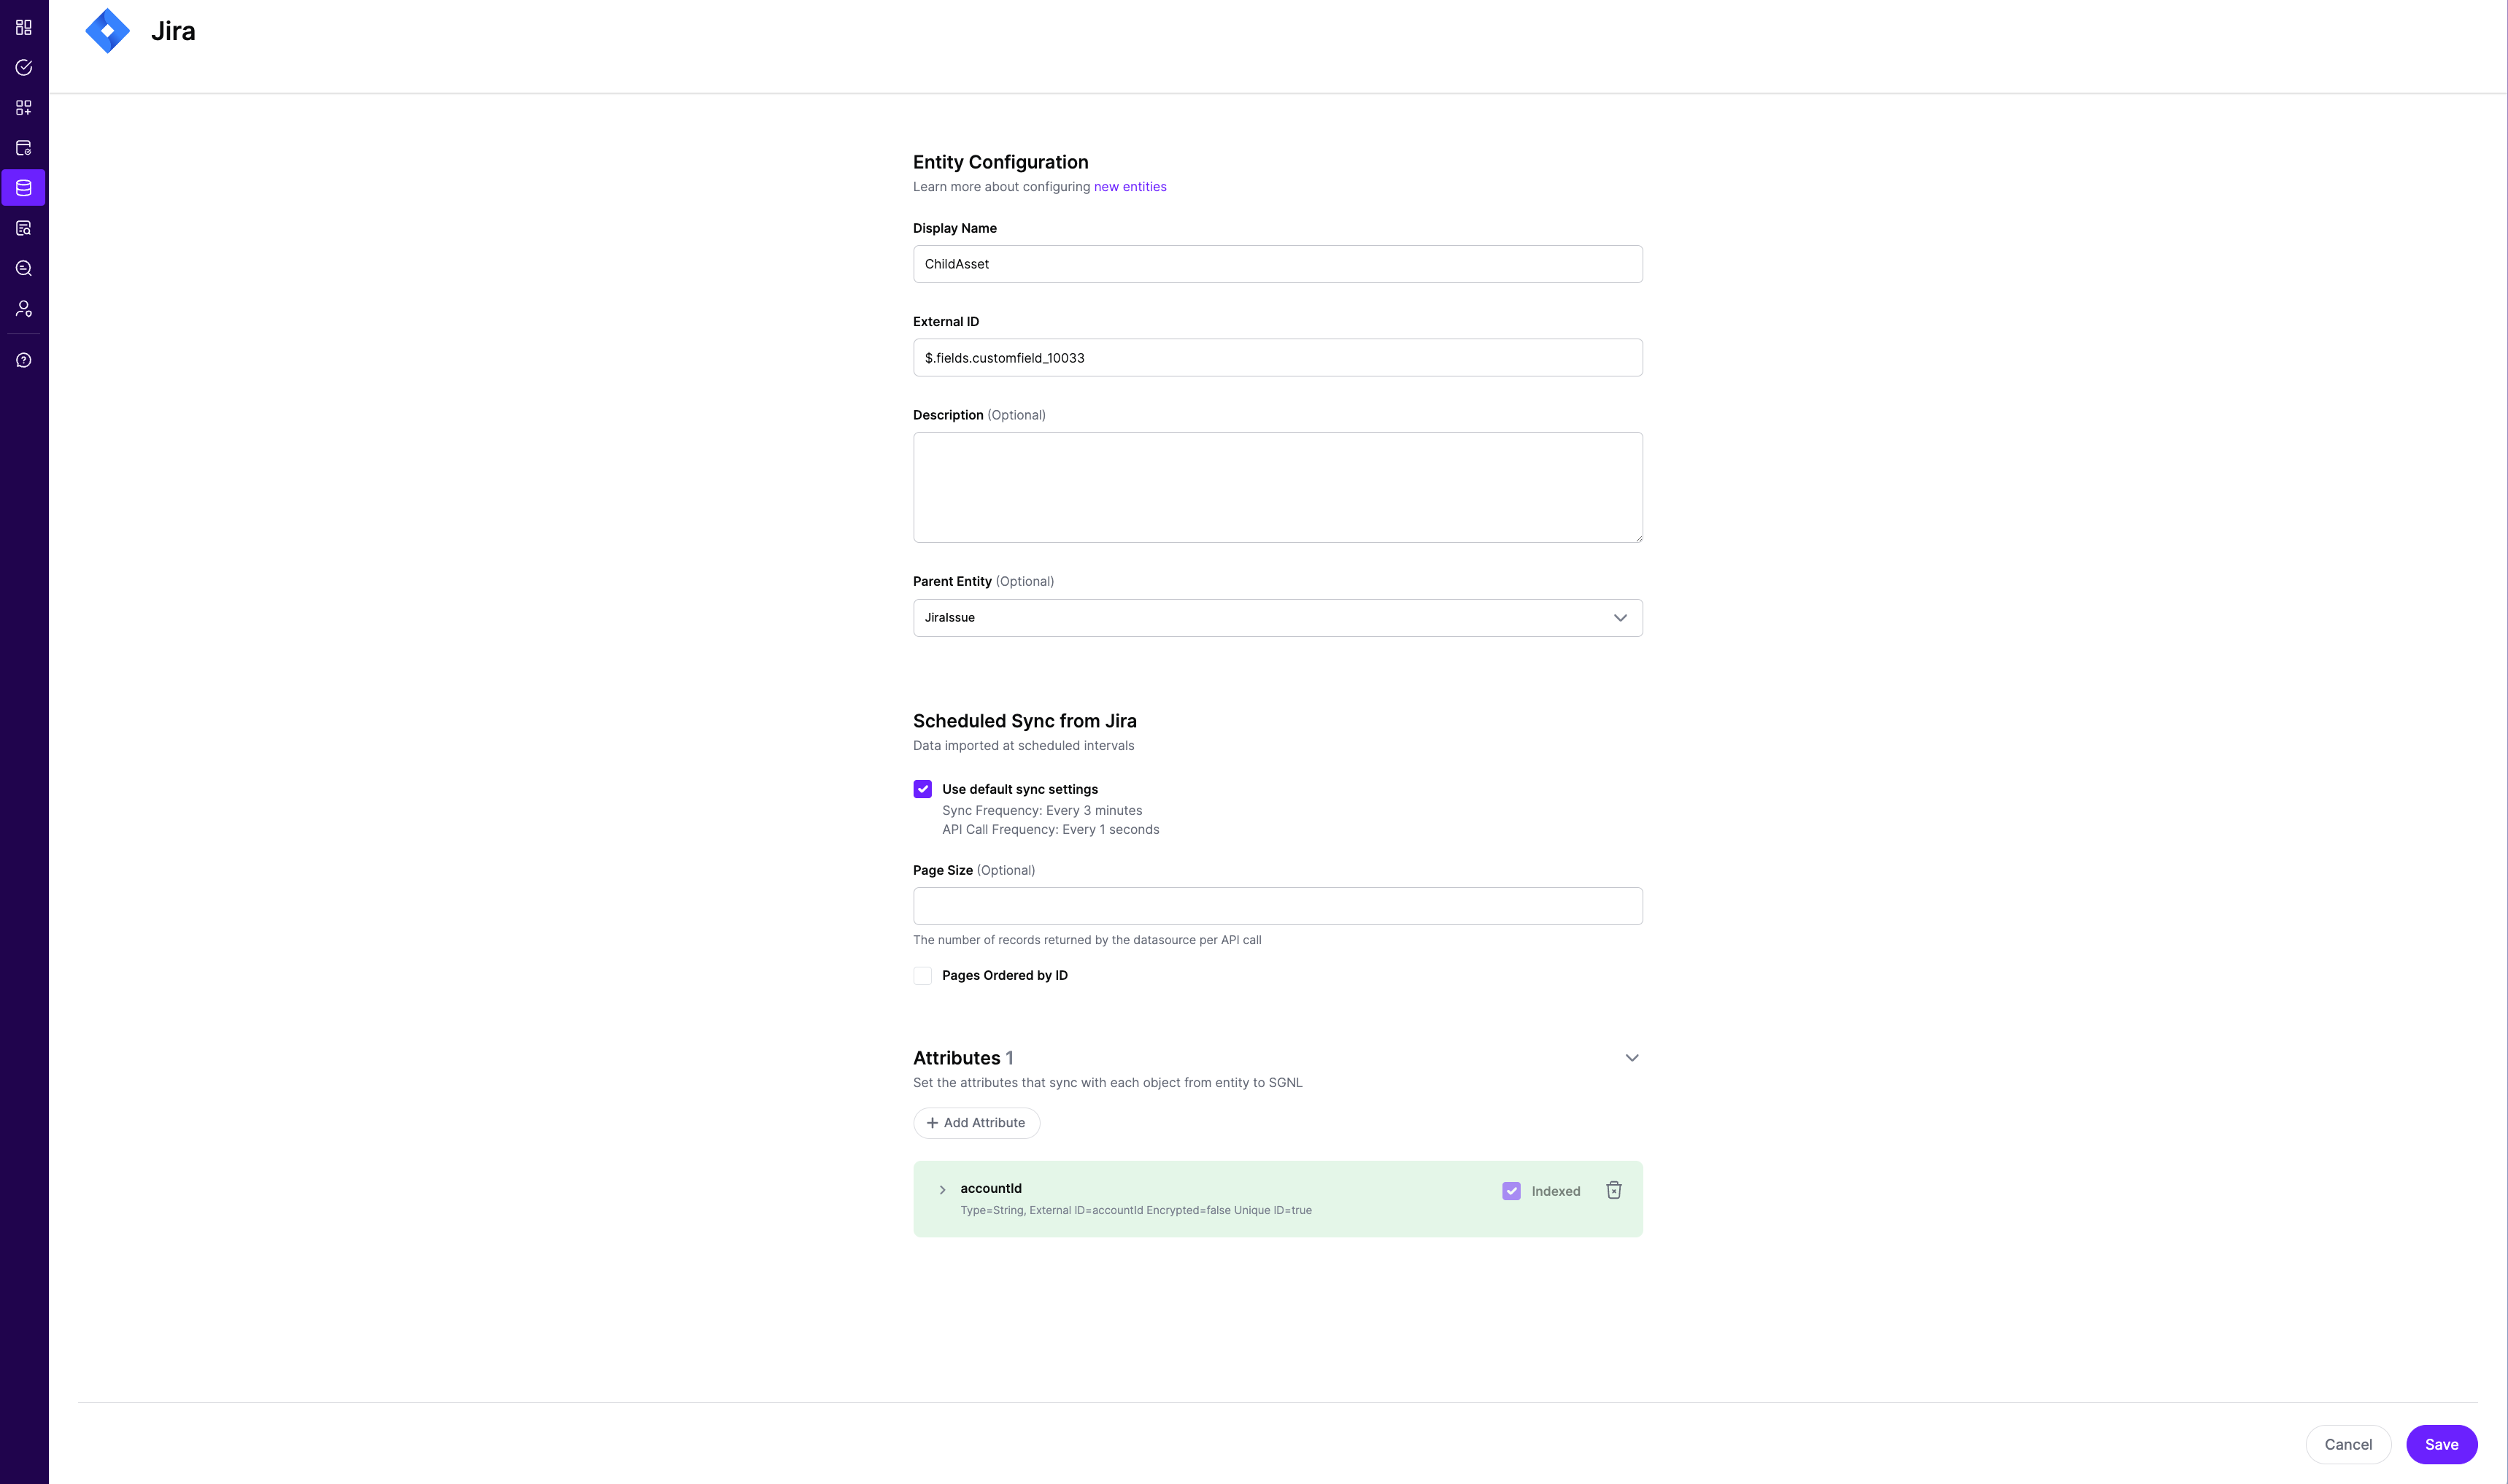
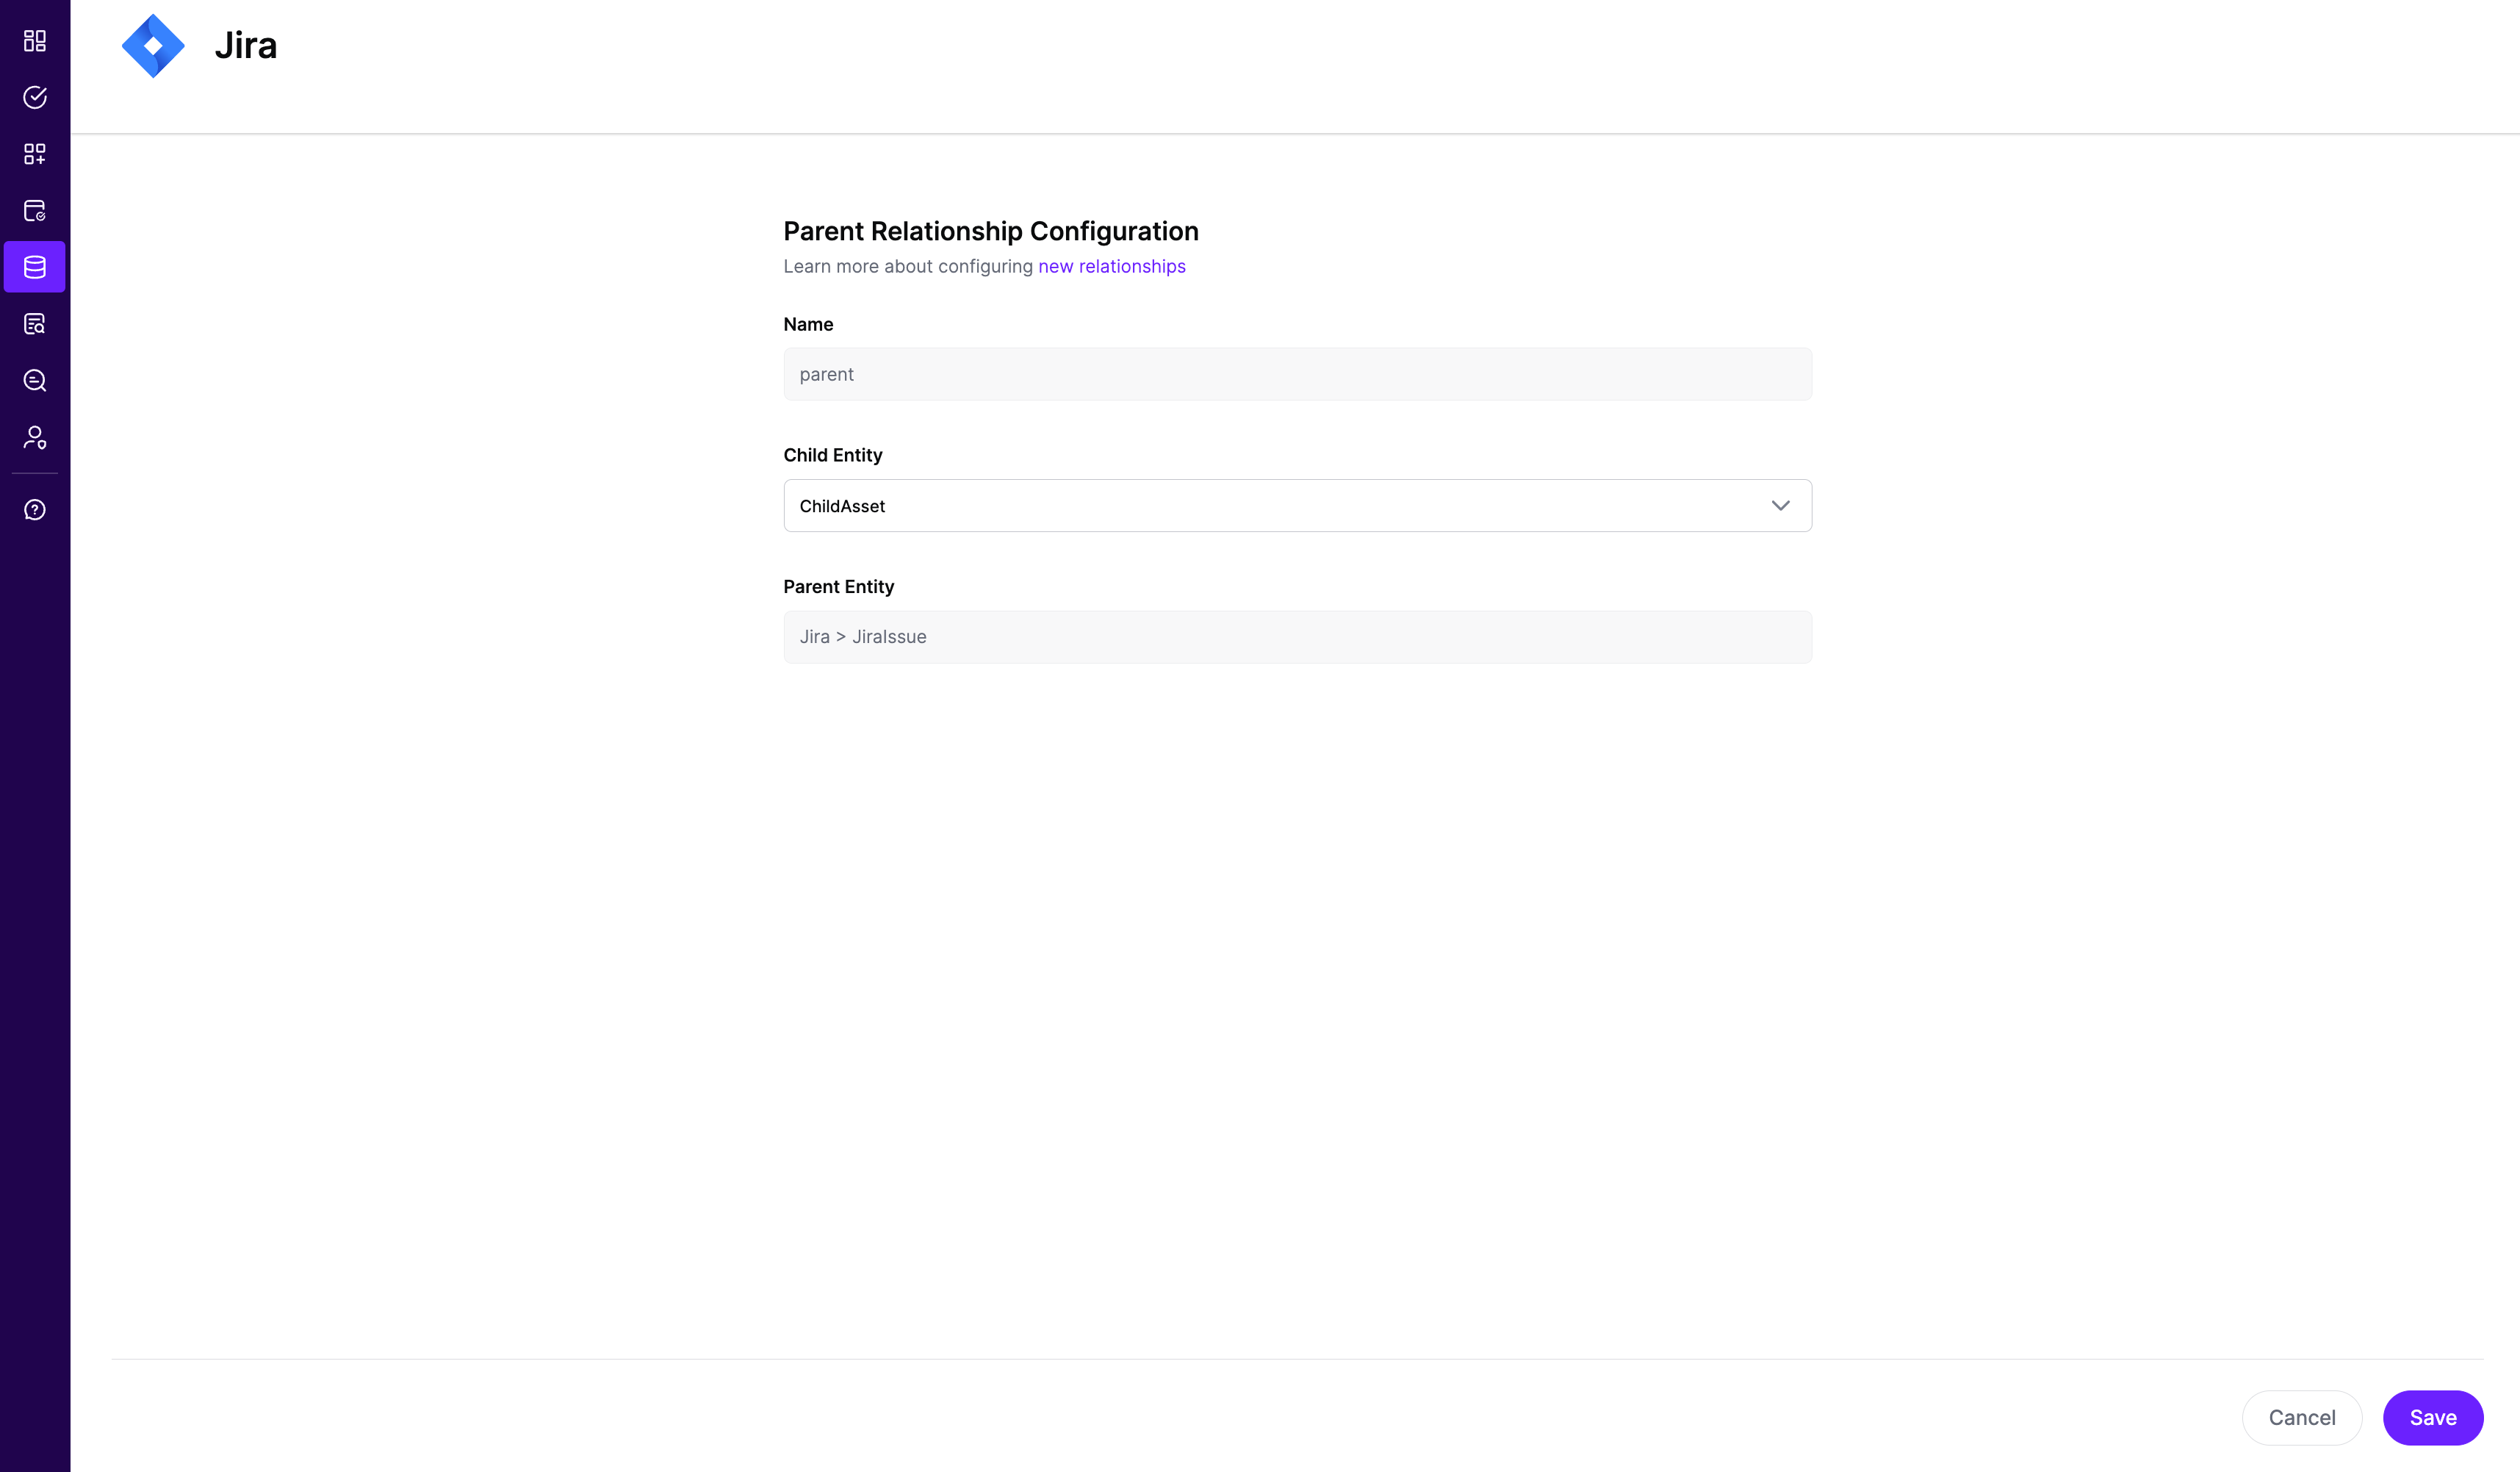
Using Jira Service Management APIs, Jira allows the creation of assets, which can subsequently be linked to Jira issues. The Jira Issues API schema represents these assets as a nested list of JSON objects, with each object containing the asset’s ID. In SGNL, a user might need to create a policy that assesses the state of an asset referenced in an issue. To facilitate this, and to enable both ingestion and policy evaluation in SGNL, users can create Child Entities and establish Parent relationships in the following manner: